
Here’s a confession. I used to throw every single toilet paper roll straight into the recycling bin without a second thought.
Turns out, a lot of them actually have potential.
What I mean is, with the right approach, these things stop looking like trash and start looking like something you’d actually want sitting on a shelf or a table.
This isn’t a list of googly eyed monster crafts that end up in a landfill by next Tuesday.
A number of ideas, genuinely easy, genuinely good looking, the kind of thing that could sit on your coffee table and nobody would guess what it used to be.
Each one comes with clear, simple steps too, nothing vague, nothing assuming you already know what you’re doing.
Keep scrolling, you’ll look at your bathroom trash can a little differently after this.
Toilet Paper Roll Crafts
Twine-Wrapped Sunflower Vase
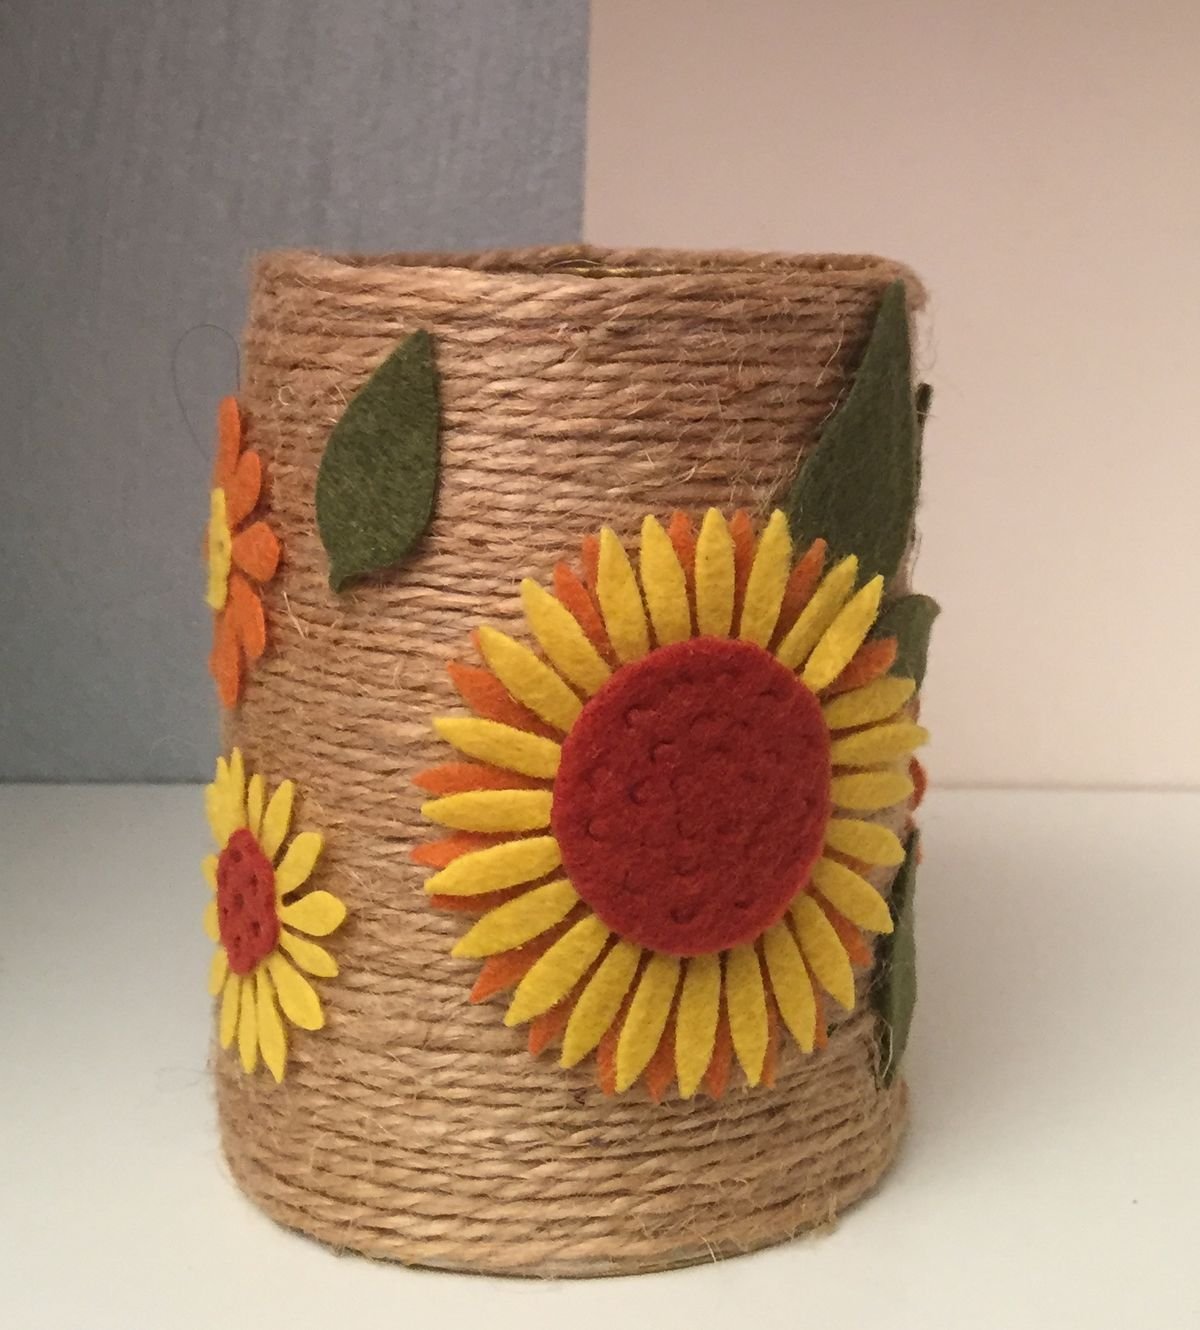
- Wrap a roll in jute twine the same way as the pen holder craft, winding it around and gluing as you go until the cardboard’s fully covered.
- Once it’s wrapped, this is where it gets a little more special: cut a handful of felt sunflowers in yellow and orange petal layers with a deep red felt circle glued in the center, then glue a few felt leaves in a darker green scattered in between.
- Layer a smaller flower behind a larger one here and there instead of spacing them perfectly even, it gives the whole thing a fuller, more natural look instead of a stiff, evenly spaced pattern.
- Use one large sunflower as the main focal point and two or three smaller ones trailing around the sides.
- Stand it upright and use it to hold pens, paintbrushes, or even as a little vase for dried stems.
- It’s genuinely one of those crafts that looks like it came from a farmhouse boutique, not a bathroom cardboard tube wrapped in twine
Painted Ring Wall Art
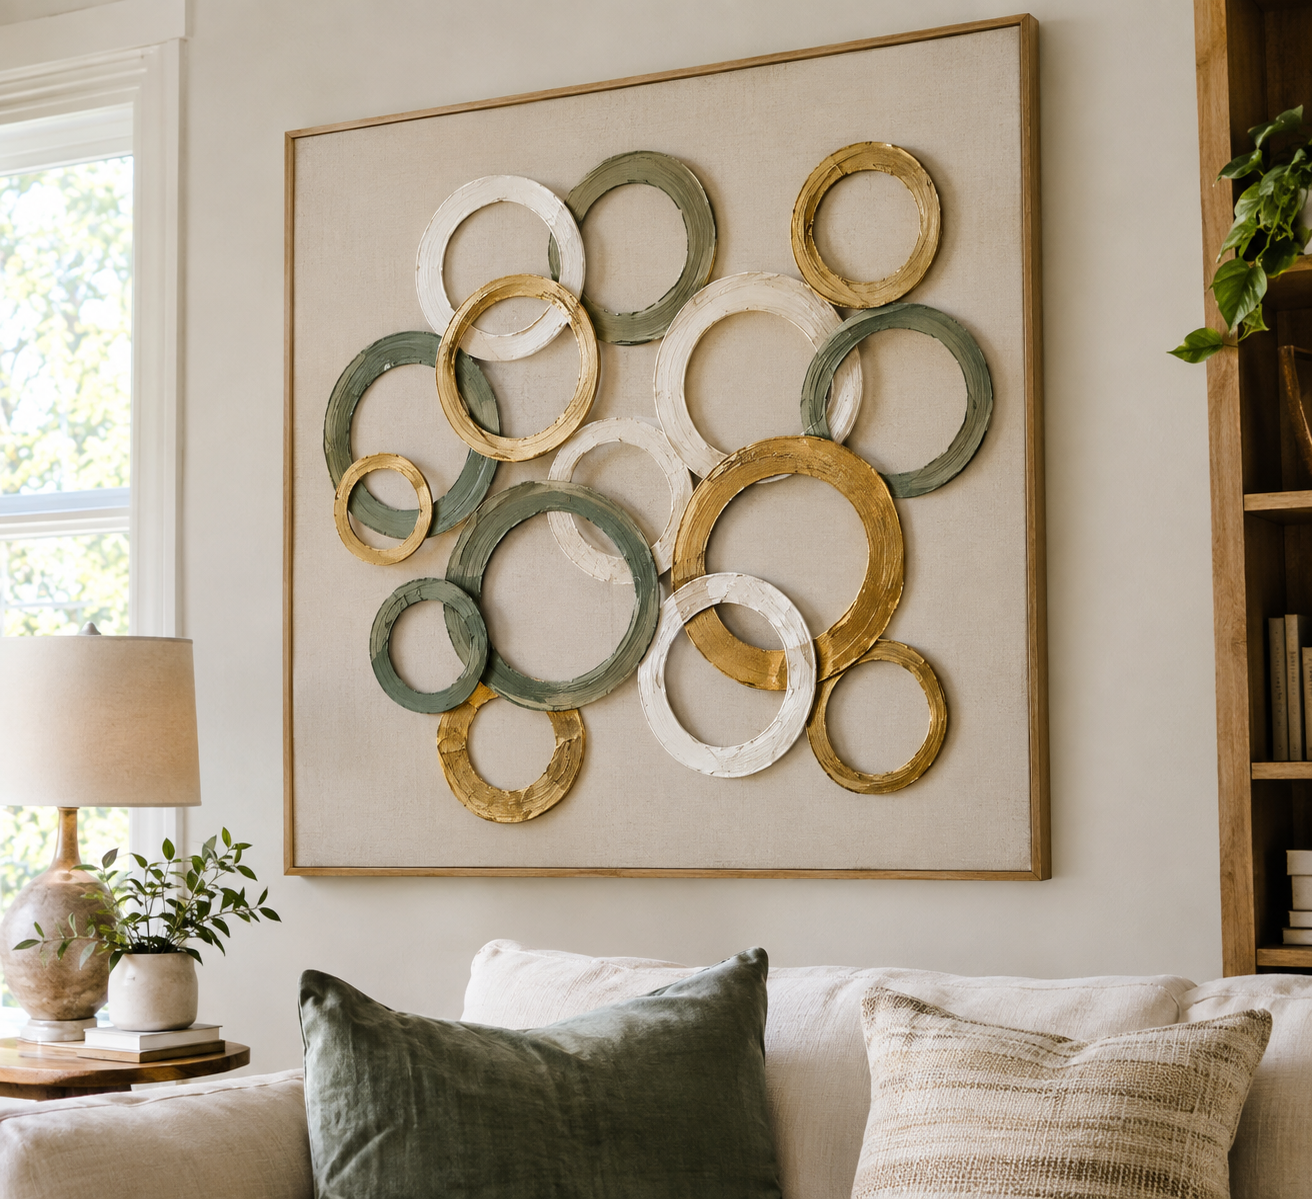
- Slice a few rolls into thin rings, maybe half an inch wide each, using sharp scissors, a craft knife works too for cleaner edges.
- Flatten them slightly into oval shapes, paint them in two or three coordinating colors, and let them dry completely.
- Once dry, arrange the rings in a cluster or a geometric pattern on a piece of canvas or a wood board, gluing each one flat.
- What you end up with looks closer to a modern art piece than anything made from a bathroom staple, genuinely.
- Metallic gold or copper paint pushes this one even further from “craft” territory into “actual home decor.”
- Keep the color palette to two or three shades max, more than that and the whole piece starts reading as busy instead of intentional.
Toilet Paper Roll Binoculars

- Tape two rolls together side by side along their full length, using a strip of tape at the top, middle, and bottom so they hold firmly without shifting apart later.
- Paint the joined rolls a bold solid color, safari green, bright orange, or even a two-tone look with one roll in each color, and let it dry completely before moving to the next step.
- Punch a small hole near the top outer edge of each roll, then thread a length of yarn or ribbon through both holes and knot each end securely on the inside so it can’t slip back out, giving you a wearable neck strap long enough for a kid to actually use hands-free.
- Cut a couple of circles from craft foam or paper in a contrasting color and glue one to the front of each roll for a pretend “lens” detail, and if you want to take it further, add a small paper dial or button glued near the top to mimic a focus knob.
- These hold up surprisingly well to actual pretend play, not just display, since the taped rolls and painted finish are sturdier than they look once fully dry.
Macrame Bead Wall Hanging
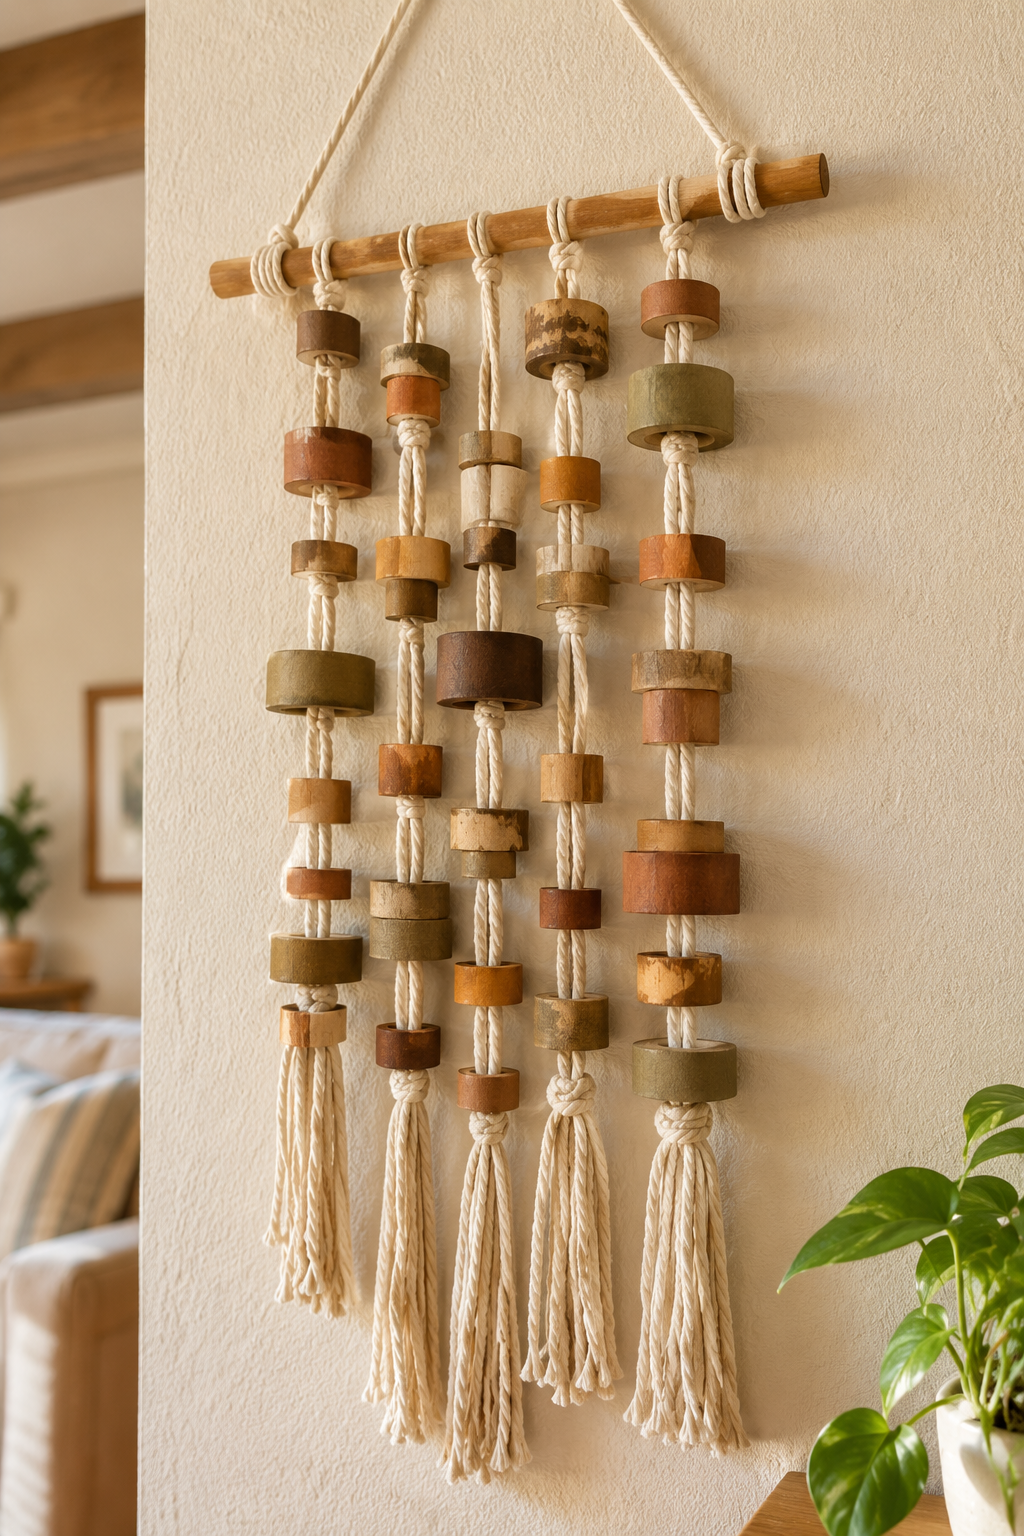
- Cut a roll into several one-inch rings, then stain or paint them in varying warm wood tones, walnut, honey, driftwood gray, to mimic actual wooden beads.
- Once dry, thread the rings onto a length of thick macrame cord or rope, spacing them unevenly rather than evenly for a more organic, handmade look.
- Knot the cord above and below each ring so it stays put instead of sliding around the rope.
- Attach the top of the cord to a small wooden dowel, then hang the dowel on the wall with two small nails or hooks.
- Let a few inches of rope hang loose and unraveled at the bottom for that classic boho fringe finish
Elegant Napkin Rings
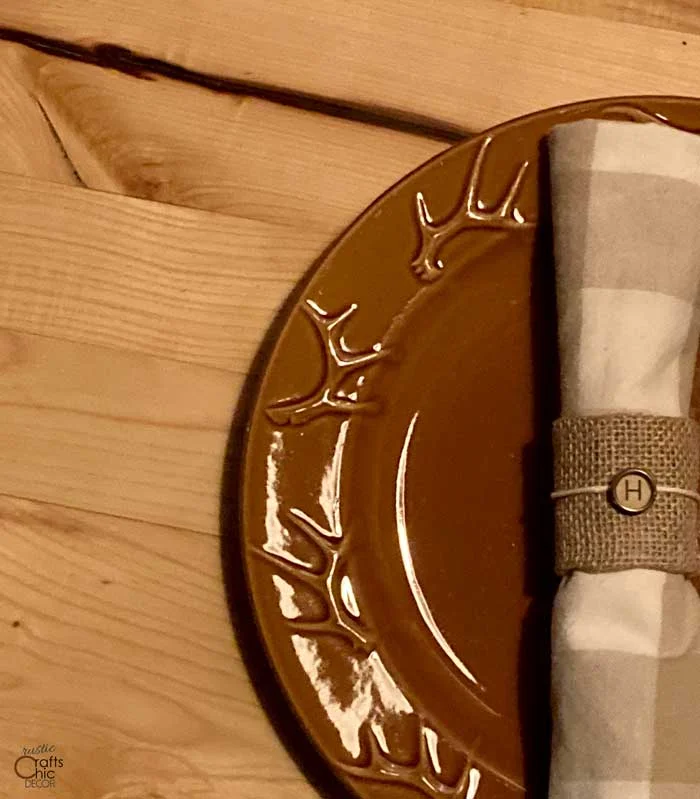
- You can tuck a small sprig of faux greenery or a single dried flower under the ribbon.
- Store them flat in a box between uses too, since they’re lightweight enough to stack without crushing.
Gnome Decor
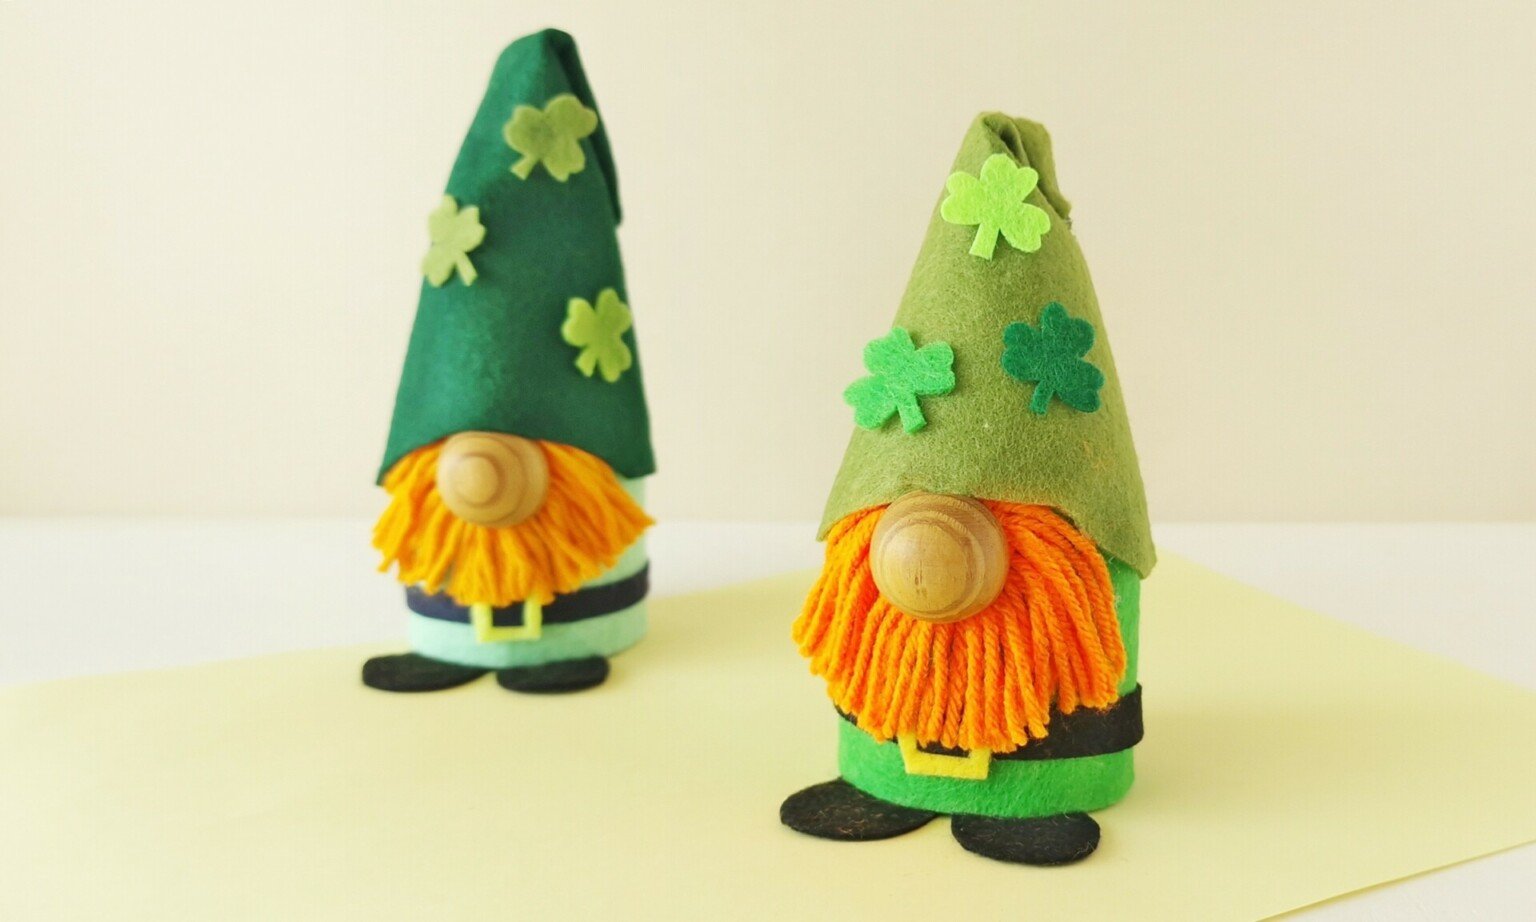
- i have found this beautiful craft ,for further details you can check at thecraftaholicwitch.com
- Using a toilet paper tube, felt, and yarn. tall green hat, fluffy orange beard, and signature buckle belt, he’s the perfect festive decoration!
- They read as a proper decor piece, especially clustered together, and nobody’s first guess is going to be “toilet paper roll.
Fringe Tassel Garland
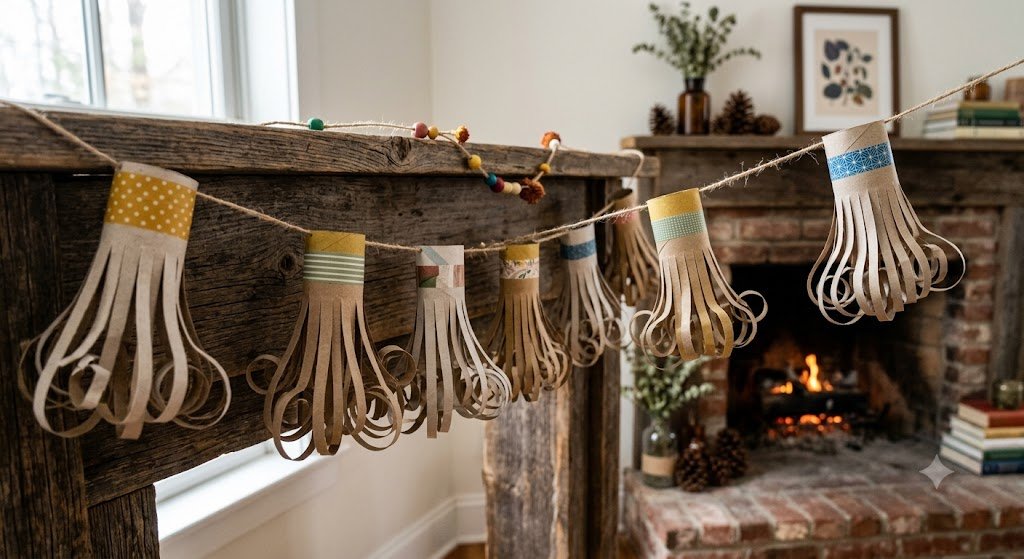
- Cut a roll into thin vertical strips most of the way down, leaving about an inch uncut at the top so it stays connected, keeping the strips roughly the same width throughout so the fringe fans out evenly once it’s finished.
- Fan the strips out slightly and wrap the uncut top portion in colorful paper or ribbon.
- String a few of these fringed pieces onto twine, spaced a few inches apart, for a garland that genuinely looks handmade in a good way.
- Hang it across a mantel or above a doorway for an easy seasonal update that costs almost nothing.
- Curl the fringe strips around a pencil beforehand if you want a looser, more textured look instead of straight hanging strands.
Lace-Wrapped Candle Holders
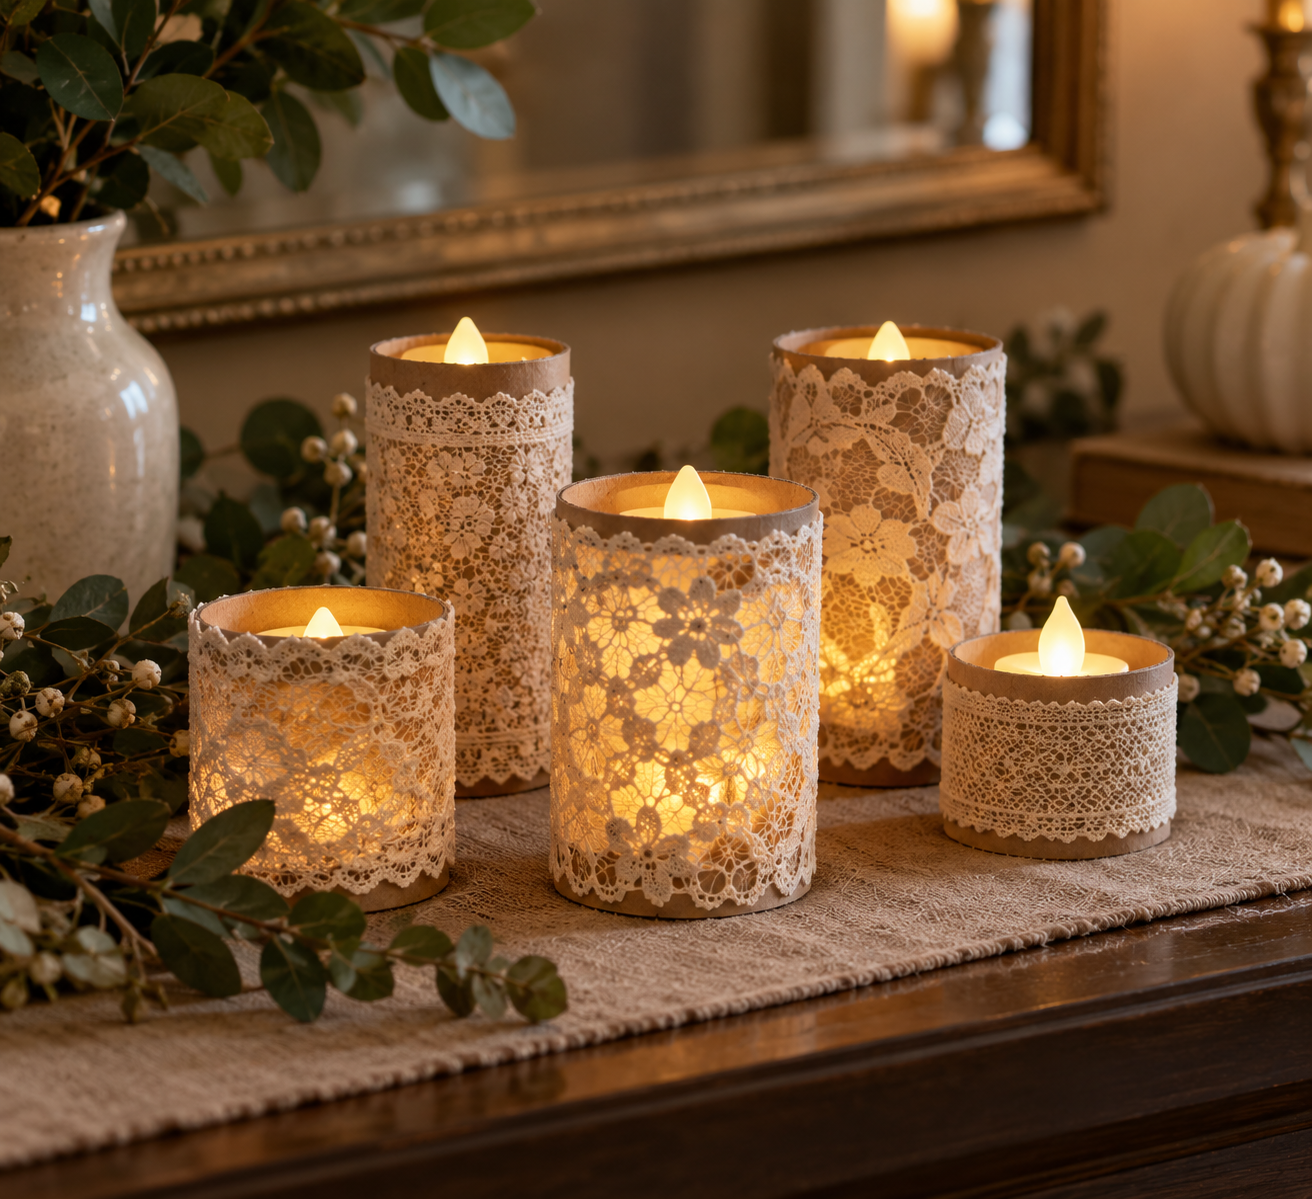
- Wrap a roll in a strip of lace trim, securing it with a dab of glue at the seam, then set a flameless candle inside so the glow filters softly through the lace texture, choosing a wider lace pattern if you want more light to show through once it’s lit.
- Cut the roll shorter first if you want the candle to sit higher and more visible above the rim.
- Grouped in odd numbers on a mantel or table runner, these genuinely pass for a bought decor piece, the lace does almost all the visual work here.
- Stick to flameless candles specifically, the cardboard base means real flame just isn’t worth the risk no matter how good it looks.
Hanging Rope Planter
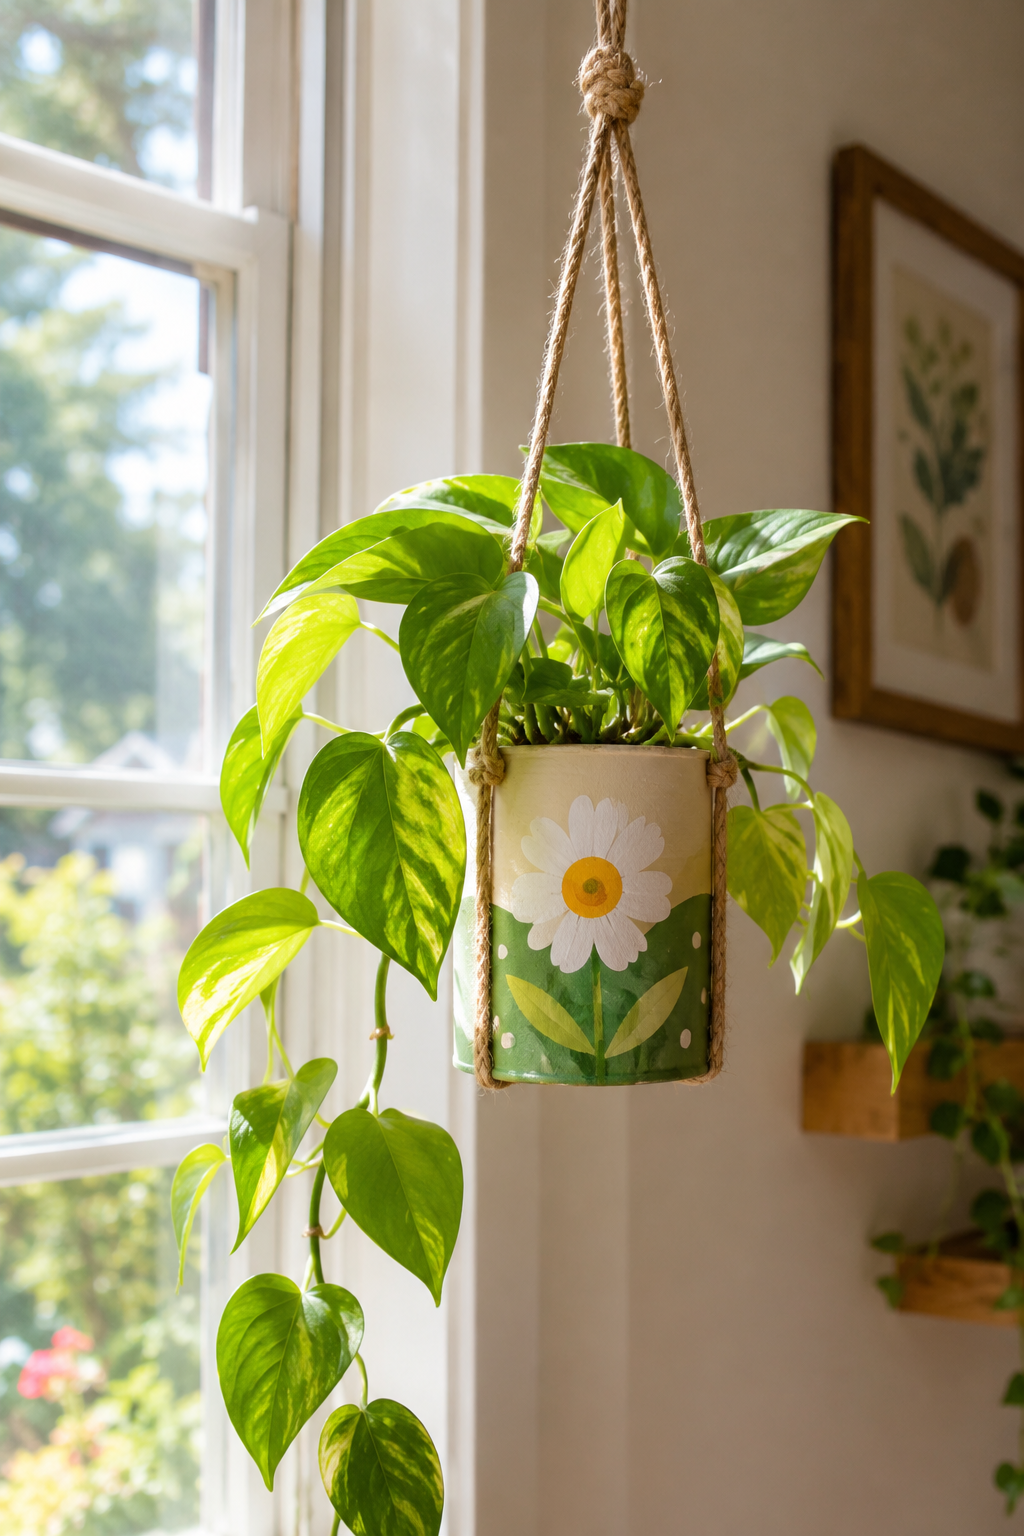
- Cut a roll down to about three inches tall, then paint it a solid neutral color or wrap it in thin cord to cover the cardboard completely.
- Punch three evenly spaced holes near the top rim, then thread a length of rope or thick twine through each hole, knotting the ends underneath so they hold.
- Gather the three rope lengths together above the planter and tie them into a single knot a foot or so up, creating a hanger you can loop over a hook or curtain rod.
- Fold the bottom edges inward and tape them flat first, just like the succulent planter, so it can actually hold soil without leaking through the seams.
- Fill it with soil and a small trailing plant, like a pothos cutting, and hang it near a window where the vine can eventually spill down over the rope.
Pillow Gift Boxes
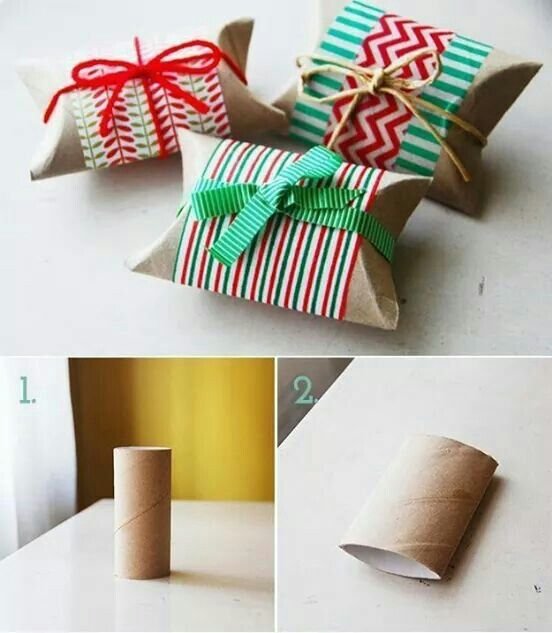
- Flatten a cardboard toilet paper roll so it creases along both sides, then gently push the two ends inward to form a soft, pillow-shaped box.
- Slip a small gift inside before closing, since the ends hold themselves shut with a light fold.
- Wrap a strip of washi tape or patterned paper around the middle in a bold design like stripes, chevrons, or leaf prints, smoothing it down so it sits flat and hides the seam.
- Tie a length of ribbon, yarn, or twine around the center in a bow, and pull the knot snug so the box stays closed and the wrap doesn’t slide.
- Pinch the two open ends toward each other and tuck one fold slightly over the other to create the curved pillow shape that gives these boxes their charm.
- Set them on a gift table or tuck them into a stocking to hold small treats like jewelry, candy, gift cards, or earrings.
- Add a thin layer of mod podge over the washi tape or paper for extra durability and to keep the edges from peeling, especially if the boxes will be handled or stored before gifting.
Woven Catchall Basket
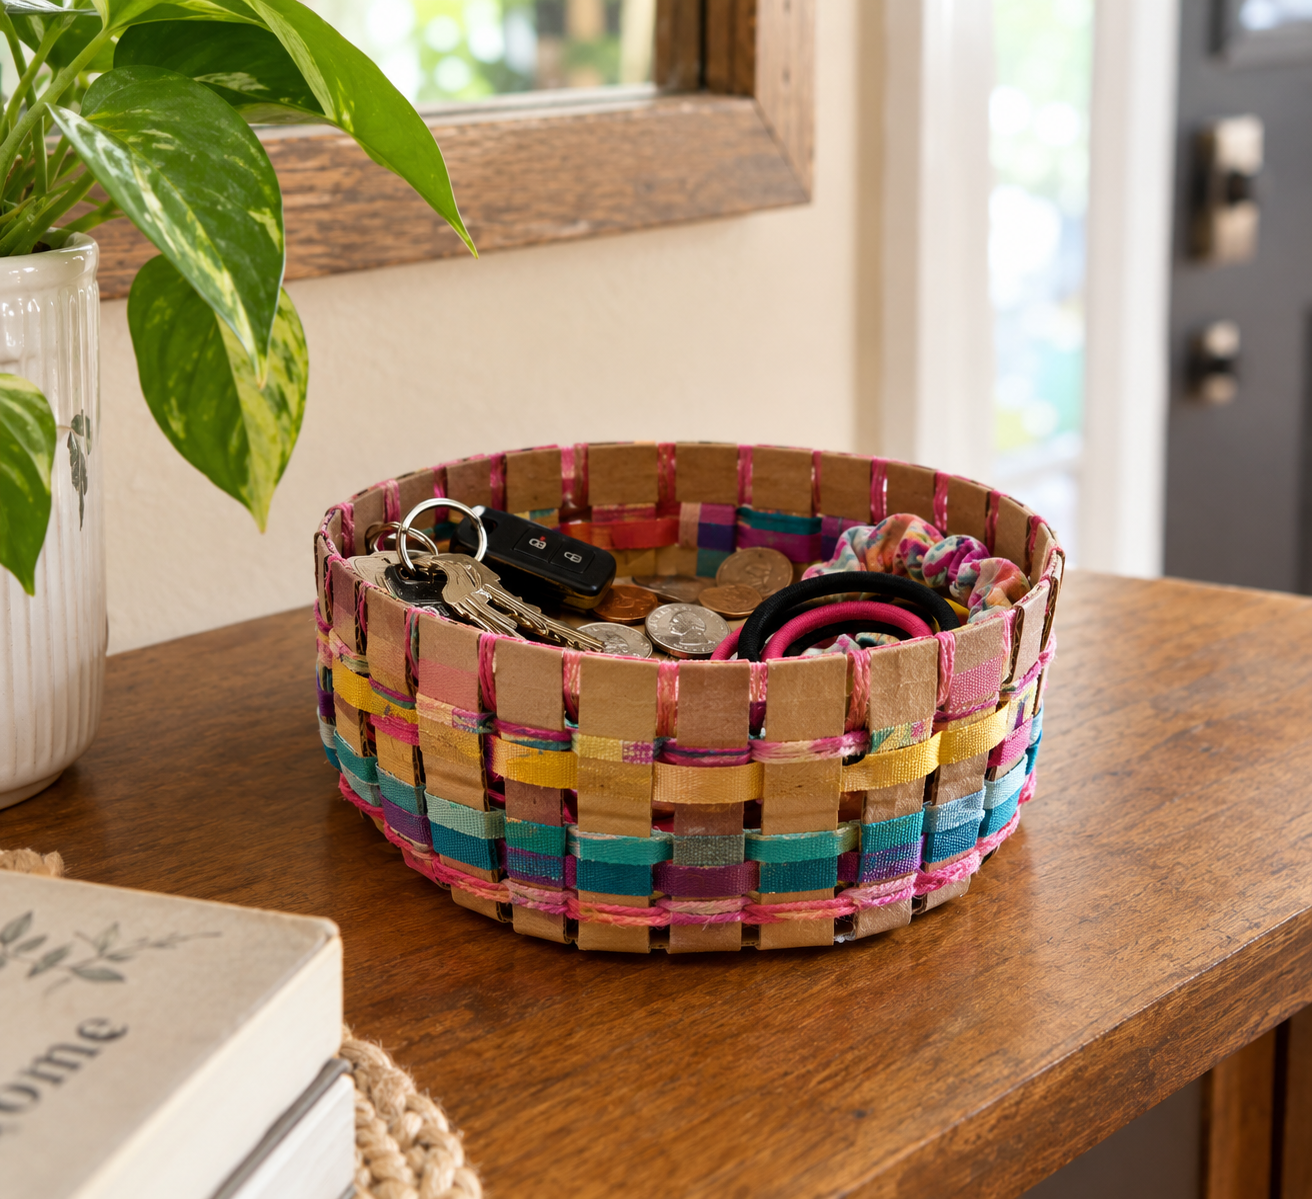
- Cut a series of evenly spaced vertical slits around the top half of a roll, then weave strips of ribbon or yarn in and out through the slits, going around the roll a few times in different colors if you want a striped effect, pulling each pass snug as you go so the weave doesn’t loosen up later.
- Fold the uncut bottom portion flat to create a base the basket can stand on.
- Set it on a dresser or entryway table to catch loose change, hair ties, or keys, it’s small, but the woven texture makes it look far more put-together than its cardboard origins would suggest.
- A coat of mod podge over the finished weave adds a bit of durability if it’s going to get daily use catching keys and loose change.
Smiling Cat
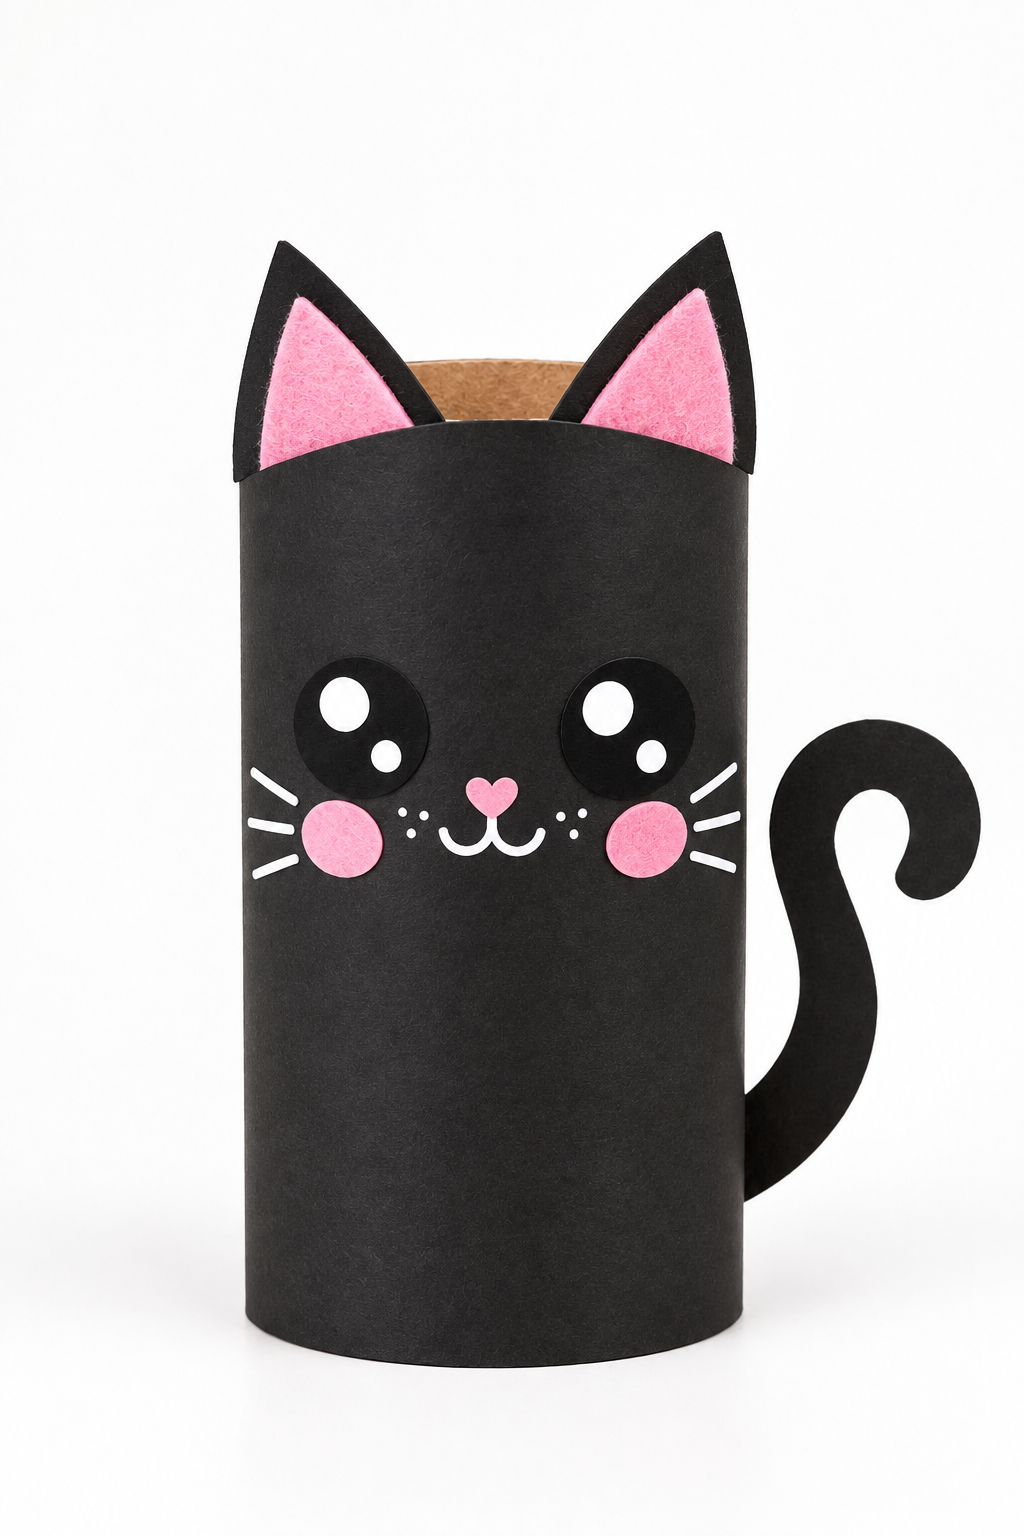
- Wrap a roll completely in black paper or black acrylic paint, letting it dry fully if you’re painting rather than wrapping, since a half-dry roll tends to smudge the second you handle it for the next step.
- Cut two triangular ears from black paper, then cut two smaller triangles from pink paper and glue them centered inside each black ear for that classic inner-ear detail. Glue the ears to the inside rim of the top opening, angled slightly outward rather than straight up, so they catch a bit more personality.
- Draw two round eyes with a paint pen or marker, adding a small white highlight dot in each for that glossy, cartoon look, then add a small pink triangle nose and a few short white whisker dots fanned out on each cheek.
- Cut a thin curved strip of black paper for a tail, curling it around a pencil first to help it hold a gentle curve, and glue it to the base so it curls out to one side like the cat is actually sitting. Pink circle cheeks under the eyes round out the whole face and make it read as friendly rather than spooky, even in solid black.
Hanging Wall Pockets for Mail or Stationery
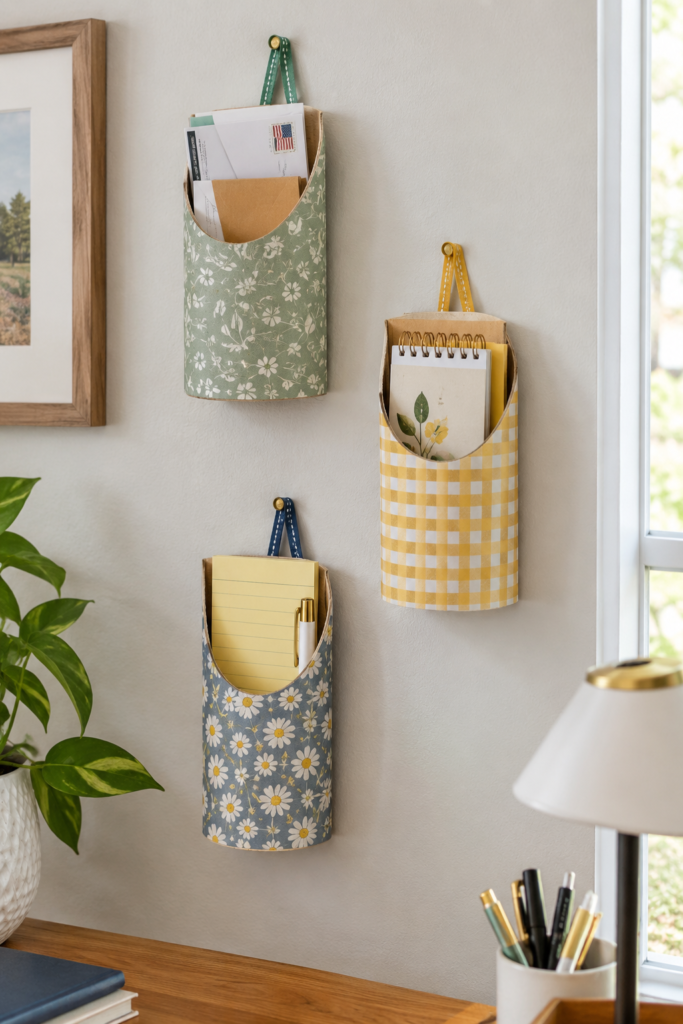
- Cut a roll in half lengthwise so you’re left with two scoop-shaped halves, then cover the outside of each in patterned paper or fabric, folding the edges under neatly where they meet the opening.
- Glue a small loop of ribbon to the back of each one near the top, then mount them to the wall side by side using a couple of small nails or adhesive strips, flat side against the wall so the scooped opening faces out.
- Slide in mail, notepads, or loose receipts so they’re corralled instead of piling up on the counter.
- Stagger two or three at slightly different heights instead of lining them up perfectly even,
- it reads a lot more like an intentional wall display and a lot less like you glued a toilet paper roll to your wall, even though that’s more or less exactly what happened here.
What I mean is, none of these toilet Paper Roll Crafts take more than twenty or thirty minutes, and most use stuff you’ve probably already got sitting in a craft drawer somewhere, glue, scissors, maybe some scrap fabric or ribbon left over from another project.
It seems to me the real trick with toilet paper roll crafts isn’t the roll itself.
it’s covering up where it came from, fabric, paint, ribbon, a little intention, and suddenly nobody’s thinking about where that cardboard started its life.
Pick whichever two or three fit your space right now instead of trying to knock out all at once, you’ll get a better result taking your time on a few than rushing the whole list.
Save your next few rolls instead of tossing them. You might be surprised what they turn into.