
It’s 12:40 on a Tuesday. You’re staring into the fridge like it owes you an answer.
Lunch has to be fast, and it has to keep you full past 3 p.m. the hour when your brain starts negotiating with the office vending machine.
Sad desk salads are out. So is sandwich bread that tastes like a damp sponge.
Now picture this. A golden, flexible, protein-packed wrap, made from two ingredients you can grab at Walmart, Target, or Kroger on any grocery run.
It folds without cracking. It doesn’t taste one bit like “diet food.” And it takes about half an hour, most of which is hands-off.
That’s what a cottage cheese wrap is, and here’s what you’ll get from this article.
- You’ll learn how to turn cottage cheese and eggs into a wrap that actually bends.
- You’ll find out why some batches come out rubbery while others turn out silky, and how to land on the silky side every time.
- You’ll get a filling combo worth making on repeat, plus a pile of swaps for when you’re bored or the fridge looks bleak.
And you’ll pick up the pro tips that save you from wasting a dozen eggs on trial and error.
If you want a lunch that’s high in protein, low on effort, and kind of fun to eat, keep scrolling. You’re in the right spot.
2-Ingredient High-Protein Cottage Cheese Wraps
Why These Wraps Work
Cottage cheese gets a bad rap. Most of us picture the lumpy, bland stuff from a hospital tray or a 1980s diet plate.
But blend it, and something wild happens. Those curds melt into a smooth, creamy base that behaves almost like a thick batter.
Add eggs, and it sets up in the oven into a soft, sturdy sheet.
The flavor is mild. Slightly savory, a touch tangy, and never “cottage-cheesy” once it’s baked.
What that means in practice is you could hand one to a skeptic and they’d never guess what’s inside.
The protein is the real story. A cup of cottage cheese packs roughly 24 to 28 grams, depending on the brand.
Four large eggs add about 24 more. Split that across four wraps and you’re at around 12 grams each before a single filling goes in.
Add chicken or turkey and you’ve got a lunch with real staying power.
They’re also naturally low in carbs, which helps if you’re keeping an eye on those. And they’re gluten-free, as long as your fillings are.
QUICK OVERVIEW
- Makes: 4 wraps (about 4 by 6 inches each), or 2 big ones if you’re feeling generous
- Prep time: 5 minutes
- Cook time: 18 to 22 minutes
- Total time: About 30 minutes, give or take
- Difficulty: Easy. If you can crack an egg, you’re qualified.
INGREDIENTS
Here’s the beautiful part. The base takes exactly two things.
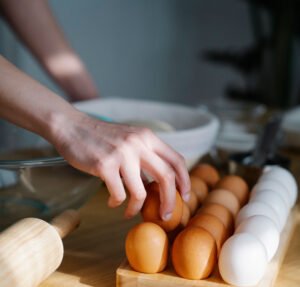
- 1 cup (8 ounces) cottage cheese. Full-fat or 2% works best. Good Culture, Daisy, Breakstone’s, and most store brands all do the job. or these are easily available at amazon.
- 4 large eggs.
- That’s the whole recipe, technically.
- A pinch of salt and pepper is optional, and so is a little garlic powder.
- They don’t count as “ingredients” here because the wraps work fine without them, so the two-ingredient label still holds.

TOOLS REQUIRED
Nothing fancy. You probably own all of it already.
- A blender, food processor, or an immersion blender with a tall cup
- A 9×13-inch baking pan or a quarter-sheet pan (a half-sheet works too, but the wraps come out thinner)
- Parchment paper (non-negotiable, and the reason’s coming up)
- A spatula
- A sharp knife or pizza cutter
- A wire rack, or just a clean counter, for cooling
INSTRUCTIONS
1. Heat the oven.
- Crank it to 375°F and let it come up to temperature while you do the rest. Put the rack in the middle.
2. Line your pan.
- Cut a sheet of parchment big enough to cover the bottom and creep up the sides a little.
- Press it flat. Don’t skip this. A greased pan sounds like a fair substitute, but it usually ends with you chiseling scrambled egg off the metal.
3. Blend the base.
- Dump the cottage cheese and eggs into your blender. Add salt, pepper, and garlic powder if you’re using them.
- Blend until it’s totally smooth, about 30 to 45 seconds.
- You want zero lumps. Stop and scrape the sides once if needed.
- The mixture should look like thin pancake batter, pourable and a bit creamy.
4. Pour and spread.
- Pour the batter into the lined pan.
- Tilt the pan so it spreads evenly, or nudge it along with a spatula.
- Aim for about 1/4 inch thick.
- Thin spots crisp up and tear later, so spend an extra few seconds here.
5. Bake.
- Slide the pan into the oven for 18 to 22 minutes.
- The top should look set and lightly golden around the edges.
- Press the center with a finger. If it springs back and no liquid pools, you’re done.
- If it jiggles, give it two more minutes.
6. Cool a bit.
- Let the pan sit for about 5 minutes.
- The sheet firms up as it cools, which makes peeling much easier.
7. Cut and peel.
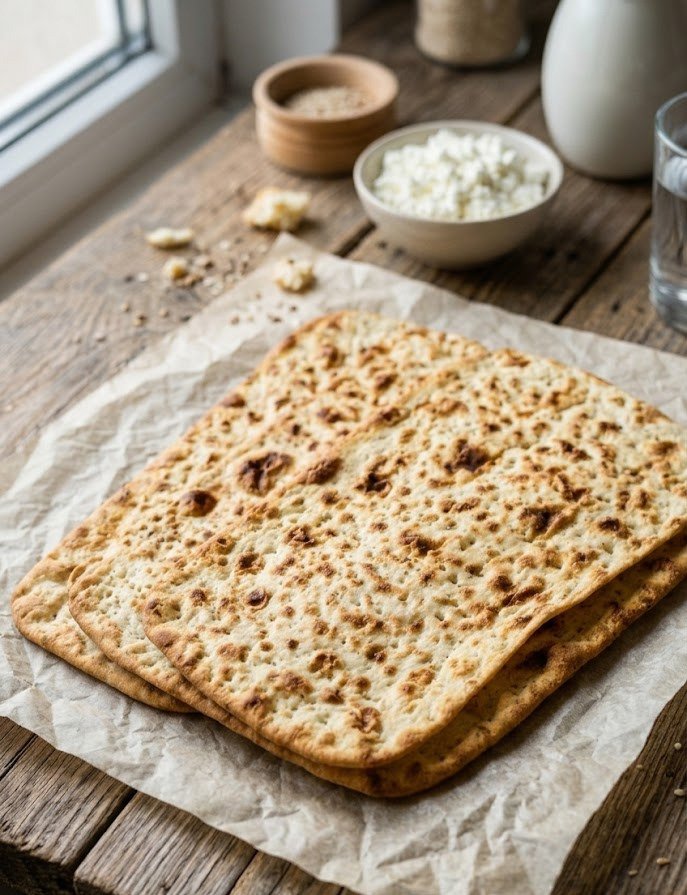
- Slice the sheet into four rectangles with a knife or pizza cutter.
- Gently peel each one off the parchment.
- Flip them over if the bottoms look a little damp.
8. Fill and fold.
- Load them up and eat right away, or let them cool completely and store them for later.
The Best Filling Combo: Lemony Chicken Crunch
Okay. Here’s the part where things get good.
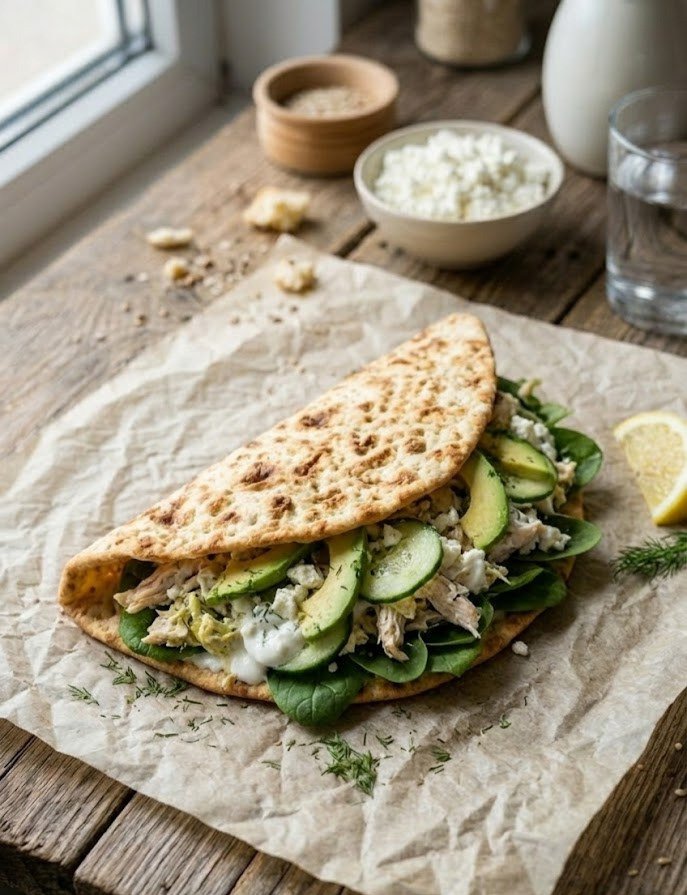
Think of those bright, fresh cafe chicken salads, the kind with a squeeze of lemon and something crunchy in every bite.
This filling borrows that whole idea and tucks it into a protein-rich wrap.
It’s creamy, tangy, crisp, and a little salty.
It also comes together in about five minutes if you start with a rotisserie chicken.
What goes in:
- 1 cup shredded rotisserie chicken (the Costco kind, the Kroger kind, whatever’s in your cart)
- 2 tablespoons plain Greek yogurt
- 1 teaspoon lemon juice, plus a little zest
- A small handful of crumbled feta
- 1/4 of an avocado, sliced thin
- A few cucumber slices
- A small handful of baby spinach or arugula
- Salt, black pepper, and a pinch of dried dill
How to build it:
Mix the chicken, yogurt, lemon juice, zest, dill, salt, and pepper in a bowl. It should look creamy but not soupy. Taste it. Add more lemon if it needs a lift. (It usually does.)
Lay a wrap flat. Spread a thin layer of the chicken mixture down the center. Add the spinach first, since it works like a little barrier against sogginess. Then the cucumber, avocado, and feta. Fold the bottom edge up, tuck in the sides, and roll it like a burrito. Or fold it in half like a taco if that feels easier.
Eat it with your hands. Lean over the sink if you have to.
One of these keeps you going for hours, and that’s not an exaggeration. The mix of protein, healthy fat, and crunch does the heavy lifting.
MORE FILLING IDEAS
Because variety matters, and Tuesday’s lunch shouldn’t look like Monday’s.
1.Turkey and Swiss
- Deli turkey, a slice of Swiss, yellow mustard, and shredded lettuce.
- Classic. Nobody argues.
2.Buffalo chicken ranch
- Shredded chicken tossed in buffalo sauce, a drizzle of ranch, and some celery.
- It tastes like game day without the wings.
3.Tuna and pickle
- Canned tuna mixed with a little mayo or Greek yogurt, chopped dill pickles, and celery.
- Tangy and punchy.
4.BLT(bacon, lettuce, and tomato)
- Crispy bacon, tomato, lettuce, and a swipe of mayo.
- Add avocado if you’re feeling fancy.
5.Breakfast style
- Scrambled eggs, shredded cheddar, and a spoonful of salsa.
- Yes, eggs inside an egg wrap. It’s silly, and it works.
6.Caprese
- Fresh mozzarella, tomato, basil, and a drizzle of balsamic.
- Light, summery, no cooking required.
7.Chickpea salad
- Mashed chickpeas with sriracha mayo and shredded carrot.
- Handy if you’re skipping meat.
8.Sweet version
- Skip the garlic powder in the batter, then fill with Greek yogurt, strawberries, and a drizzle of honey.
- It sounds odd, but it eats like a crepe’s healthier cousin.
PRO TIPS
These are the details that separate a flexible, silky wrap from a rubbery, crumbly one.
1. Blend longer than you think. Leave any curds in the batter and the wrap bakes up bumpy and weak. Smooth batter makes a smooth, flexible sheet. It’s the single biggest factor.
2. Use full-fat or 2% cottage cheese. Fat-free versions release more water, and you end up with a wetter, more fragile wrap. Skip the “extra healthy” move here.
3. Parchment, not foil. Not a greased pan. Parchment releases cleanly. Foil sticks. A greased pan sort of works, but the edges tear.
4. Watch the thickness. Too thin and it cracks when you fold it. Too thick and it turns into a baked omelet, which is fine, but it’s not a wrap. A quarter inch is the sweet spot.
5. Don’t overbake. Once the edges go dark brown, the wrap turns stiff and papery. You want pale gold, soft, and just set. Pulling it a minute early is okay.
6. Let it cool before peeling. Hot wraps are tender and tear easily. Five minutes makes a huge difference.
7. Drain watery cottage cheese. Some brands sit in a lot of liquid. Pour off the extra, or dab the curds with a paper towel before blending.
8. Fill right before eating. A filled wrap that sits for hours goes soft. If you’re packing lunch for work, pack the filling separately and assemble when you’re hungry.
9. Warm them up for better flexibility. If a cold wrap feels stiff, microwave it for 10 to 15 seconds. It loosens right up.
NOTES
- Storage: Cooled wraps keep in an airtight container in the fridge for up to 4 days. Stack them with a piece of parchment between each one so they don’t stick together.
- Freezing: You can freeze them for about 2 months. Layer with parchment, seal in a freezer bag, and thaw overnight in the fridge.
- Reheating: A quick zap in the microwave or a minute in a dry skillet brings them back to life.
- Texture: These aren’t flour tortillas. They’re softer, a little eggier, and more tender. Think of them as a cross between a crepe and a thin omelet. If you expect a Mission tortilla, you’ll be disappointed. If you expect something new, you’ll probably love them.
- Seasoning the base: Garlic powder, onion powder, smoked paprika, or Italian seasoning all work well. A teaspoon of any of them changes the personality of the wrap completely. Everything bagel seasoning is surprisingly good, too.
- Flavor warning: Cottage cheese brands vary in saltiness. Taste your batter before you bake it. A tiny dab on your finger will do. (Yes, there’s raw egg in it. Your call.)
- Dairy-free? This recipe doesn’t work without the cottage cheese, and there’s no tested substitute worth recommending.
- Scaling up: Double the batch and use a half-sheet pan. You’ll get thinner wraps, so shorten the bake time by a few minutes and watch closely.
- Nutrition: Numbers shift by brand and filling, so treat the protein estimates above as ballpark figures. Check your labels if you’re tracking closely.
TROUBLESHOOTING
1. The wrap came out rubbery. It probably baked too long, or your oven runs hot. Pull it sooner next time, and grab an oven thermometer if you don’t own one. They cost a few bucks and save a lot of guessing.
2. It tore when folded. Likely too thin, or too hot when peeled. Spread the batter a bit thicker and let it cool longer.
3. There’s liquid pooling on top. Underbaked, or the cottage cheese was extra watery. Give it a few more minutes, then blot the top with a paper towel.
4. It tastes too eggy. Add garlic powder and pepper to the batter, and squeeze some lemon into your filling. A tangy filling balances the egg flavor nicely.
5. It stuck to the parchment. Cool it a little longer, or flip the whole sheet upside down and peel the paper off from the back.
Why This Recipe Sticks
Healthy swaps have a way of disappointing people. Cauliflower everything. Lettuce wraps that collapse the second you pick them up.
Protein bread that tastes like a yoga mat. Most of it ends up forgotten in the back of the fridge.
These wraps tend to stay in rotation because they ask for so little. You don’t need a special flour or a trip to some specialty store.
You need a blender, a pan, and about half an hour. Make a batch on Sunday and you can eat well through Thursday.
They also shift with your mood. Some days call for something crisp and lemony. Other days call for a lazy turkey-and-cheese situation.
The wrap doesn’t care. It just holds whatever you hand it.
So here’s the plan. Make one batch this week. Fill the first wrap with the lemony chicken combo, then get weird with the second.
See what happens. Maybe you’ll hate it, though that’s unlikely. More likely you’ll become the person at work who suddenly has a really good lunch and won’t stop talking about it.