Raise your hand if you’ve ever stood in front of the mirror, hair half-brushed, running out of time, and thought, “I’ll just throw it up.”Same.
Every single week.Here’s the problem, though. “Throw it up” works for about ten minutes, and then the bun slumps, the pins poke, and you look like you gave up somewhere around the ponytail stage.
It doesn’t have to go that way.
A good bun takes maybe three minutes, and it can look polished, playful, or party-ready depending on how you build it.
That’s what this guide is for.
You’ll get 30 bun ideas for 2026, sorted by hair length, so you can skip straight to your own:long, shoulder-length, short, curly, or dressed up for a wedding.
Each one comes with a plain-English how-to, a note on who it suits, and a trick or two I picked up the hard way.
No fancy tools. No salon skills.
Whether you need a quick fix before work, a clean look for the gym, or something pretty for prom season, you’ll find it below.
Keep scrolling. Your next favorite bun is closer than you think.
Bun Ideas for Long Hair
Long hair gives you room to be dramatic. Use it.
1. The Sleek High Bun
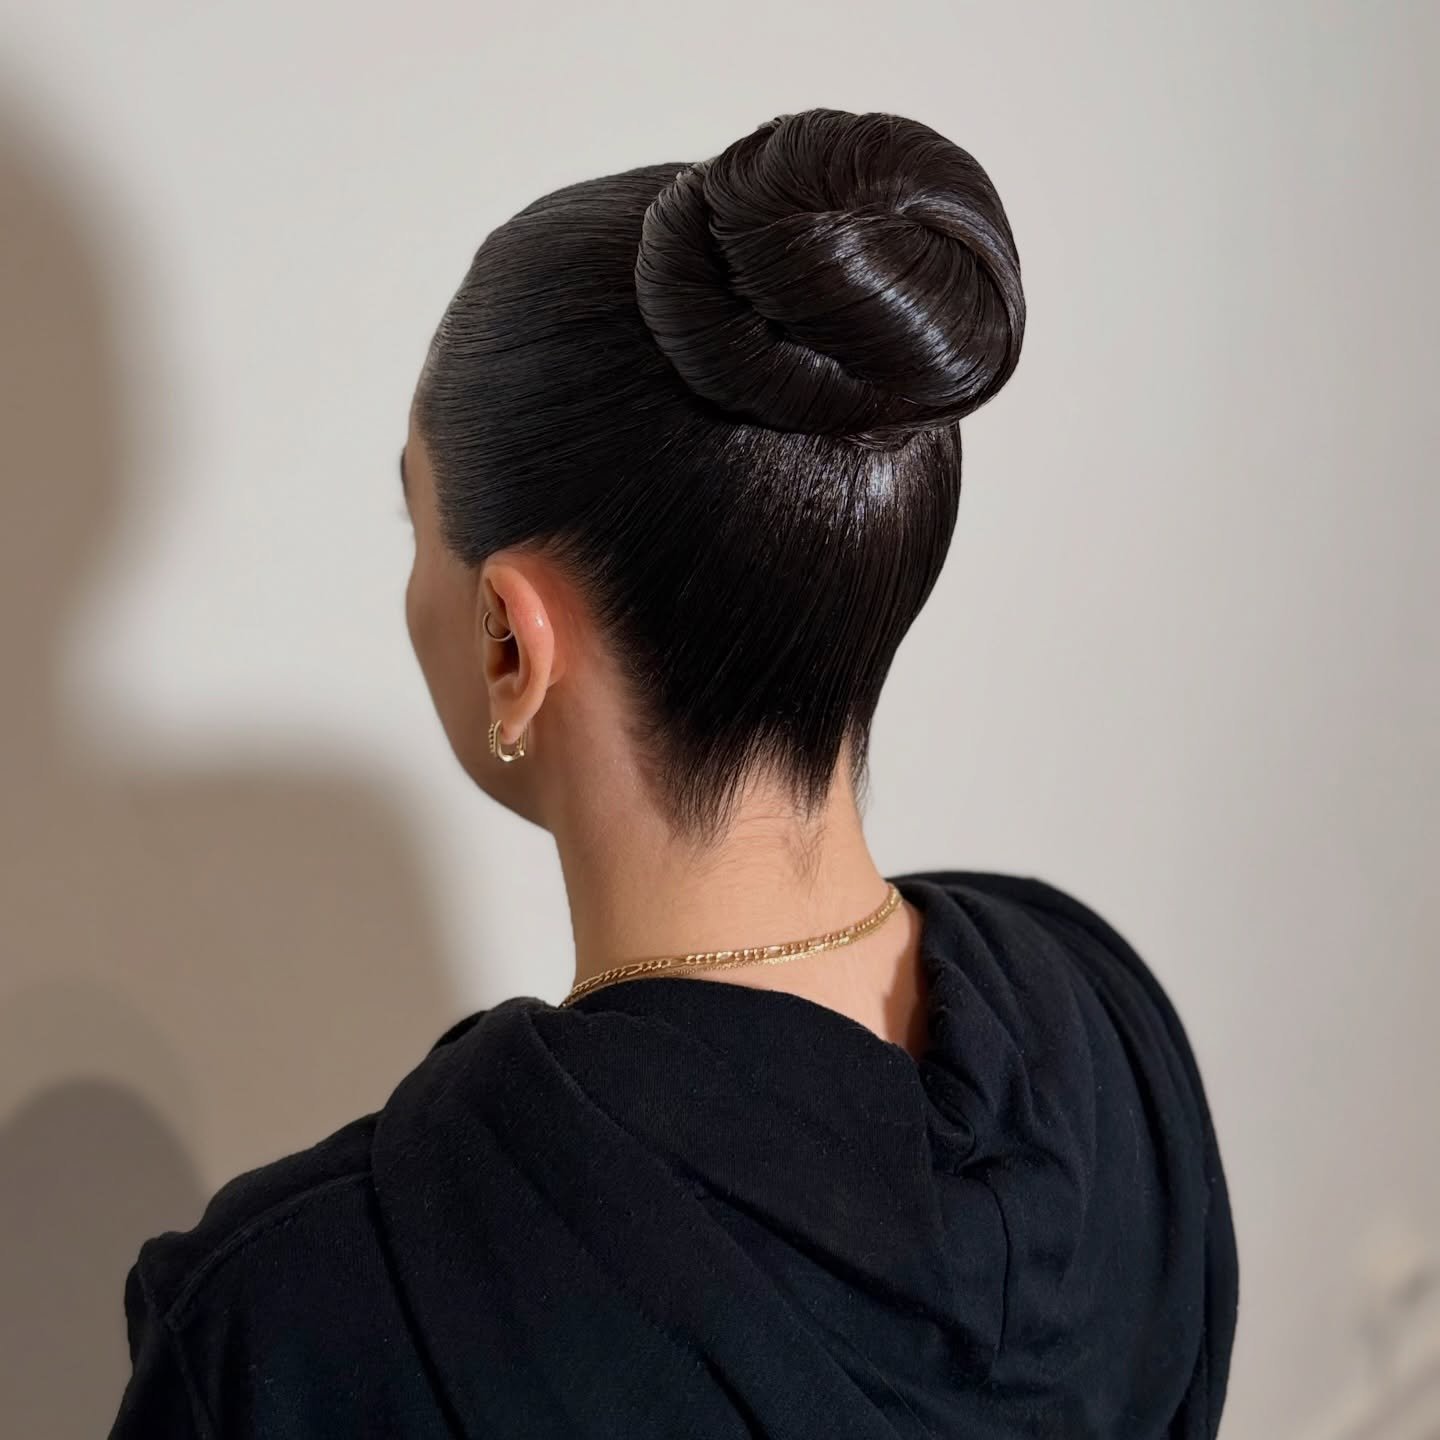
A tight, glossy bun right at the crown. Brush your hair up with a boar-bristle brush, working in a little smoothing cream or light gel, and keep going until there isn’t a bump anywhere.
Twist the ponytail, coil it around the base, and pin it flat. It looks sharp, a bit like a ballet teacher’s, and it shows off your neck, ears, and jewelry.
A pair of small gold hoops finishes it. Smooth the flyaways with a clean toothbrush and a touch of hairspray.
2. The Ballerina Bun
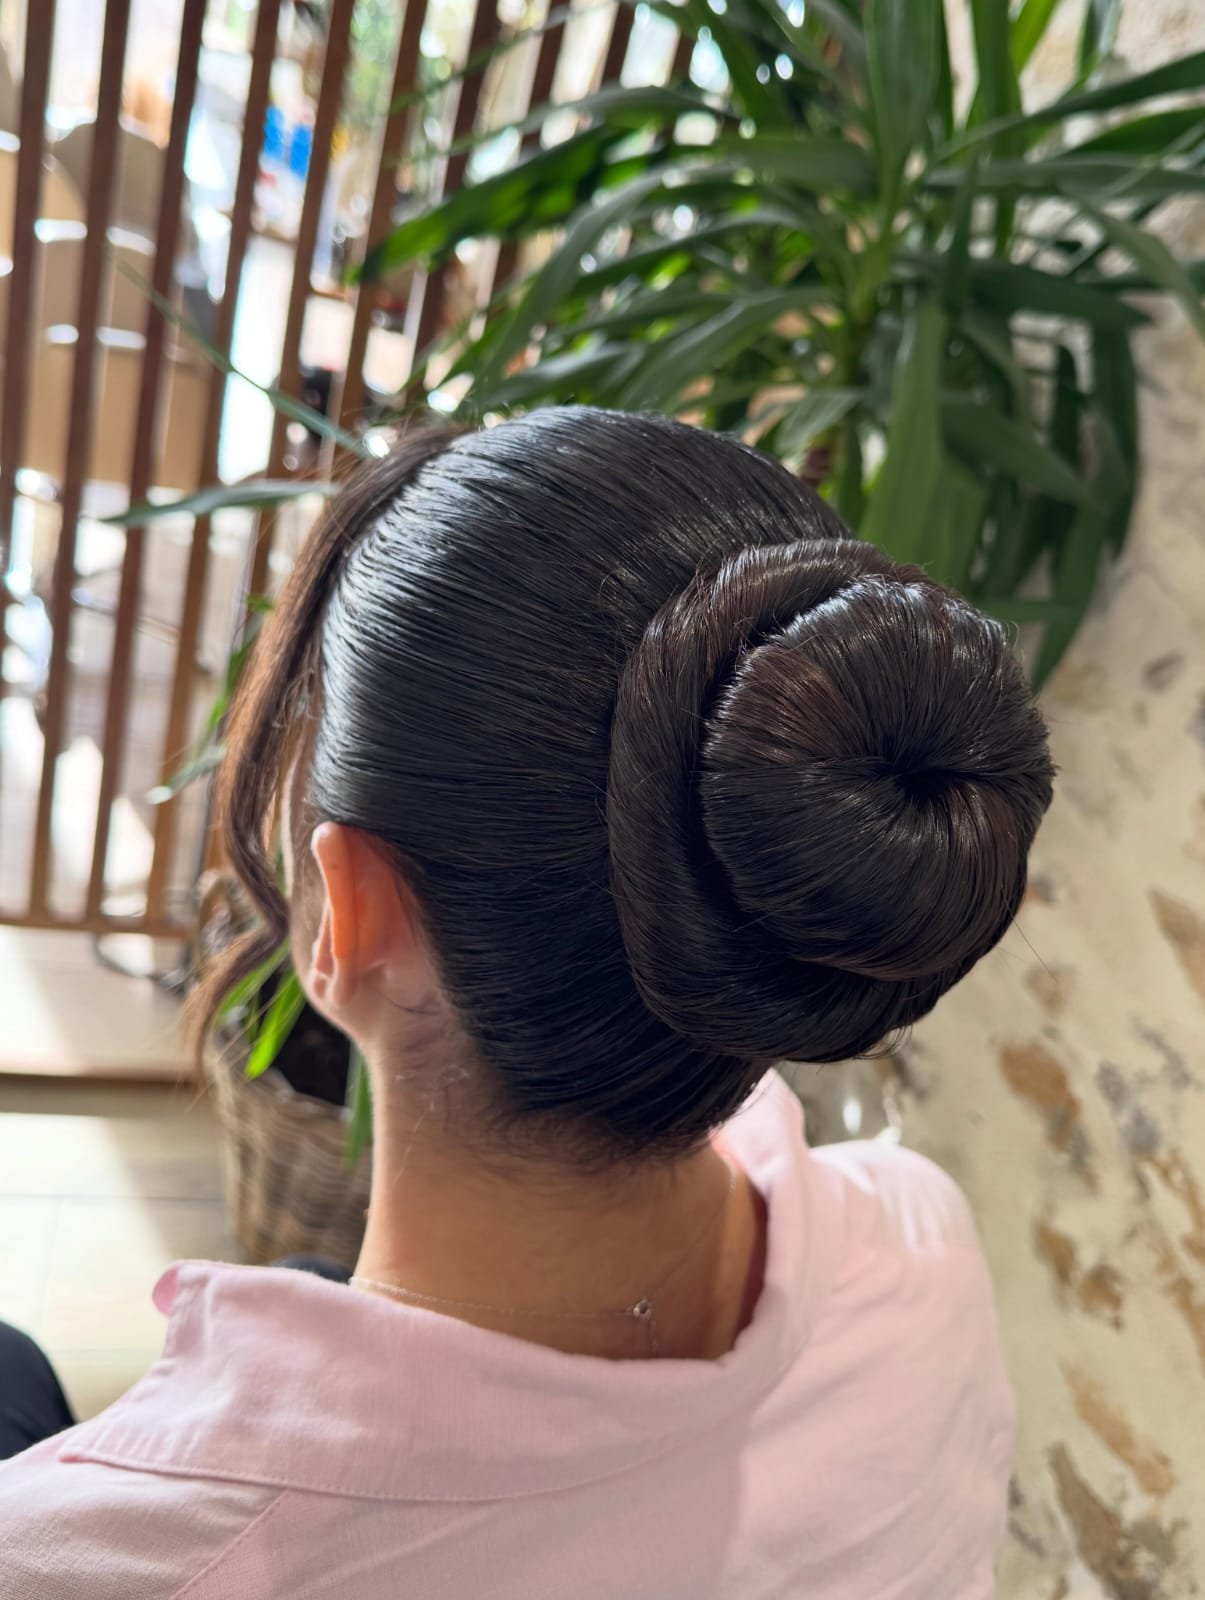
Smooth, round, and neat. Brush your hair back into a ponytail at the crown or just below, then twist it and wrap it around the base in a circle, tucking the ends under as you go.
Pin it flat, working all the way around the bun.
Add a hairnet if you want a flawless finish, and a bit of gel or smoothing cream to keep the sides sleek.
It’s a great choice for dance classes, recitals, and any day you want to look composed.
Leave out one soft strand near your ear if you like a gentler finish.
3. Chunky Braided Bun
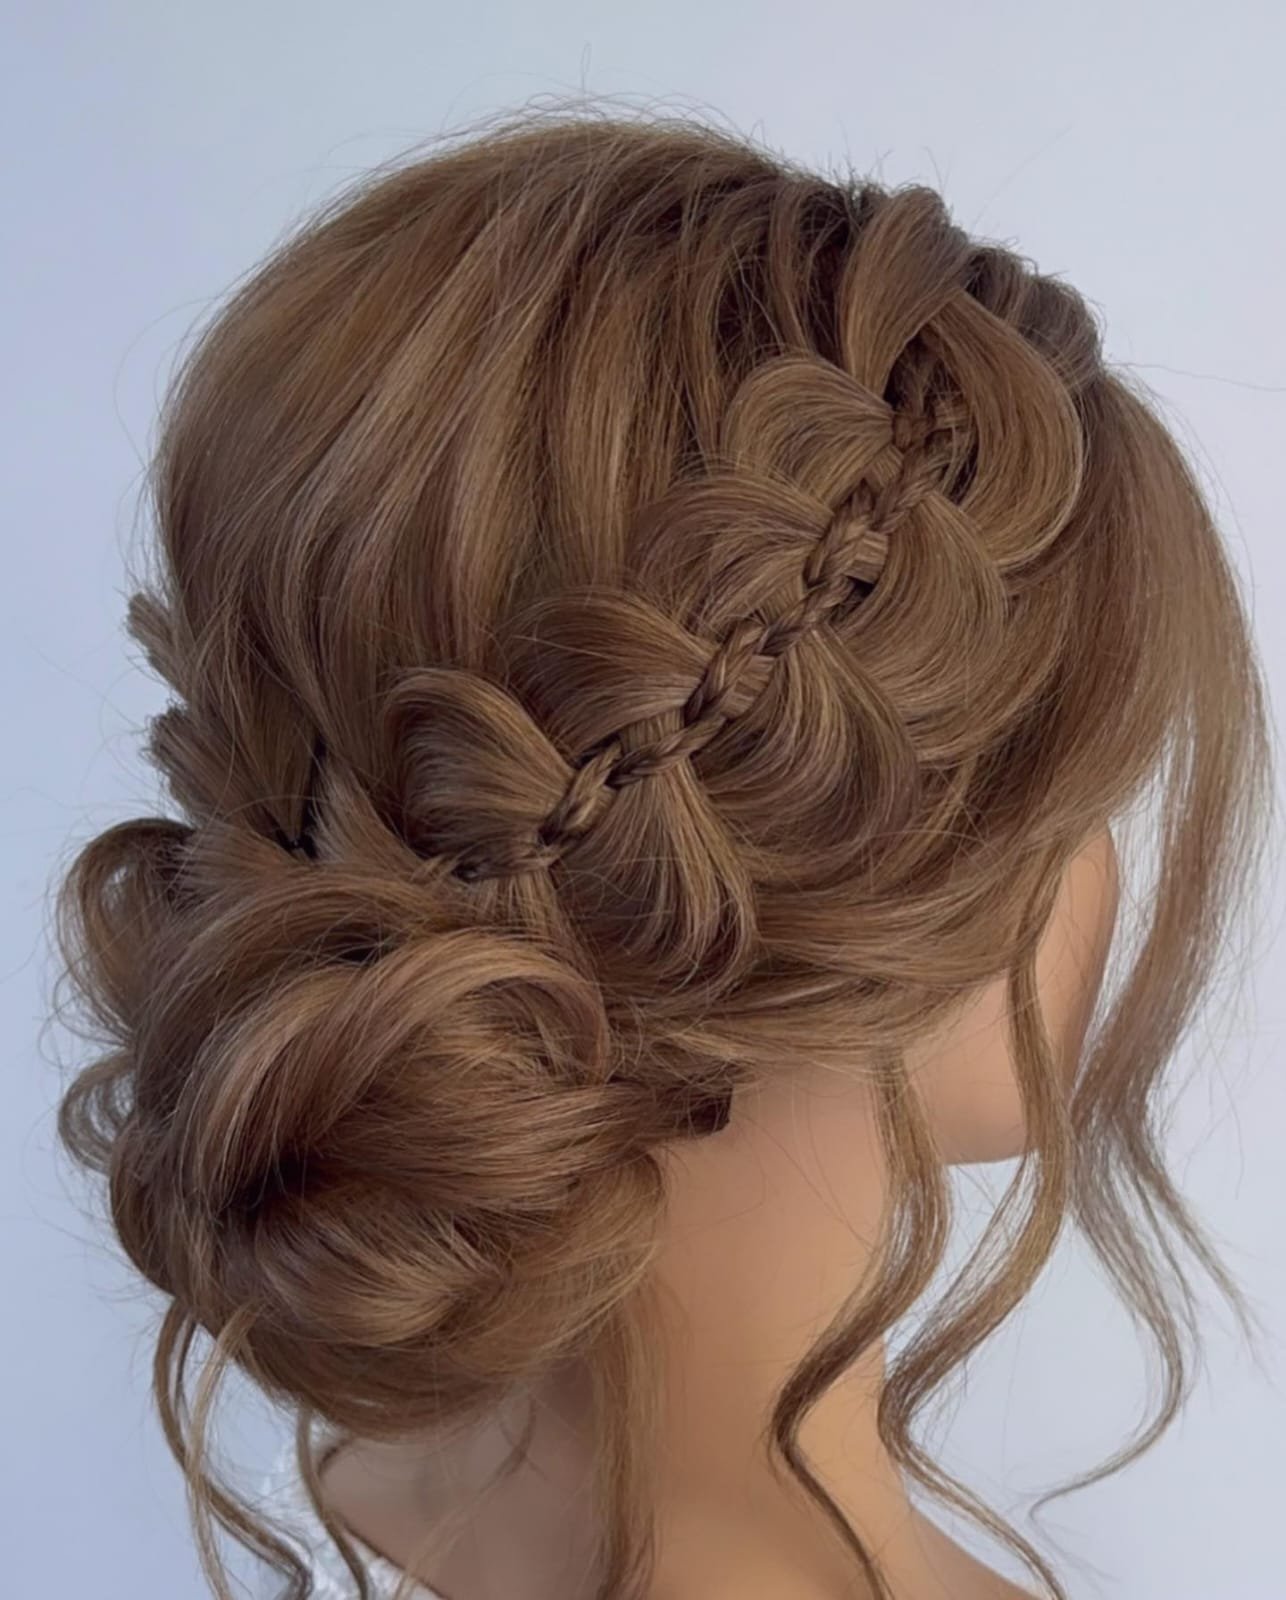
A braid with real volume. Start at one temple and work a loose braid across the back of your head, adding hair as you go.
Then gently pull apart the edges of each section, so the braid looks wide and puffy.
At the nape, gather everything into a low ponytail, twist it, and pin it into a soft bun.
Leave a few strands out near your face and neck.
4. Double Braided Buns
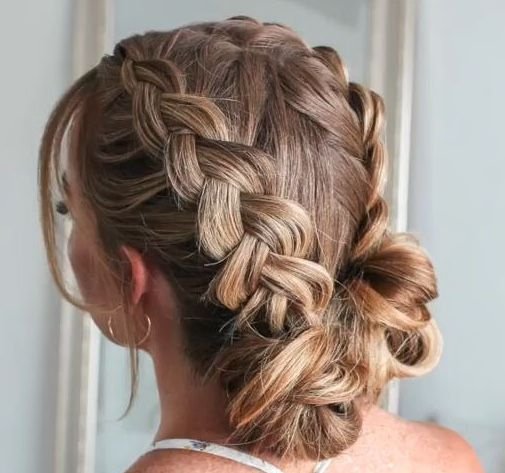
Two braids, two buns, zero fuss. Part your hair down the middle and work a loose Dutch or French braid along each side, following the curve of your head.
When each braid reaches the nape, twist the ends into a soft bun and pin it in place.
Gently pull the edges of each braid so they look wide and puffy, and leave a few strands out by your face.
It looks cute and a little romantic, and it holds up through dancing, hugs, and wind.
Add small ribbons or pearl pins if you’re feeling playful.
5.The Low Chignon
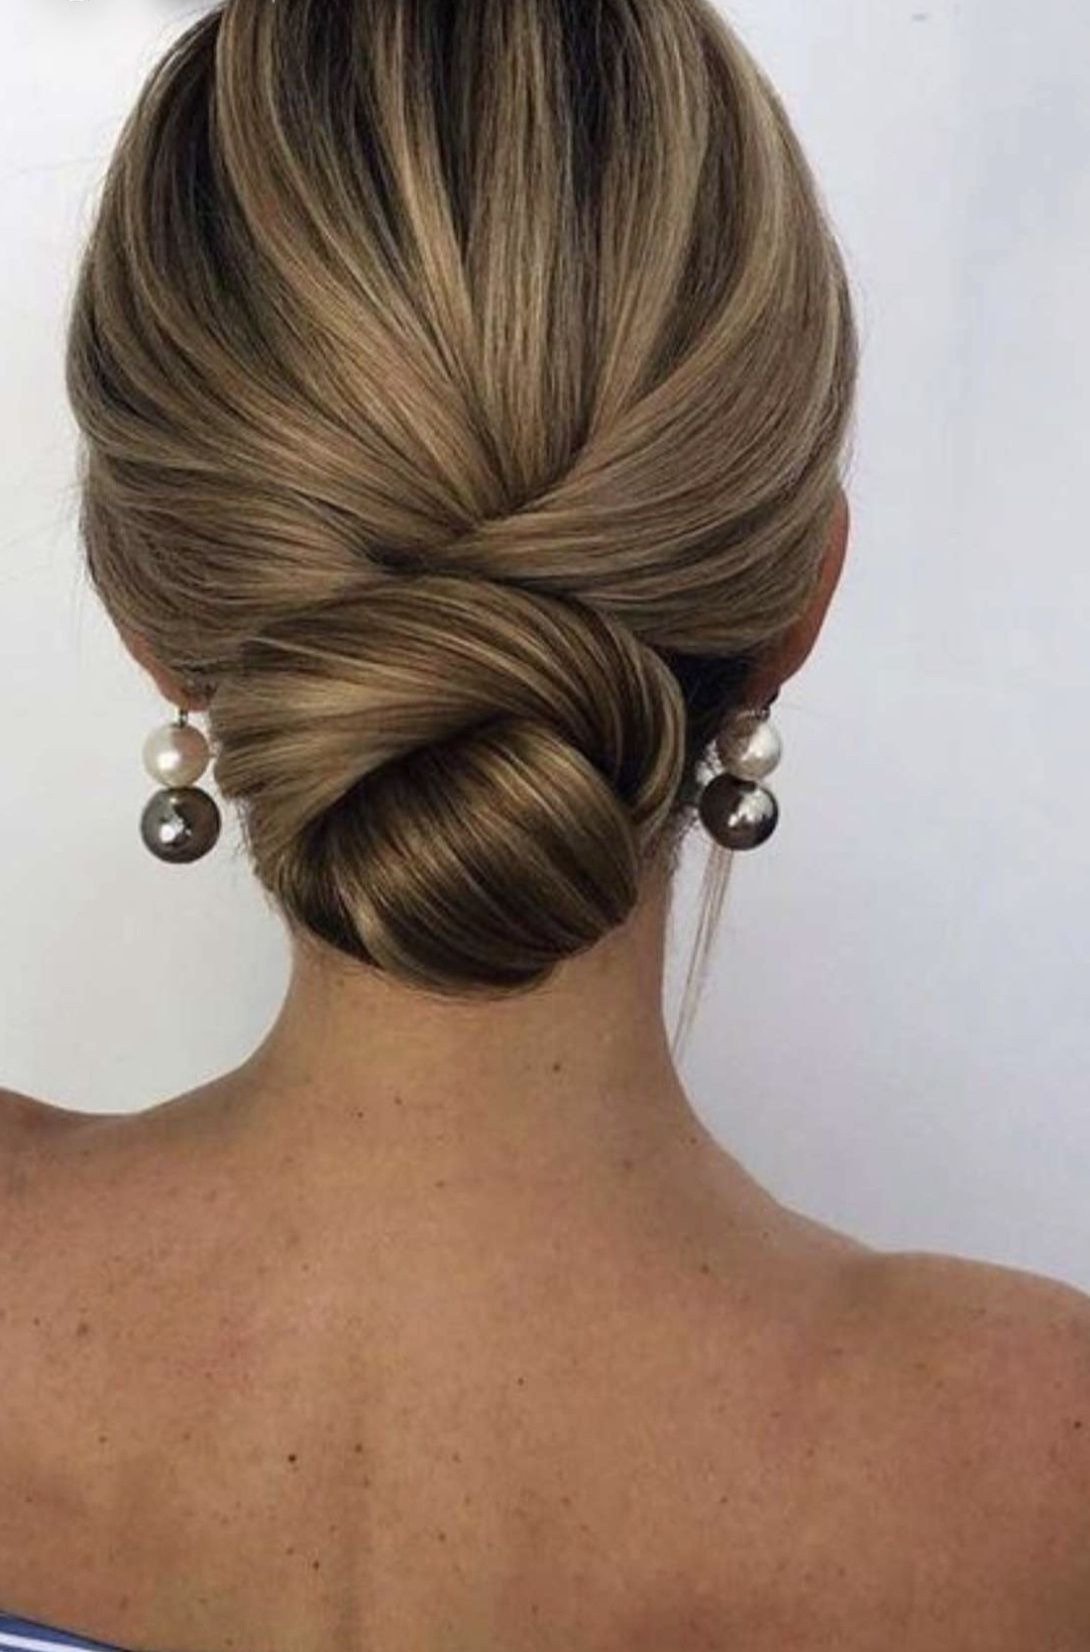
The grown-up version.
Make a low, soft twist at the nape, with a little volume at the crown.
It’s a classic for weddings, interviews, and dinners out.
Hairspray, a few well-hidden pins, and you’re set.
6. The Cinnamon Roll Bun
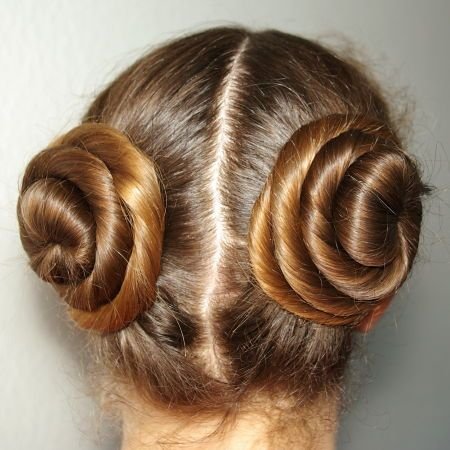
Part your hair down the middle, twist each side into a rope, and coil it into a flat spiral just above your ear.
Pin it in place and tuck in the ends.
Quirky, fun, and surprisingly easy, like a pair of pastries on your head.
7. Silk Scarf Bun
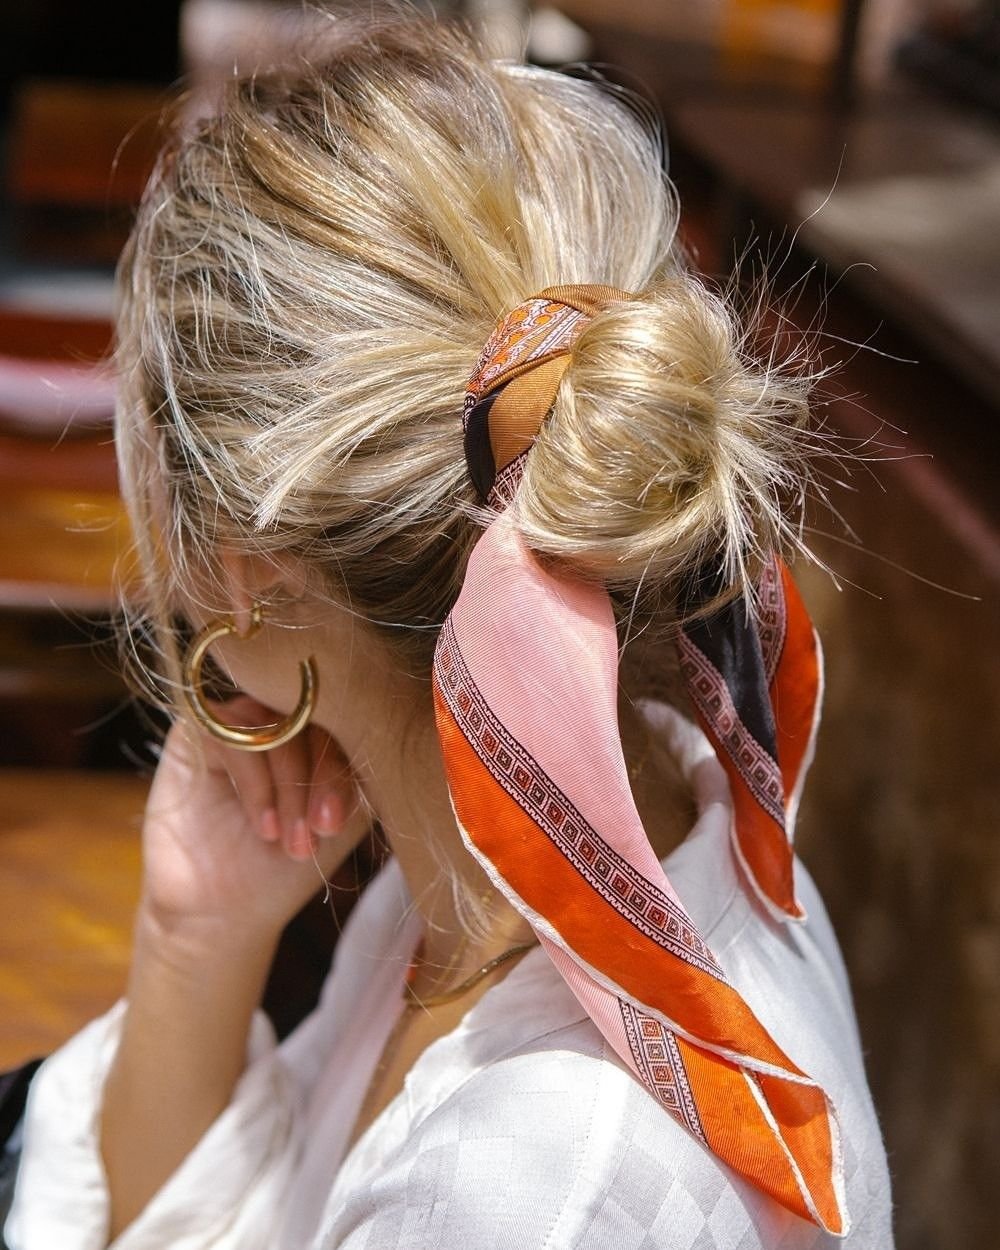
A scarf, a bun, and a little color. Gather your hair into a loose, messy bun, then fold a square silk scarf into a long band and tie it around the base in a knot or a bow.
Let the ends fall down your back or over one shoulder.
It covers the elastic, adds a pop of color, and makes a plain outfit look planned.
Thrift stores and vintage shops are great places to find scarves.
8. Double Fishtail Braid Bun
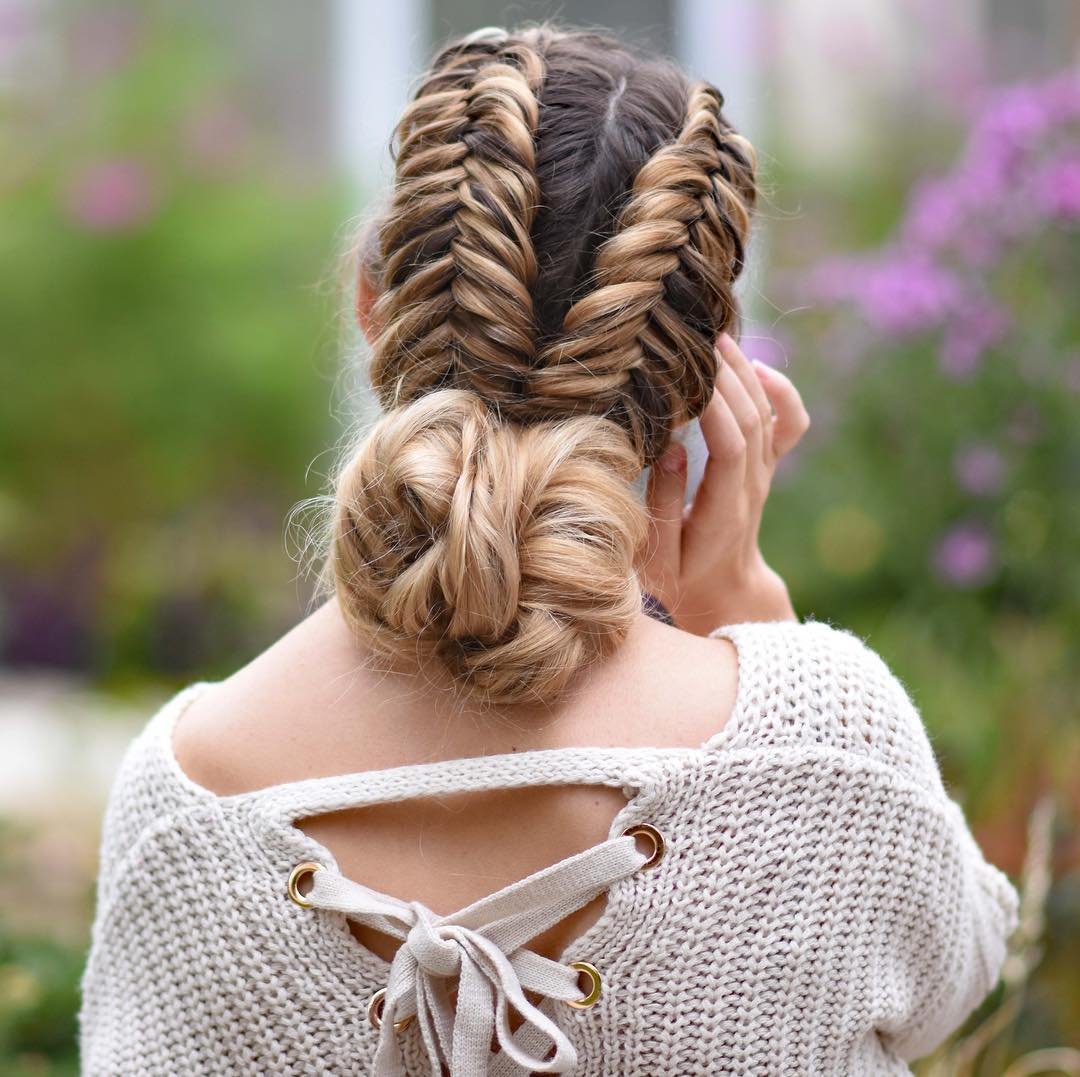
Two fishtails, one bun.
Part your hair down the middle and make a fishtail braid on each side: split each section in two, then keep crossing thin strands from the outside to the inside.
Start at the crown, and the braids will sit snug against your head. At the nape, gather both braids, twist them, and coil them into a bun. Pin it in place.
Bun Ideas for Shoulder-Length Hair
This is the sweet spot. You’ve got enough length to play, and not so much that it weighs you down.
9. The Classic Messy Bun
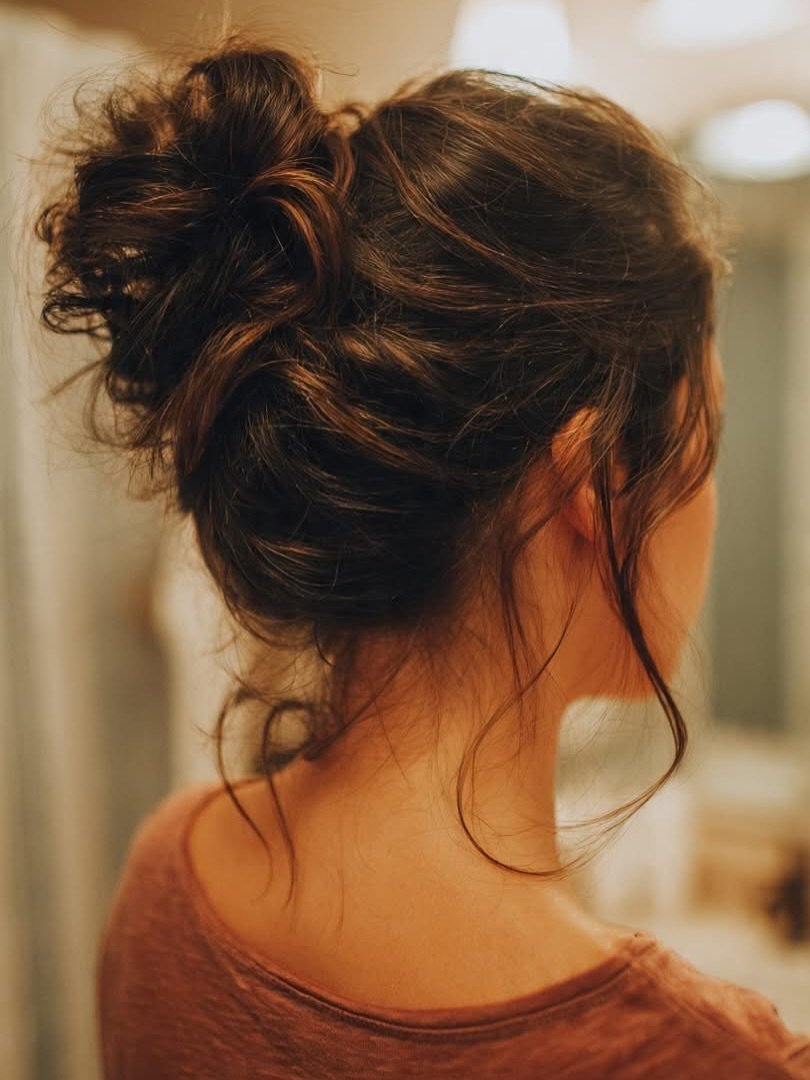
Flip your head upside down, gather your hair high, and twist it into a loose loop.
Secure it with an elastic and a pin or two, then tug at the edges.
The messier, the better.
If your hair is freshly washed and slippery, a little dry shampoo helps it hold.
10. The Twisted Low Bun
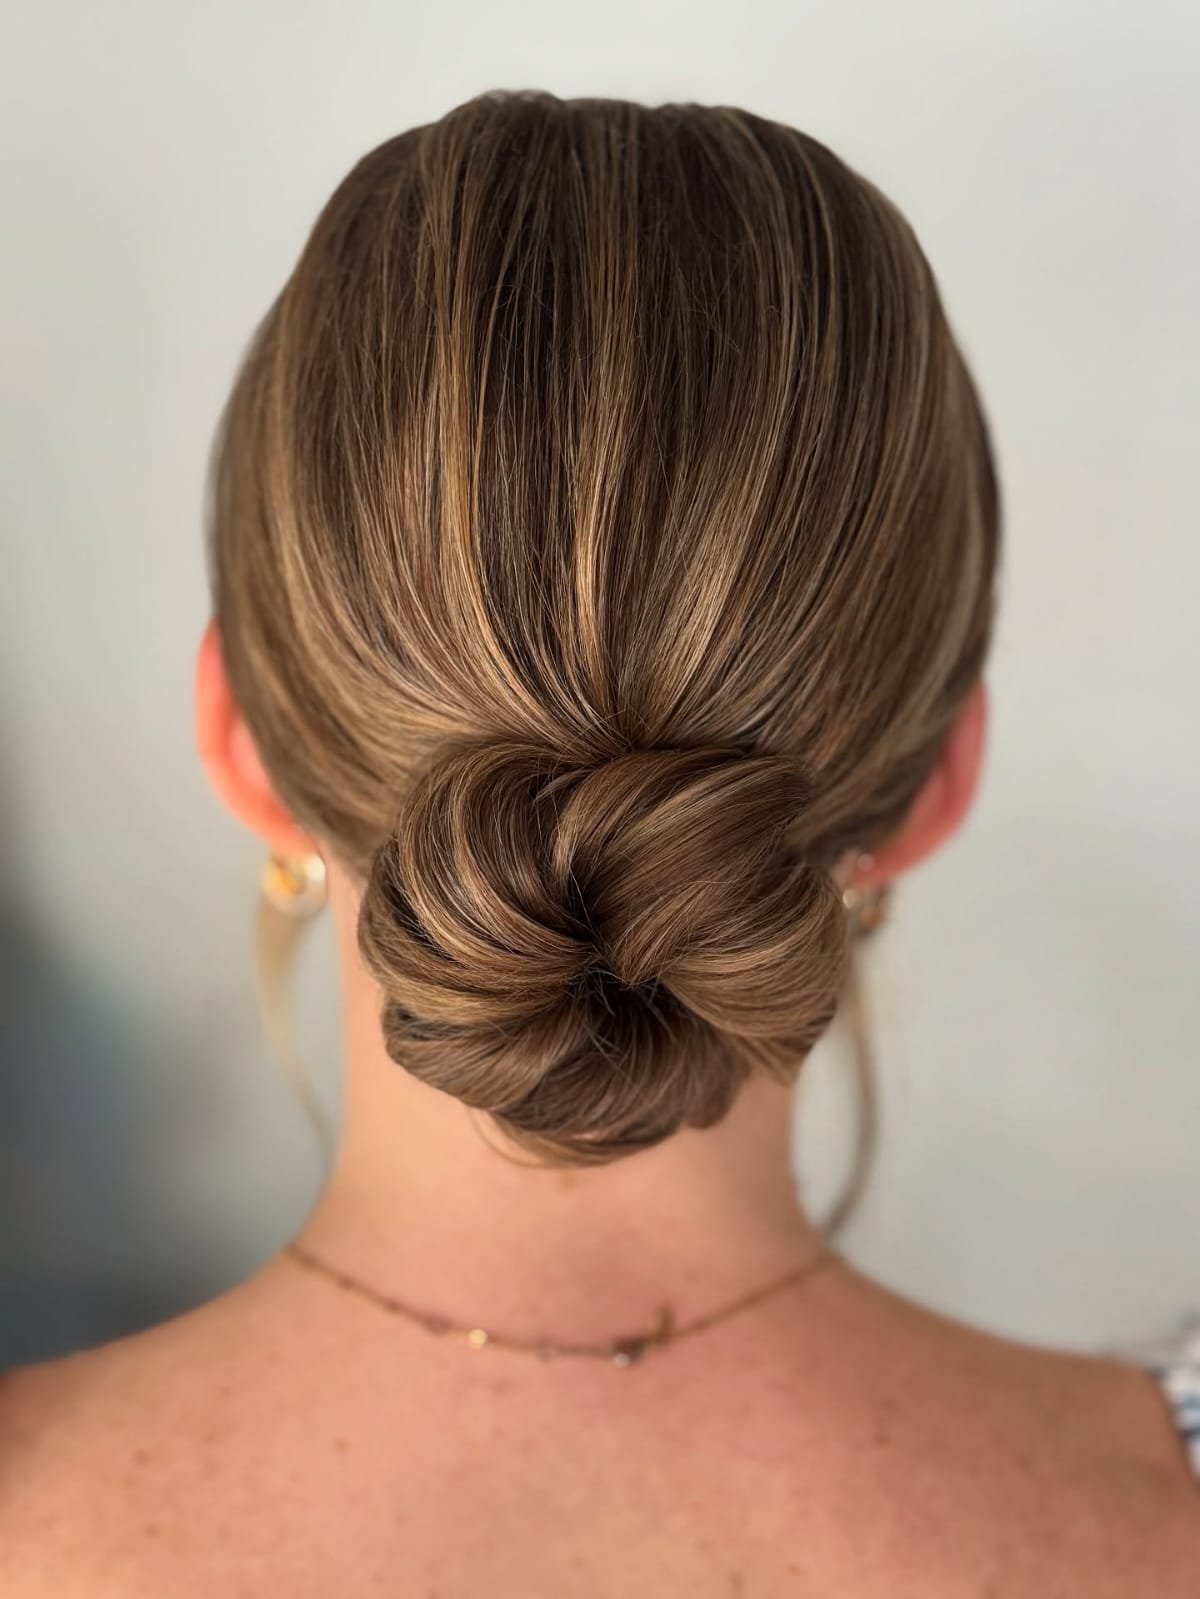
Two-minute upgrade.
Make a low ponytail, twist it tightly, and coil it around the elastic.
Pin it at the base. It looks like you tried, but you didn’t.
This one pairs well with a blazer, and I’d say it’s the unofficial hairstyle of every American office.
11. The Sock Bun
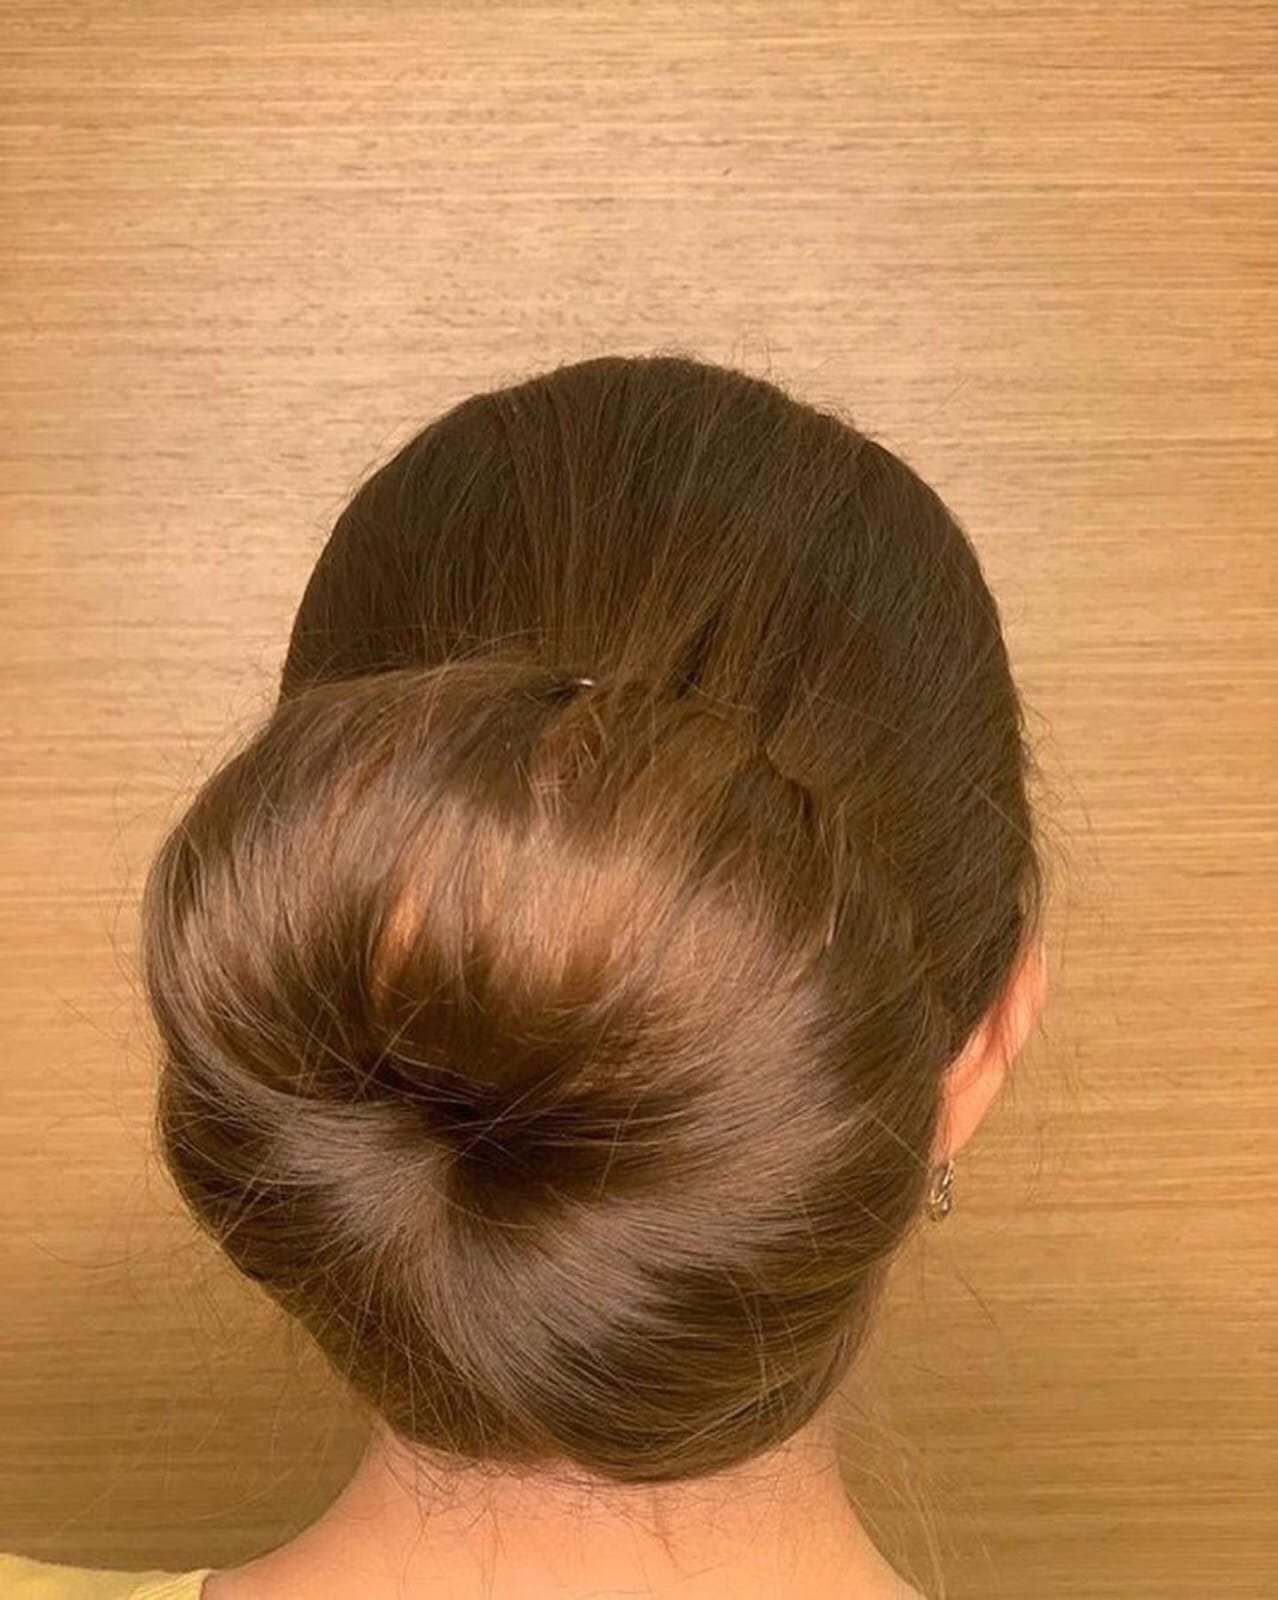
Cut the toe off a clean sock and roll it into a donut.
Gather your hair in a ponytail at the back of your head, slide the donut over it, and fan the hair out around it.
Smooth it down, add a second elastic, and pin the ends under.
You get a full, round bun with almost no effort. It’s a throwback, but it still works.
12. The French Twist Bun
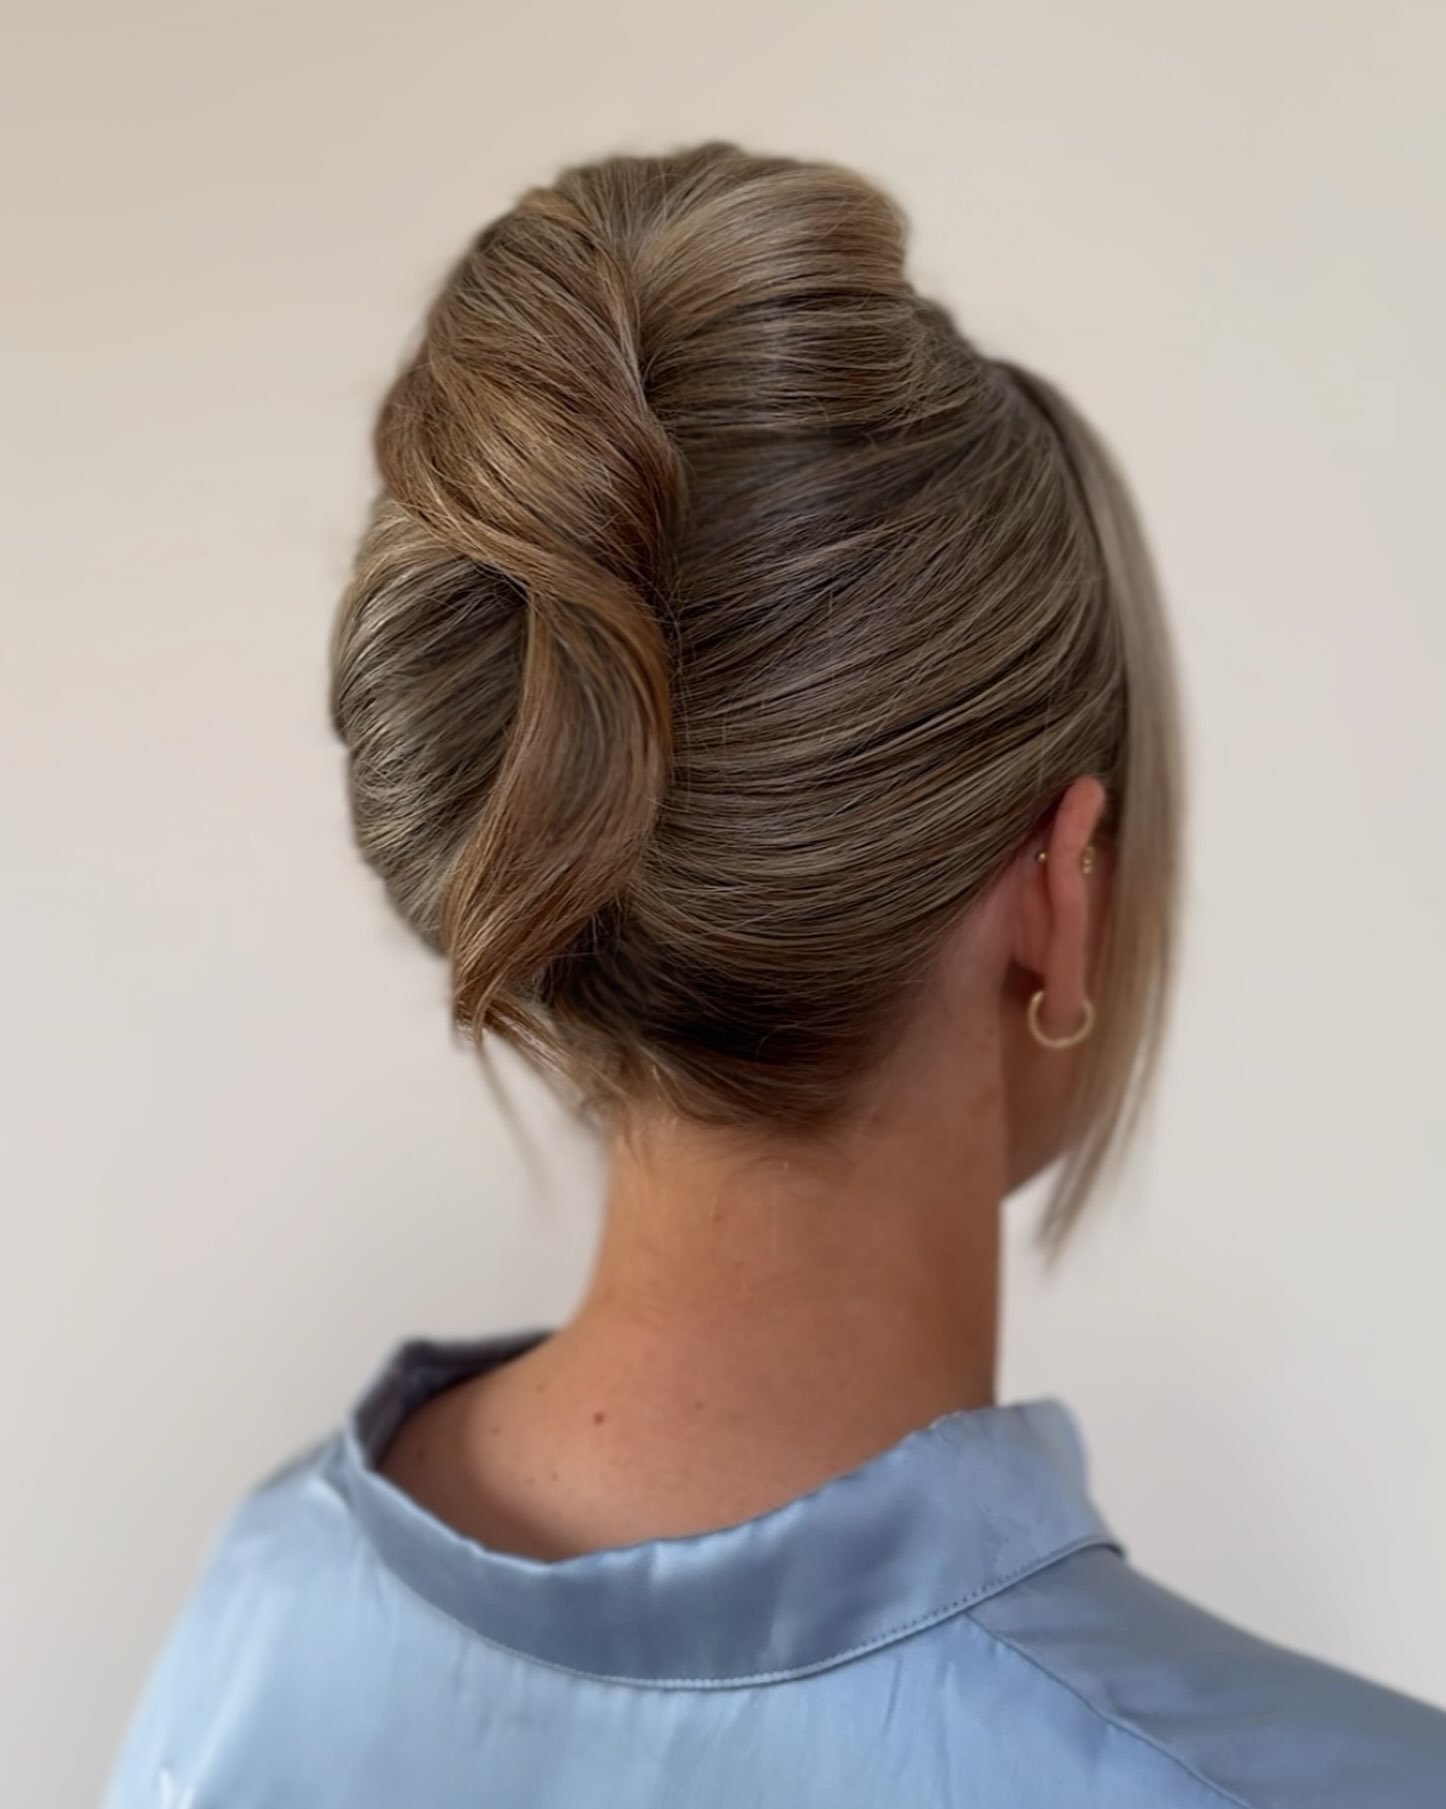
A classic that looks like you tried harder than you did.
Gather your hair at the back of your head, twist it upward in one smooth roll, and tuck the ends inside.
Pin it down the center with a few bobby pins, and leave one soft strand out near your face.
It’s polished enough for the office or a wedding, and it holds all day.
13. The Side-Swept Low Bun
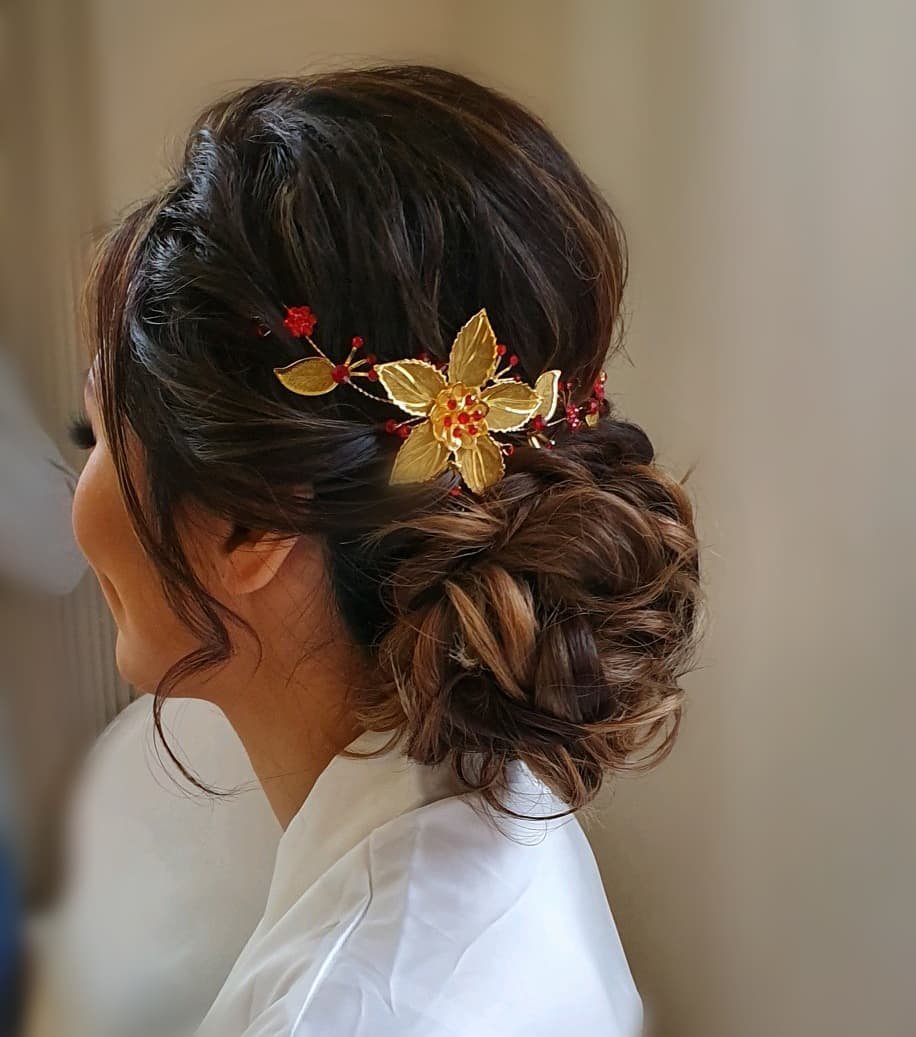
Part your hair deep on one side, sweep it across, and gather it into a low bun just behind one ear.
Pin it loosely so it looks soft and a little vintage. Add a statement hairpin or a pair of bold earrings, and the whole outfit comes together.
14. Claw Clip Bun
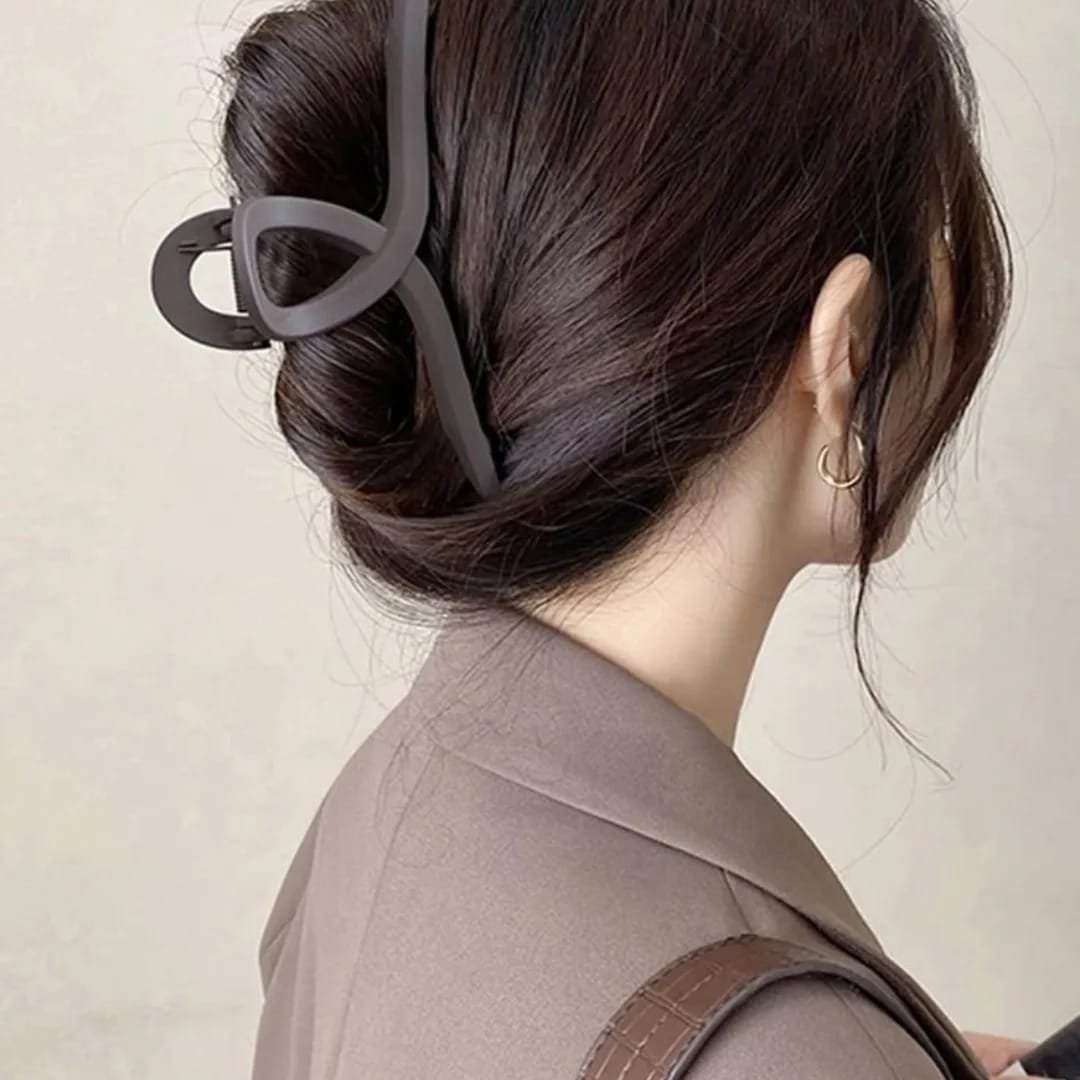
Twist, fold, clip. That’s the whole recipe.
A big claw clip has made a huge comeback, and it’s easy to see why: it takes ten seconds, holds all day, and looks cute with a loose shirt or a work dress.
Choose a matte finish for a modern feel.
15. The Knotted Bun
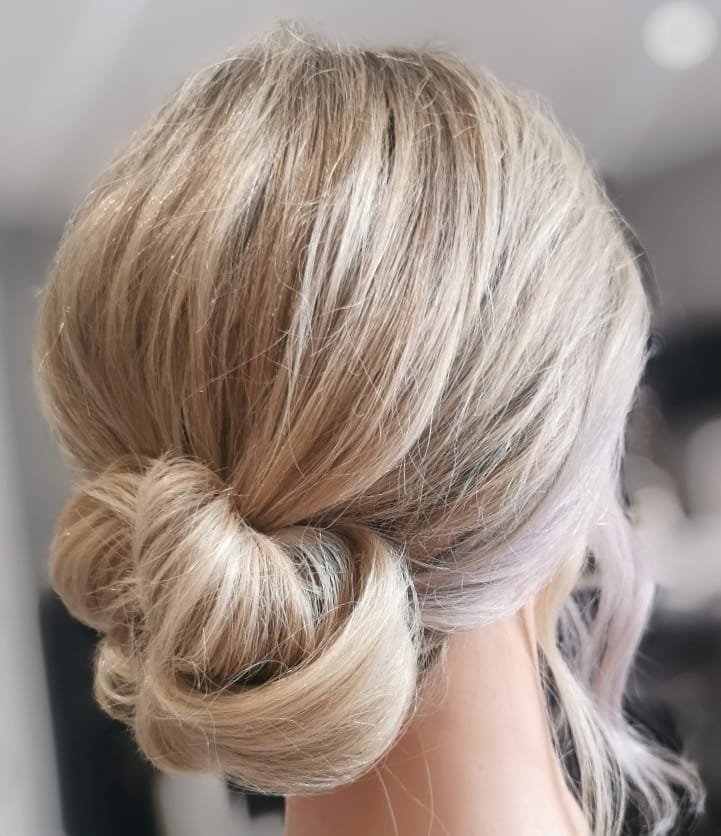
Gather your hair into a low ponytail, split it in two, and tie the sections in a simple knot.
Wrap the ends around the base and pin them. Brush the top smooth, and leave a few wispy ends loose.
It sits close to your head, so it holds through a walk, a run, or a long meeting.
Bun Ideas for Short Hair
Yes, short hair can do buns. It just needs a little more creativity and a lot more pins.
16. The Mini Top Knot
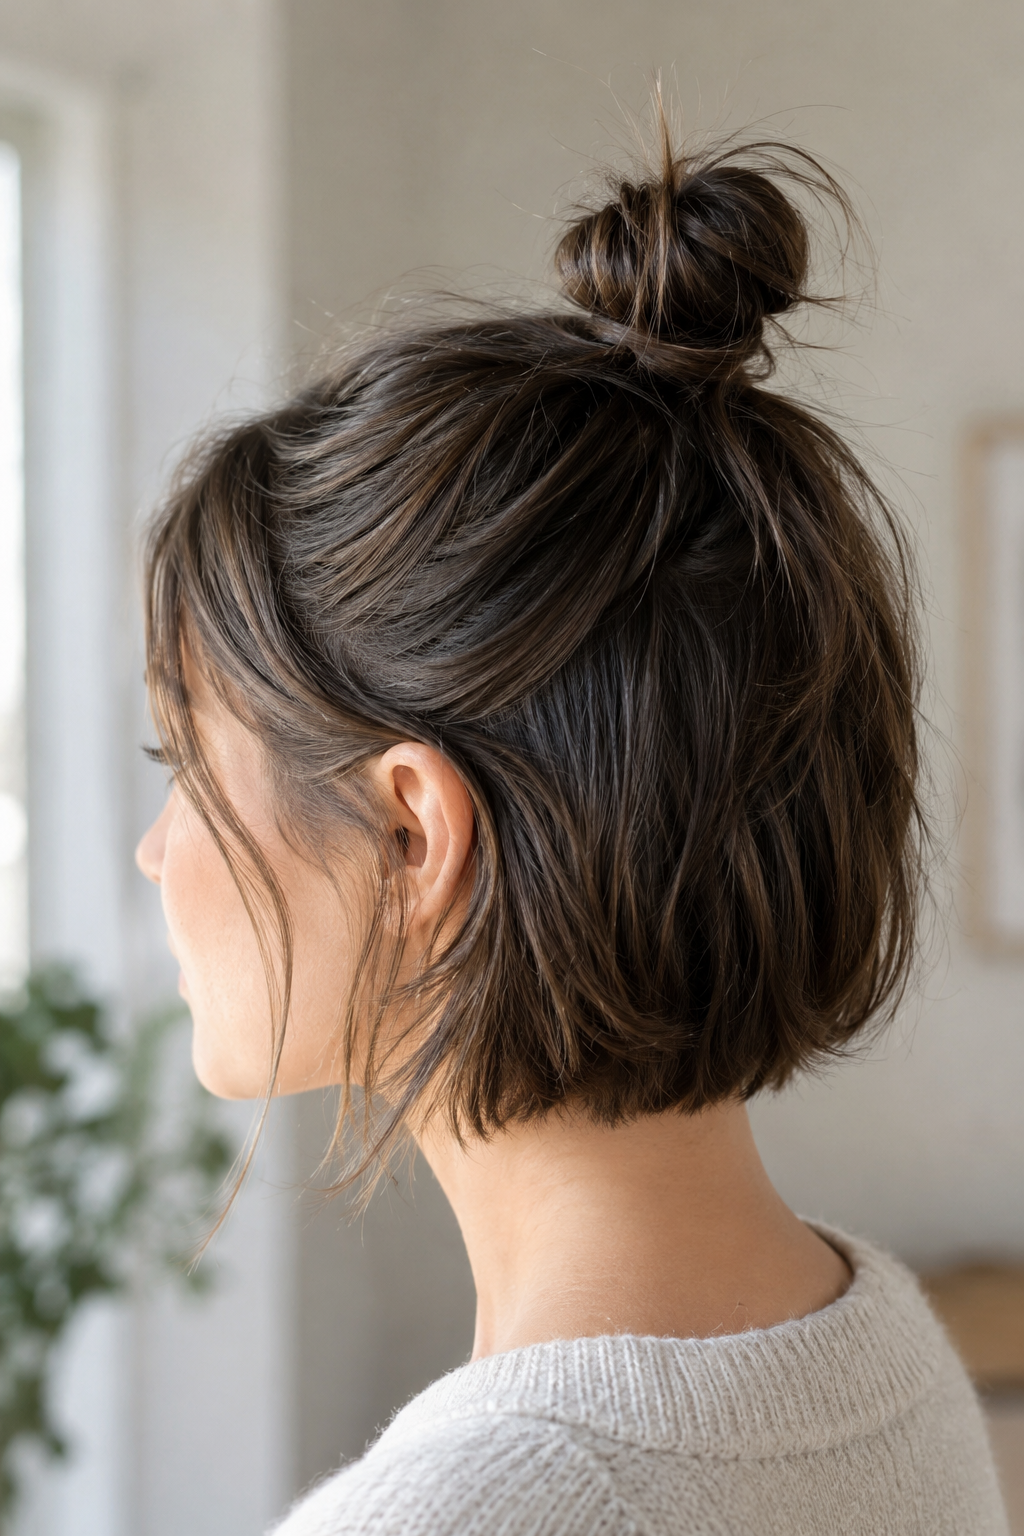
Gather everything high on your crown, twist it, and wrap it once around itself. Pin it flat. That’s it.
On chin-length hair this makes a tiny, perky knot, kind of like a cinnamon bun that never grew up.
Pull out a couple of wispy strands in front so it doesn’t look severe.
17. The Half-Up Baby Bun
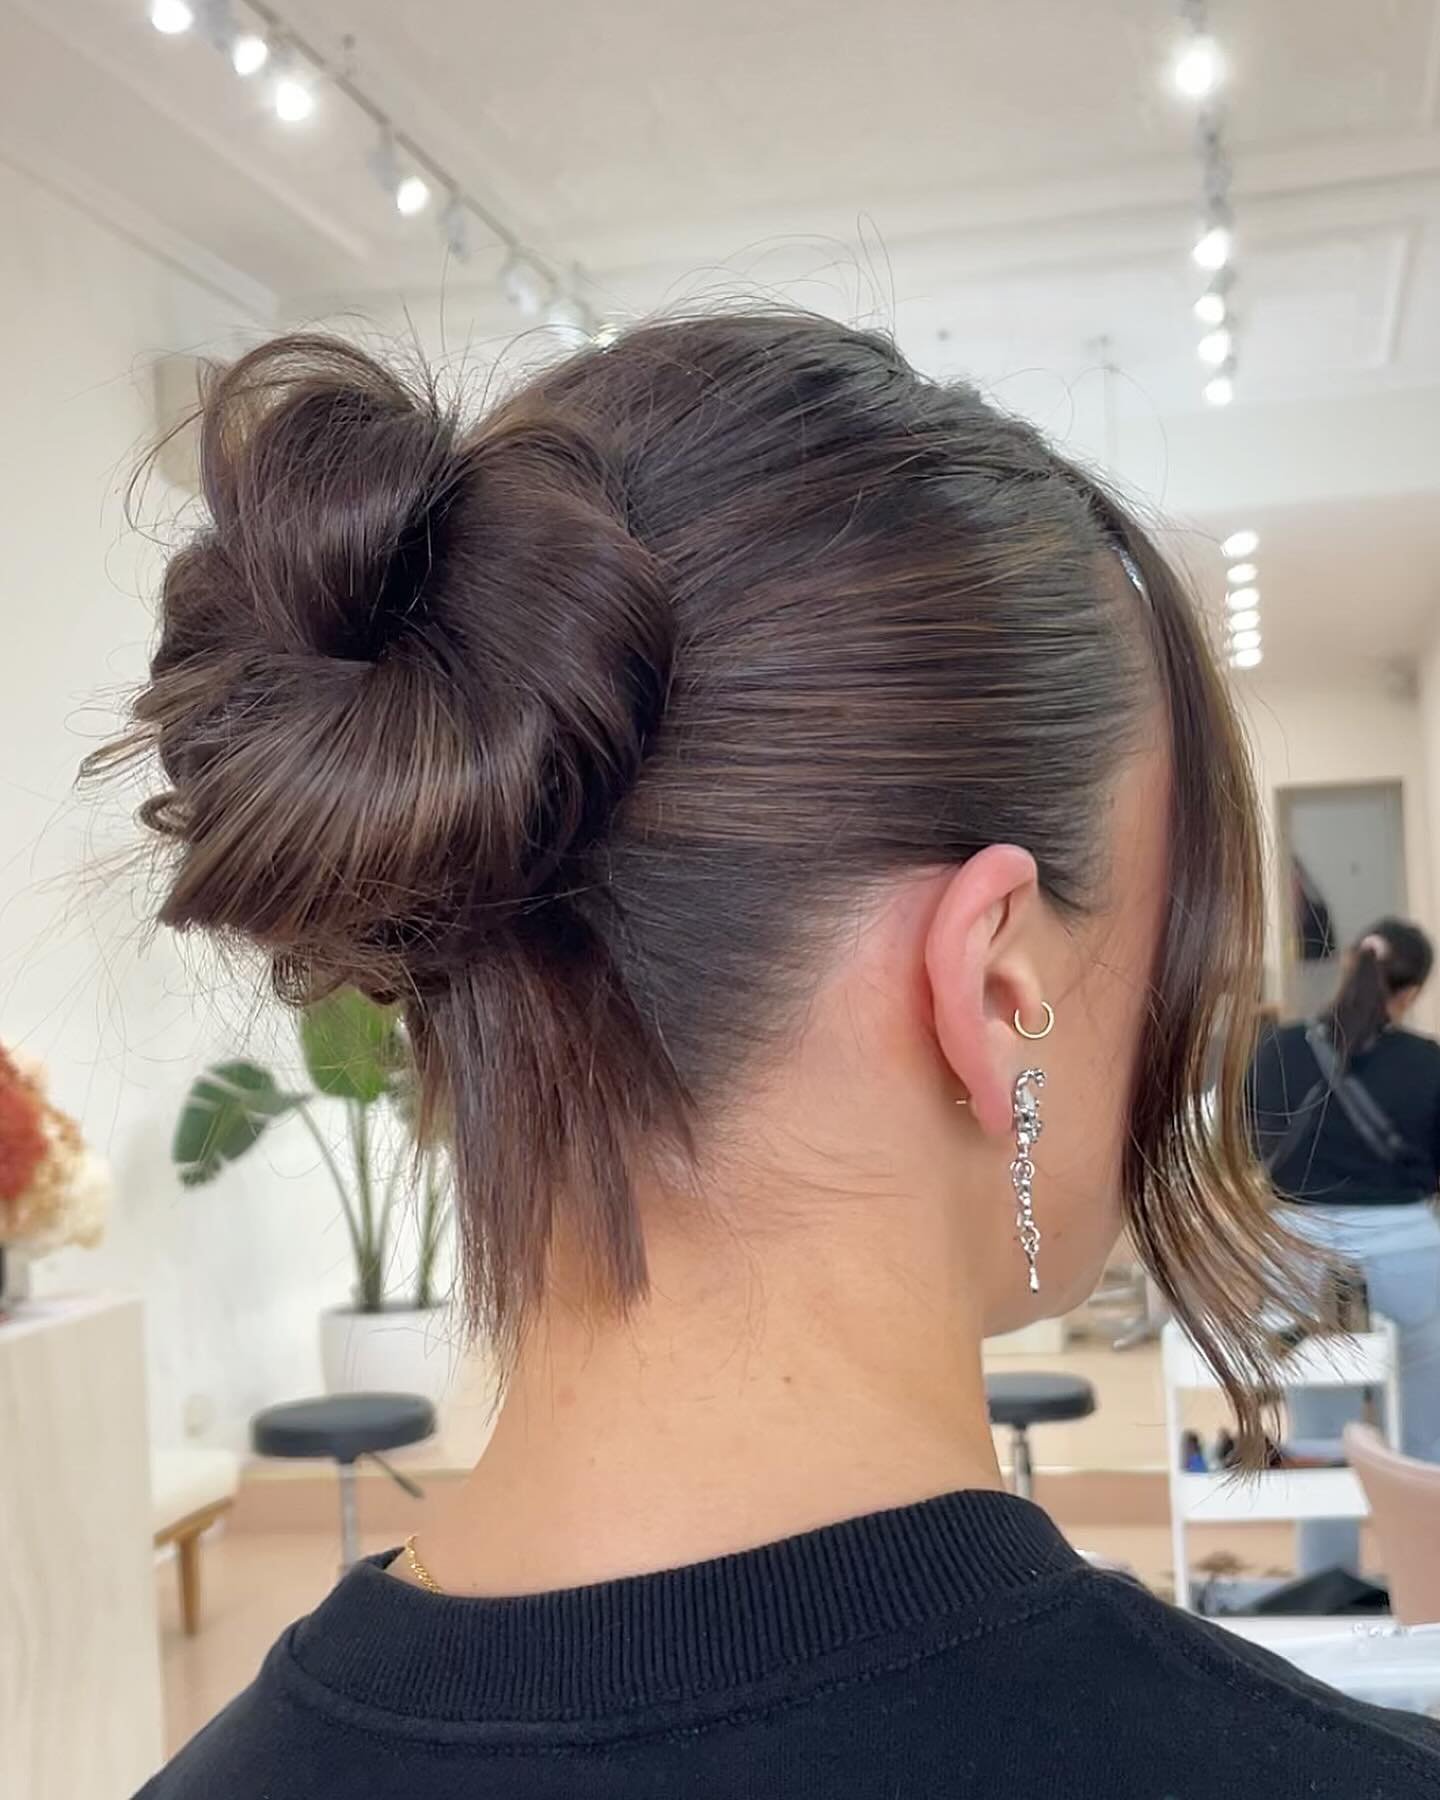
Take the top section from ear to ear, smooth it back, and twist it into a small bun.
Leave the rest down. One loose strand by your cheek keeps it soft.
Easy, polished, and perfect for a bad hair day.
18. The Low Stubby Bun
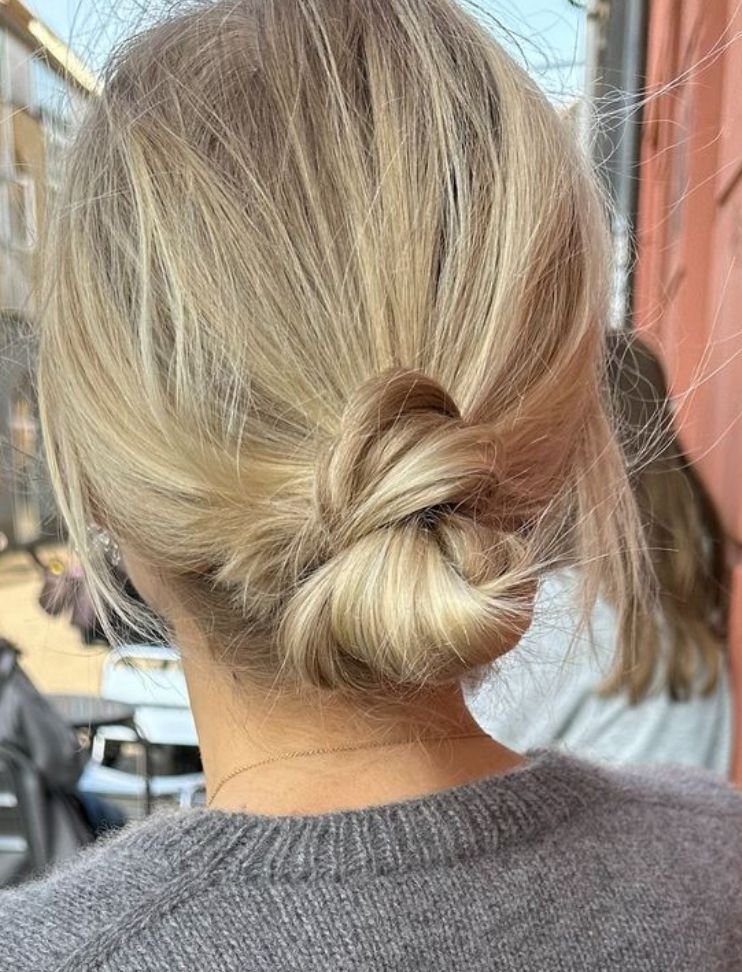
Go low, right at the nape.
Even a short bob has enough hair for a tiny bun there, as long as you use a couple of strong pins.
Leave out face-framing pieces and rake some texture into the bun so it looks relaxed, not stiff.
19. Headband and Mini Bun
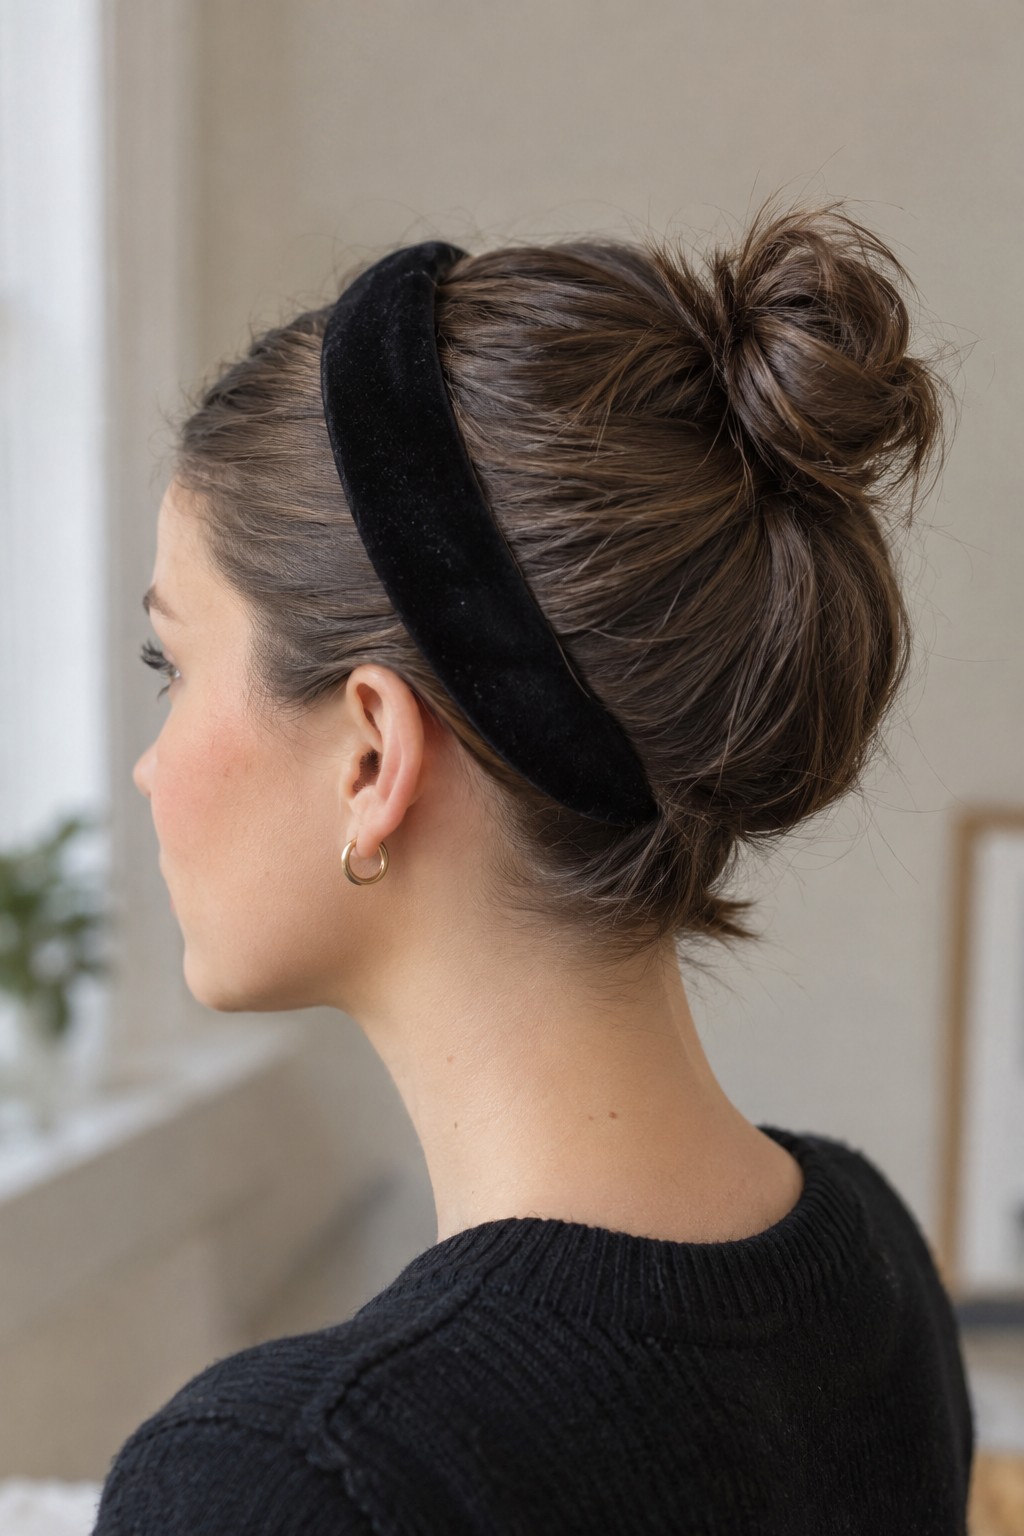
Wide headband first, bun second.
The band covers the shorter hairs that always escape, and it adds a retro, 90s mood without trying too hard.
A velvet band in a deep color looks especially good in fall.
20. Tiny Space Buns
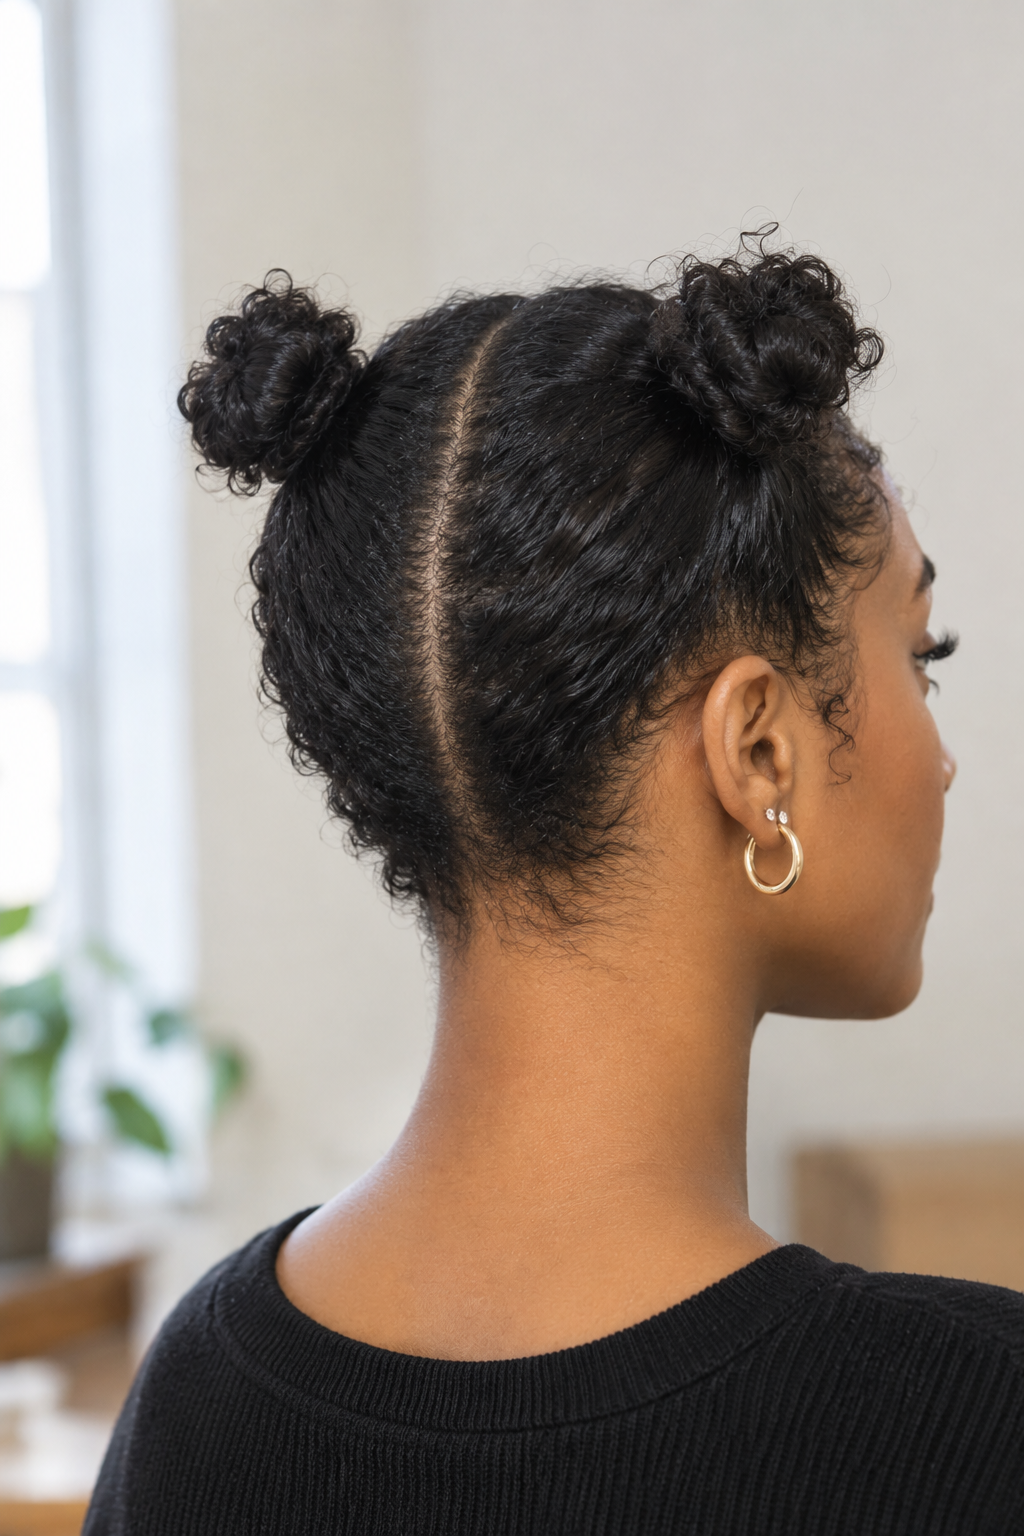
Two little buns, one on each side of your crown.
Sounds like a music festival, and sure, it can be.
But on short hair, with a clean part and a bit of texture spray, they look playful and surprisingly grown-up.
Use small elastics, since big ones swallow the hair.
21. Slicked Mini Bun with a Clip
Smooth your hair back with a little gel, twist it into a mini bun, and snap on a metal clip for extra polish.
Sleek, quick, and a little edgy.
It holds up through humidity better than most styles, and honestly, that matters in July.
Bun Ideas for Curly and Textured Hair
Curls aren’t a problem to solve. They’re the whole point.
These styles work with your texture, not against it.
22. The Pineapple Bun
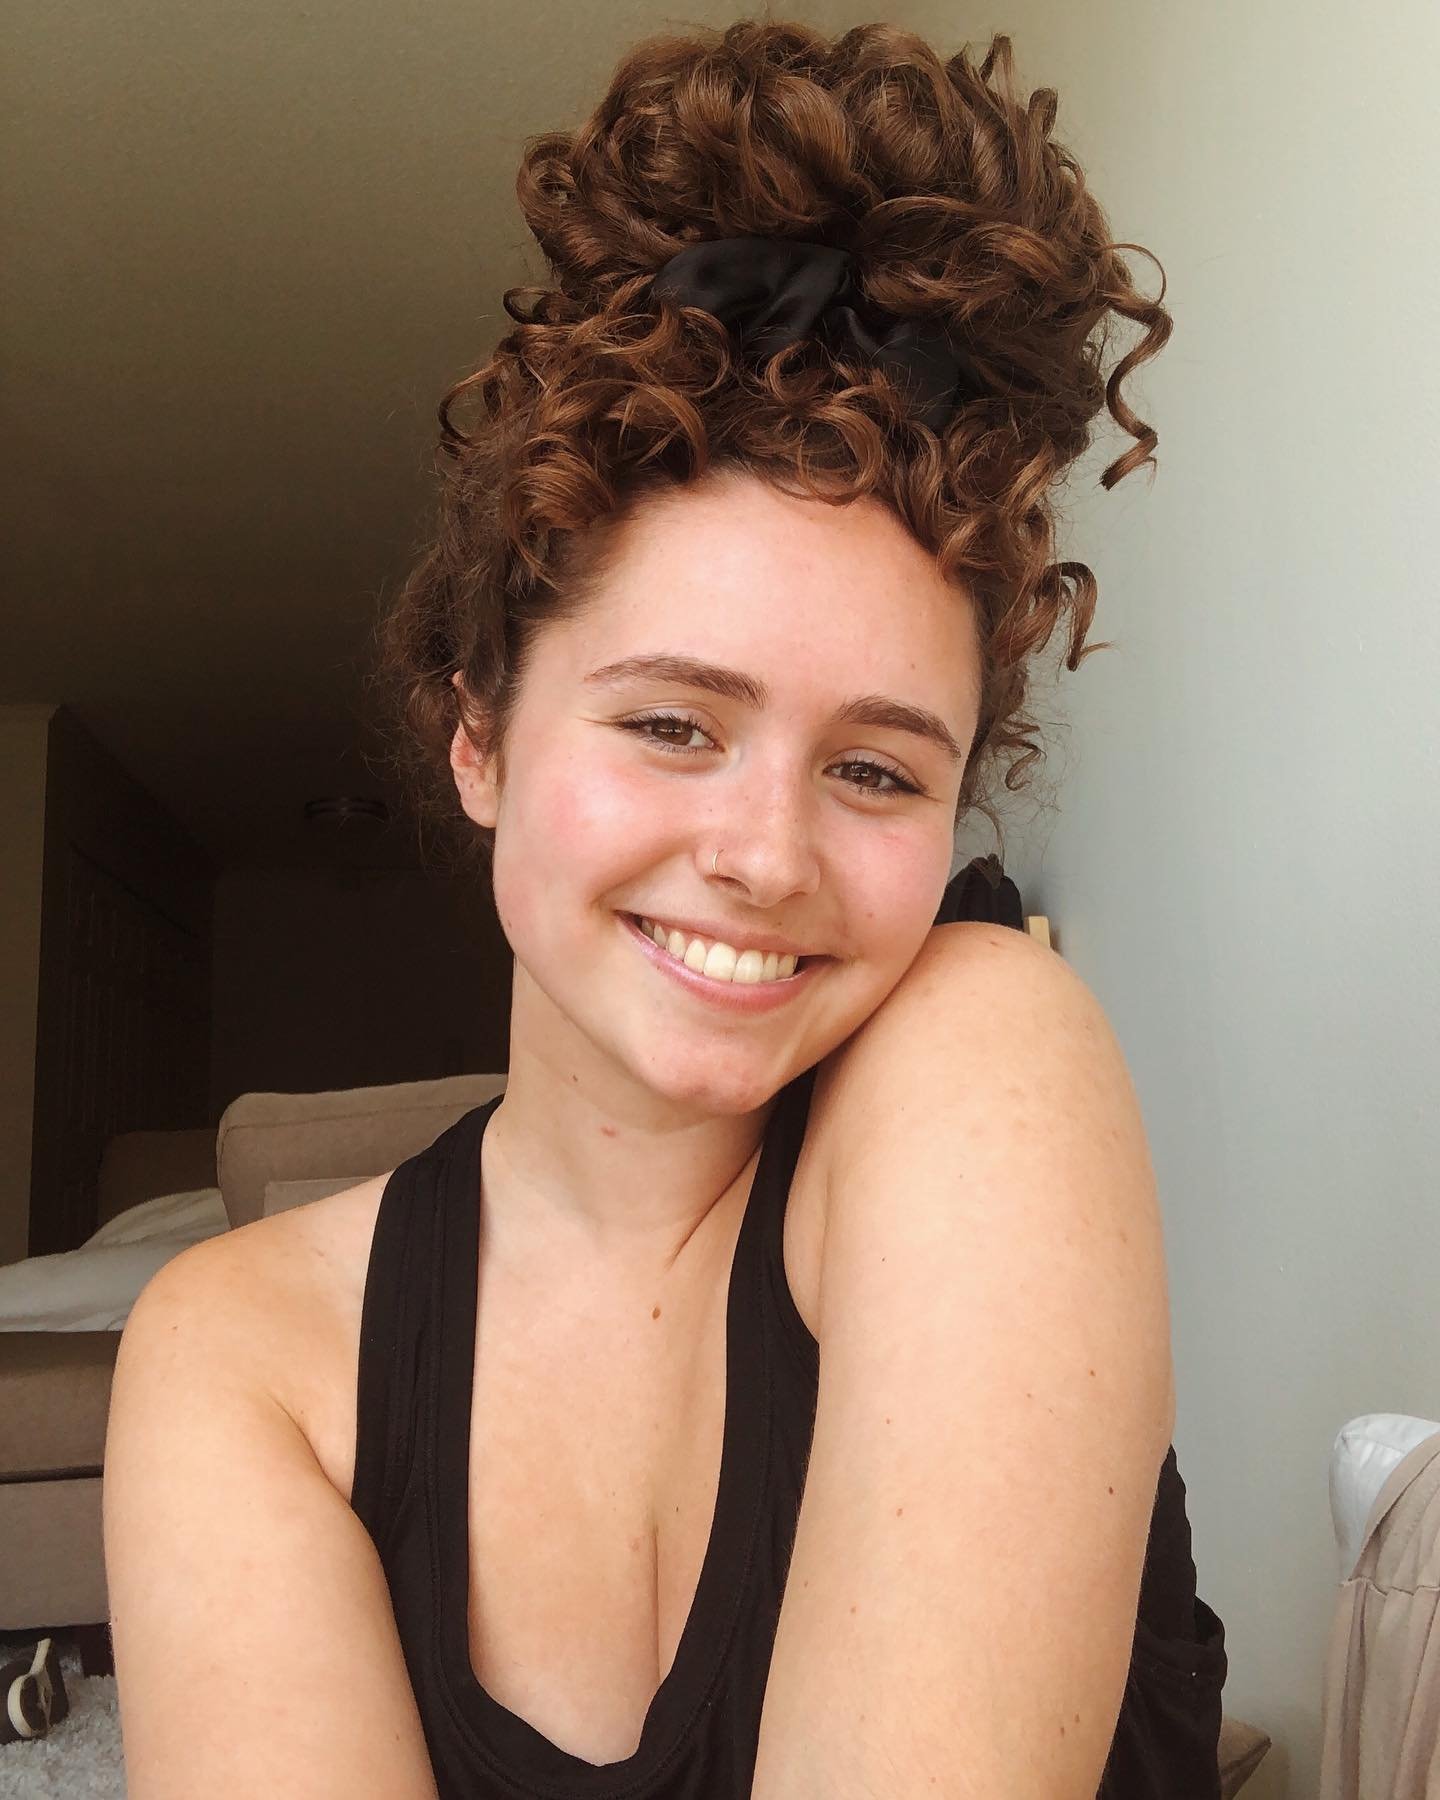
Flip your head forward, gather your curls loosely at the very top, and secure them with a soft satin scrunchie.
Don’t pull tight.
The pineapple shape keeps your curls from flattening overnight, and in the morning it works as a ready-made bun.
Satin is kinder to curls than a regular elastic, so you get less frizz and fewer snags.
Fluff the ends with your fingers, and leave a few curls loose around your face.
23. The High Curly Puff Bun
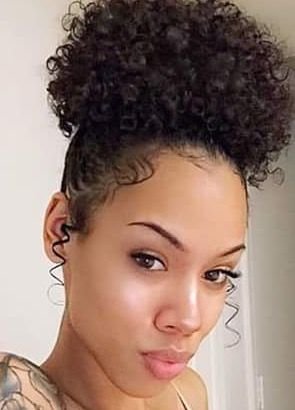
Bold, bouncy, and full of volume.
Gather your curls at the crown, wrap a soft elastic around the base, and fluff the ends so the puff looks round and even.
Smooth the edges with a little gel and a soft brush, and curl a few baby hairs near your ears for a finished touch.
A bit of curl cream keeps the frizz in check, and a satin scarf at night helps the shape last another day.
24. Twist Updo Bun
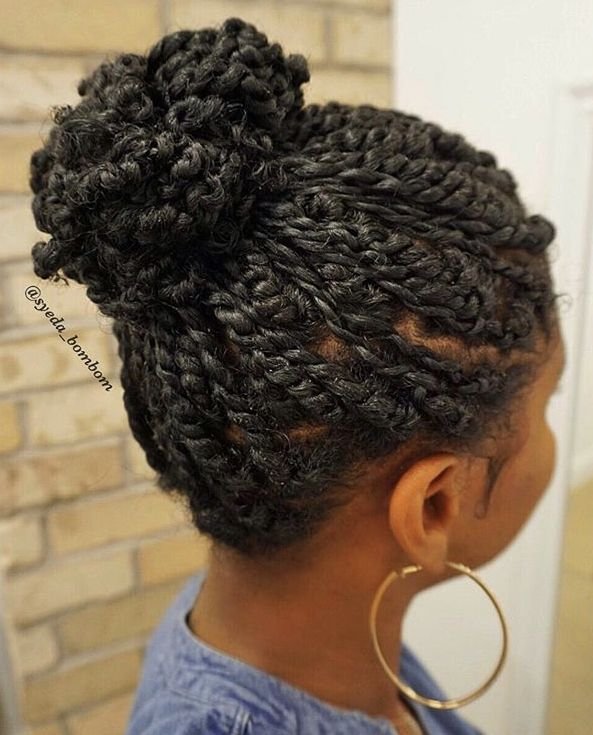
Texture does all the work here.
Gather your twists at the crown, loop them into a loose, rounded bun, and secure it with a snag-free band.
Let the curly ends spill out for volume, and tuck any stray pieces into the base.
It keeps hair off your neck, it shows off the twist pattern, and it holds for days.
Add big gold hoops and you’ve got a look that works for the office or a night out. A little light oil on the ends keeps them soft and shiny.
25. The Loose Curly Low Bun
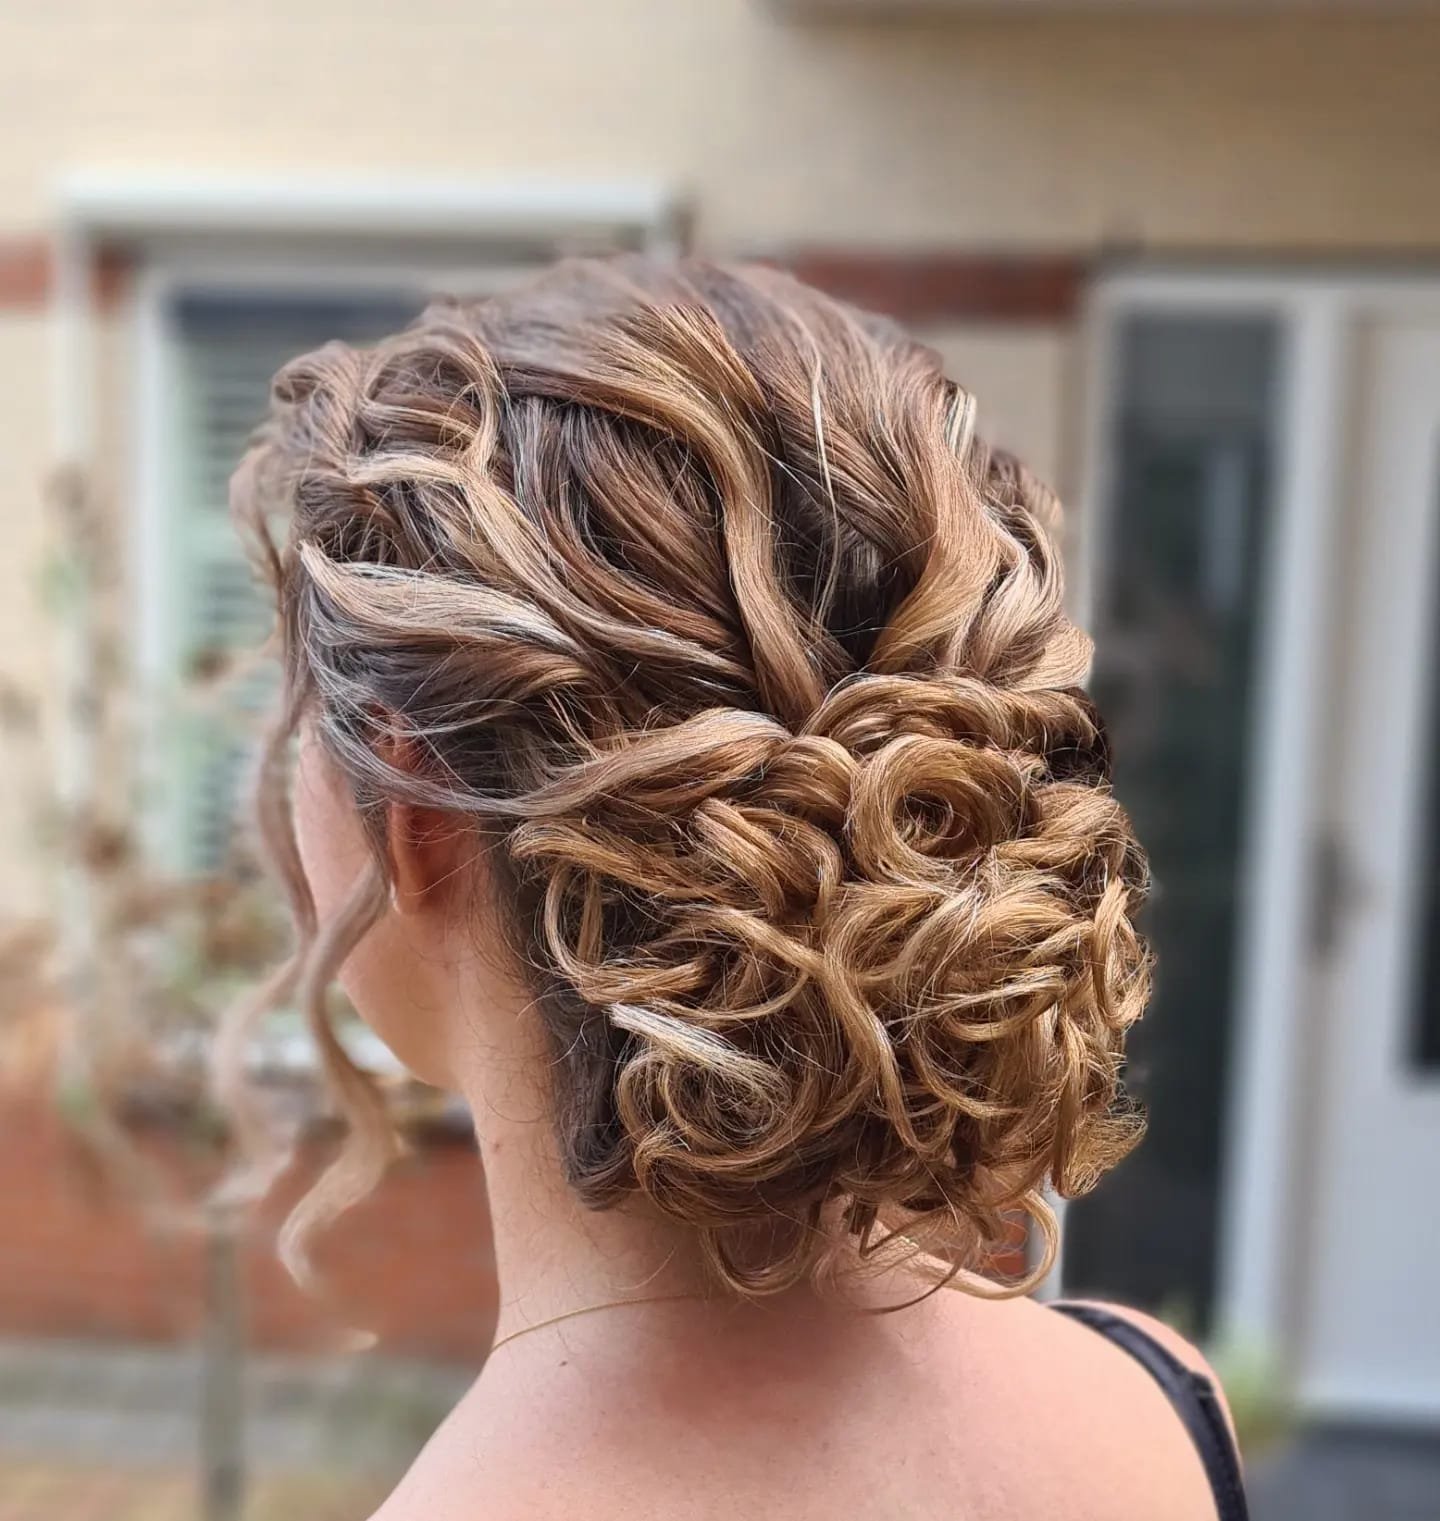
Soft, romantic, and a little undone. Gather your curls low at the nape, twist them loosely, and pin them into a full, rounded bun.
Don’t pull anything tight. Leave a few curls hanging by your ears, and let the rest spill out a little.
It looks dressy without trying too hard, so it works for a dinner date, a wedding guest outfit, or a Saturday night out.
Use a flexible hold spray on the curls and a few pins hidden underneath, so it keeps its shape.
26. Box Braid Top Bun
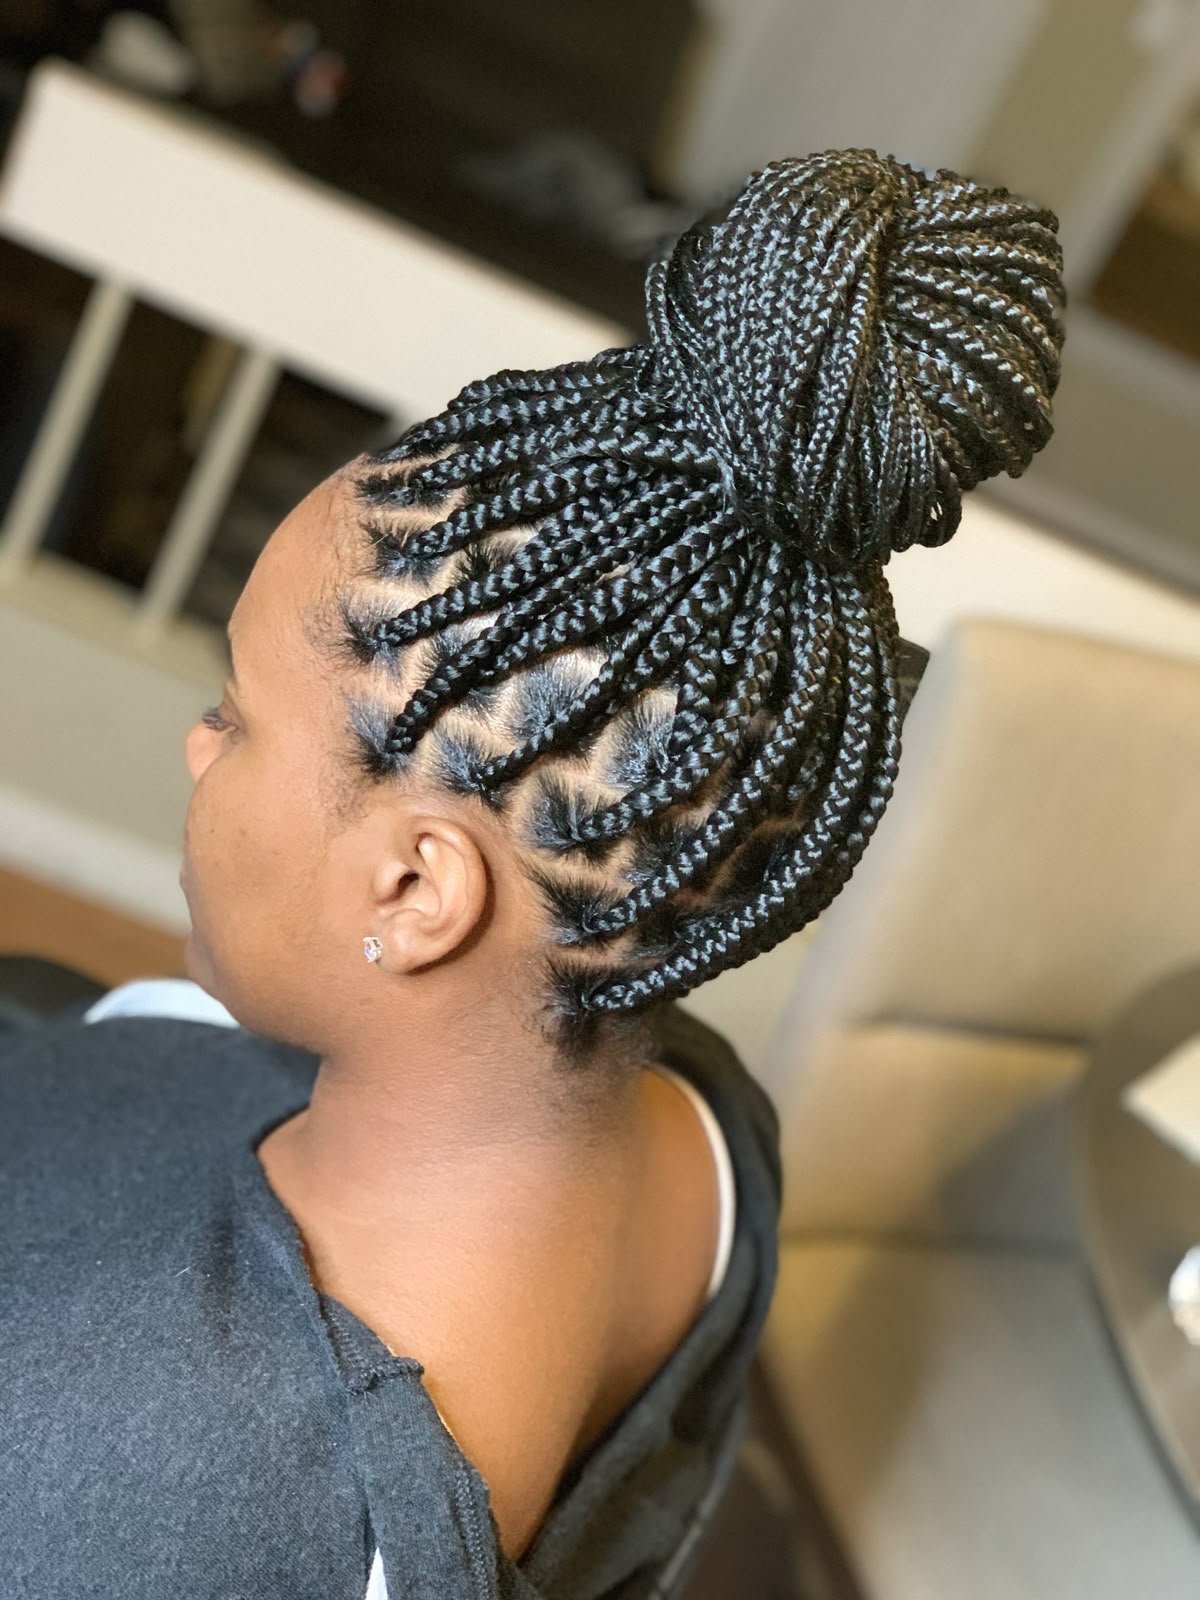
Gather your box braids at the crown and wrap them into a big, bold bun.
It lifts the weight off your neck, which feels incredible in summer heat, and it shows off the braid pattern.
you can add gold cuffs for a little shine.
Dress It Up (or Down)
One last batch. Some of these are for weddings, some are for the gym, and a few are for the in-between days.
27. Wedding Bun with Baby’s Breath
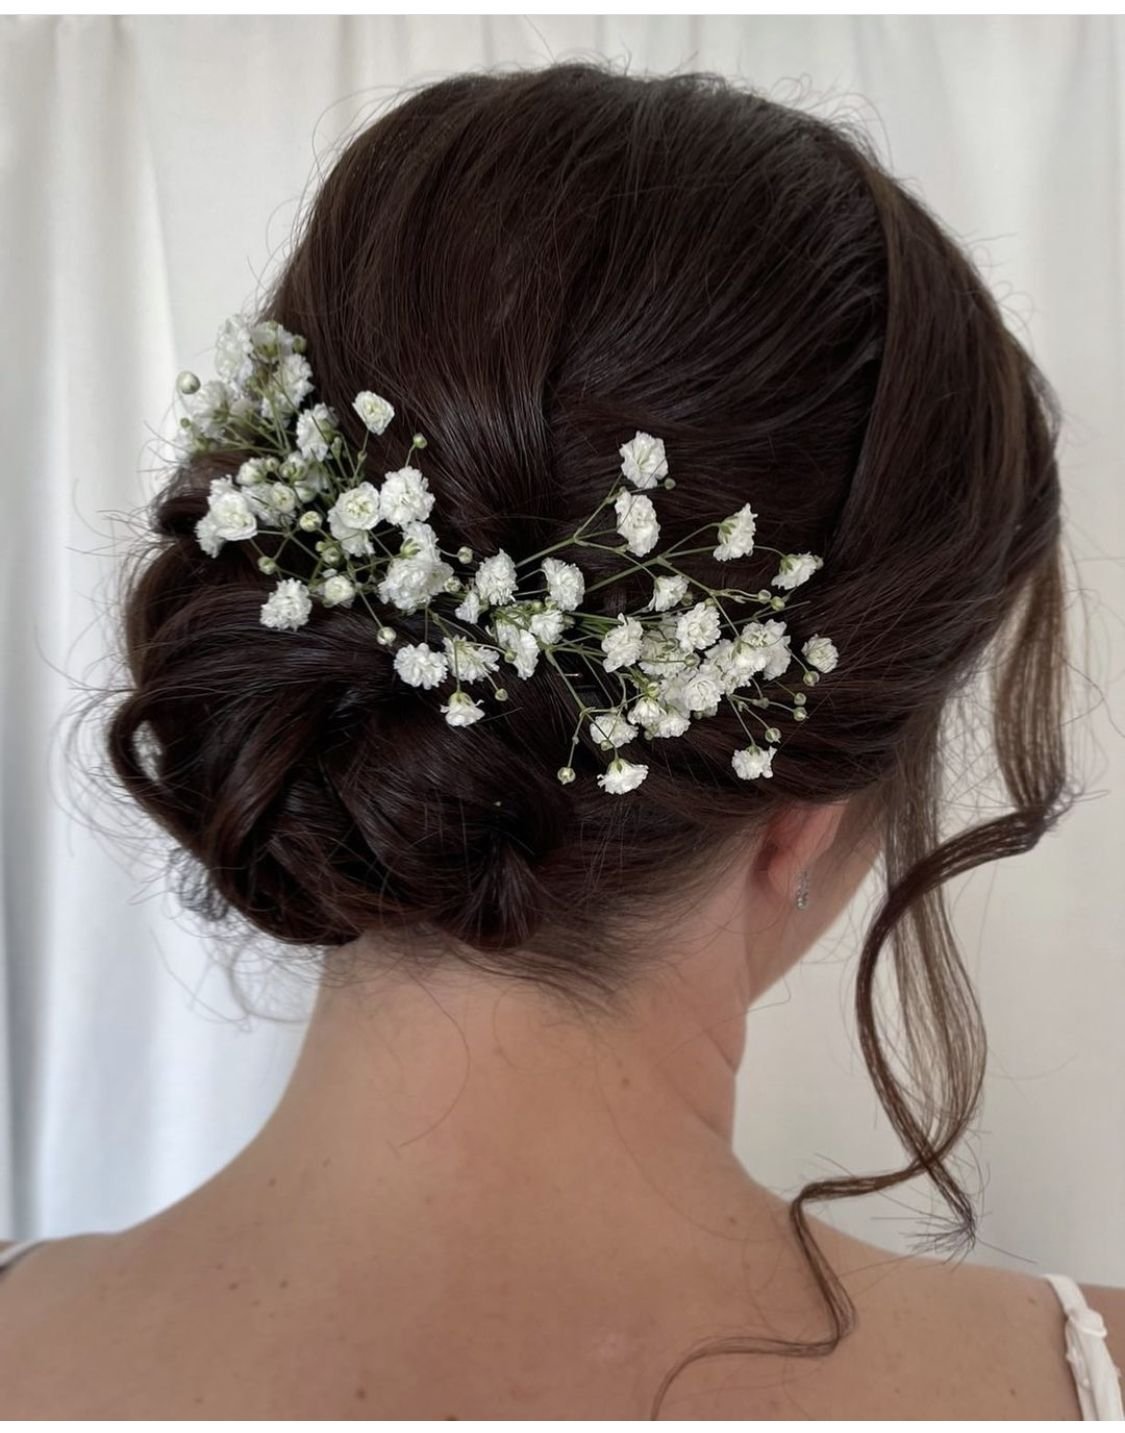
Soft, romantic, and easy to love. Twist your hair into a loose low bun at the nape, pin it in place, and leave one or two curled strands near your face.
Then tuck small sprigs of baby’s breath into one side, so the flowers trail along the curve of the bun.
It looks like something out of a garden wedding, and it works just as well for bridesmaids and guests as for the bride.
28. Pearl-Pinned Bun
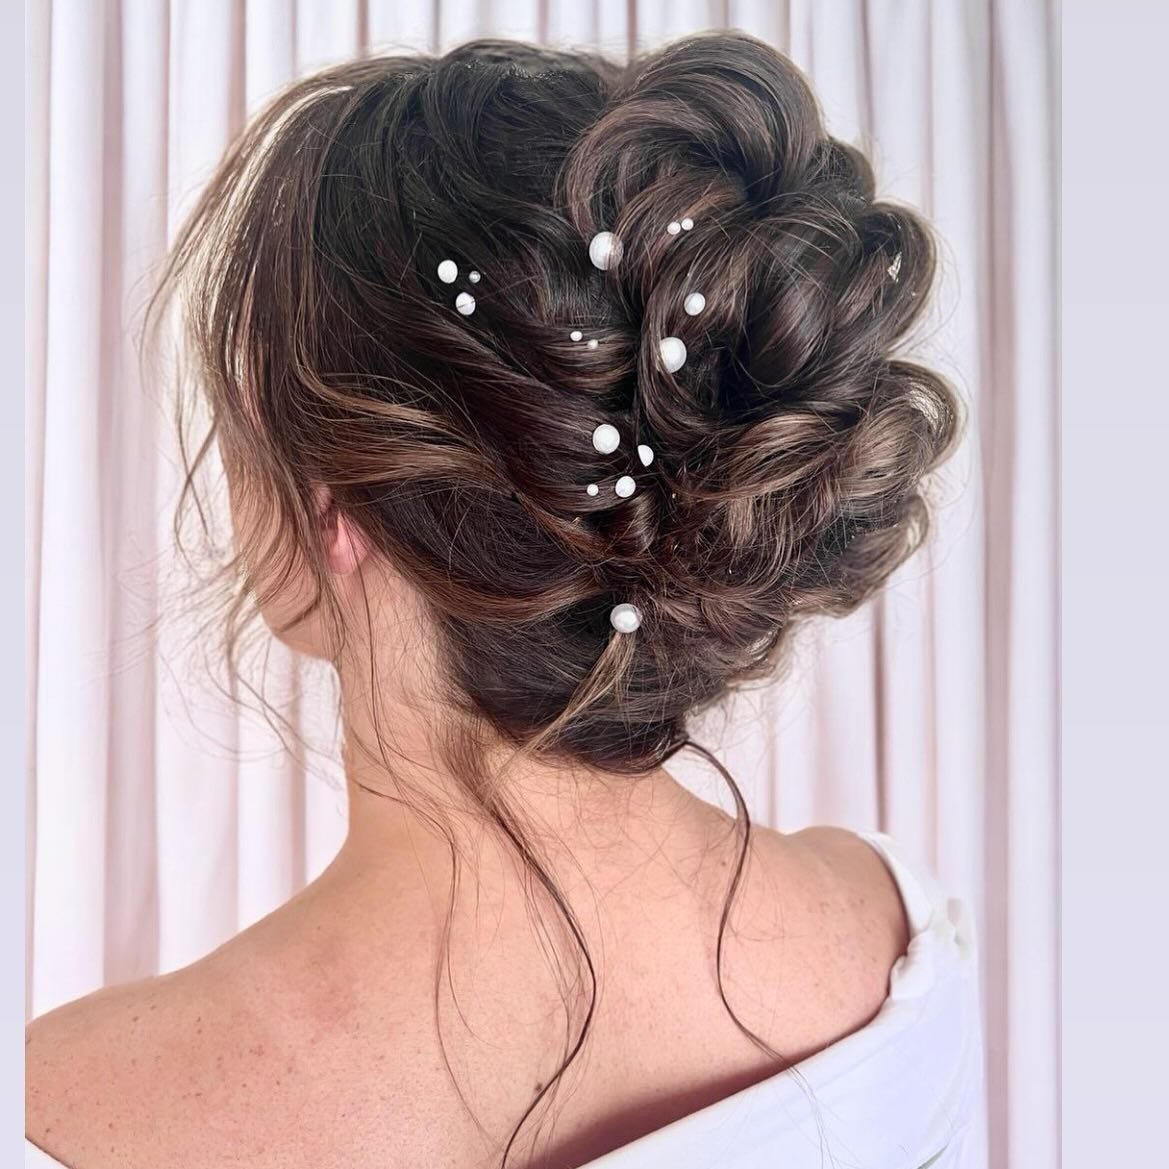
Soft, textured, and a little dreamy.
Twist your hair into a full, loose bun at the back of your head, and let a few strands fall free near your neck.
Then slide in a scattering of small pearl pins, in mixed sizes, so they look like they landed there by accident.
The pearls add shine without any fuss, and they pair beautifully with a simple dress or an off-shoulder neckline.
29. The Bow Bun
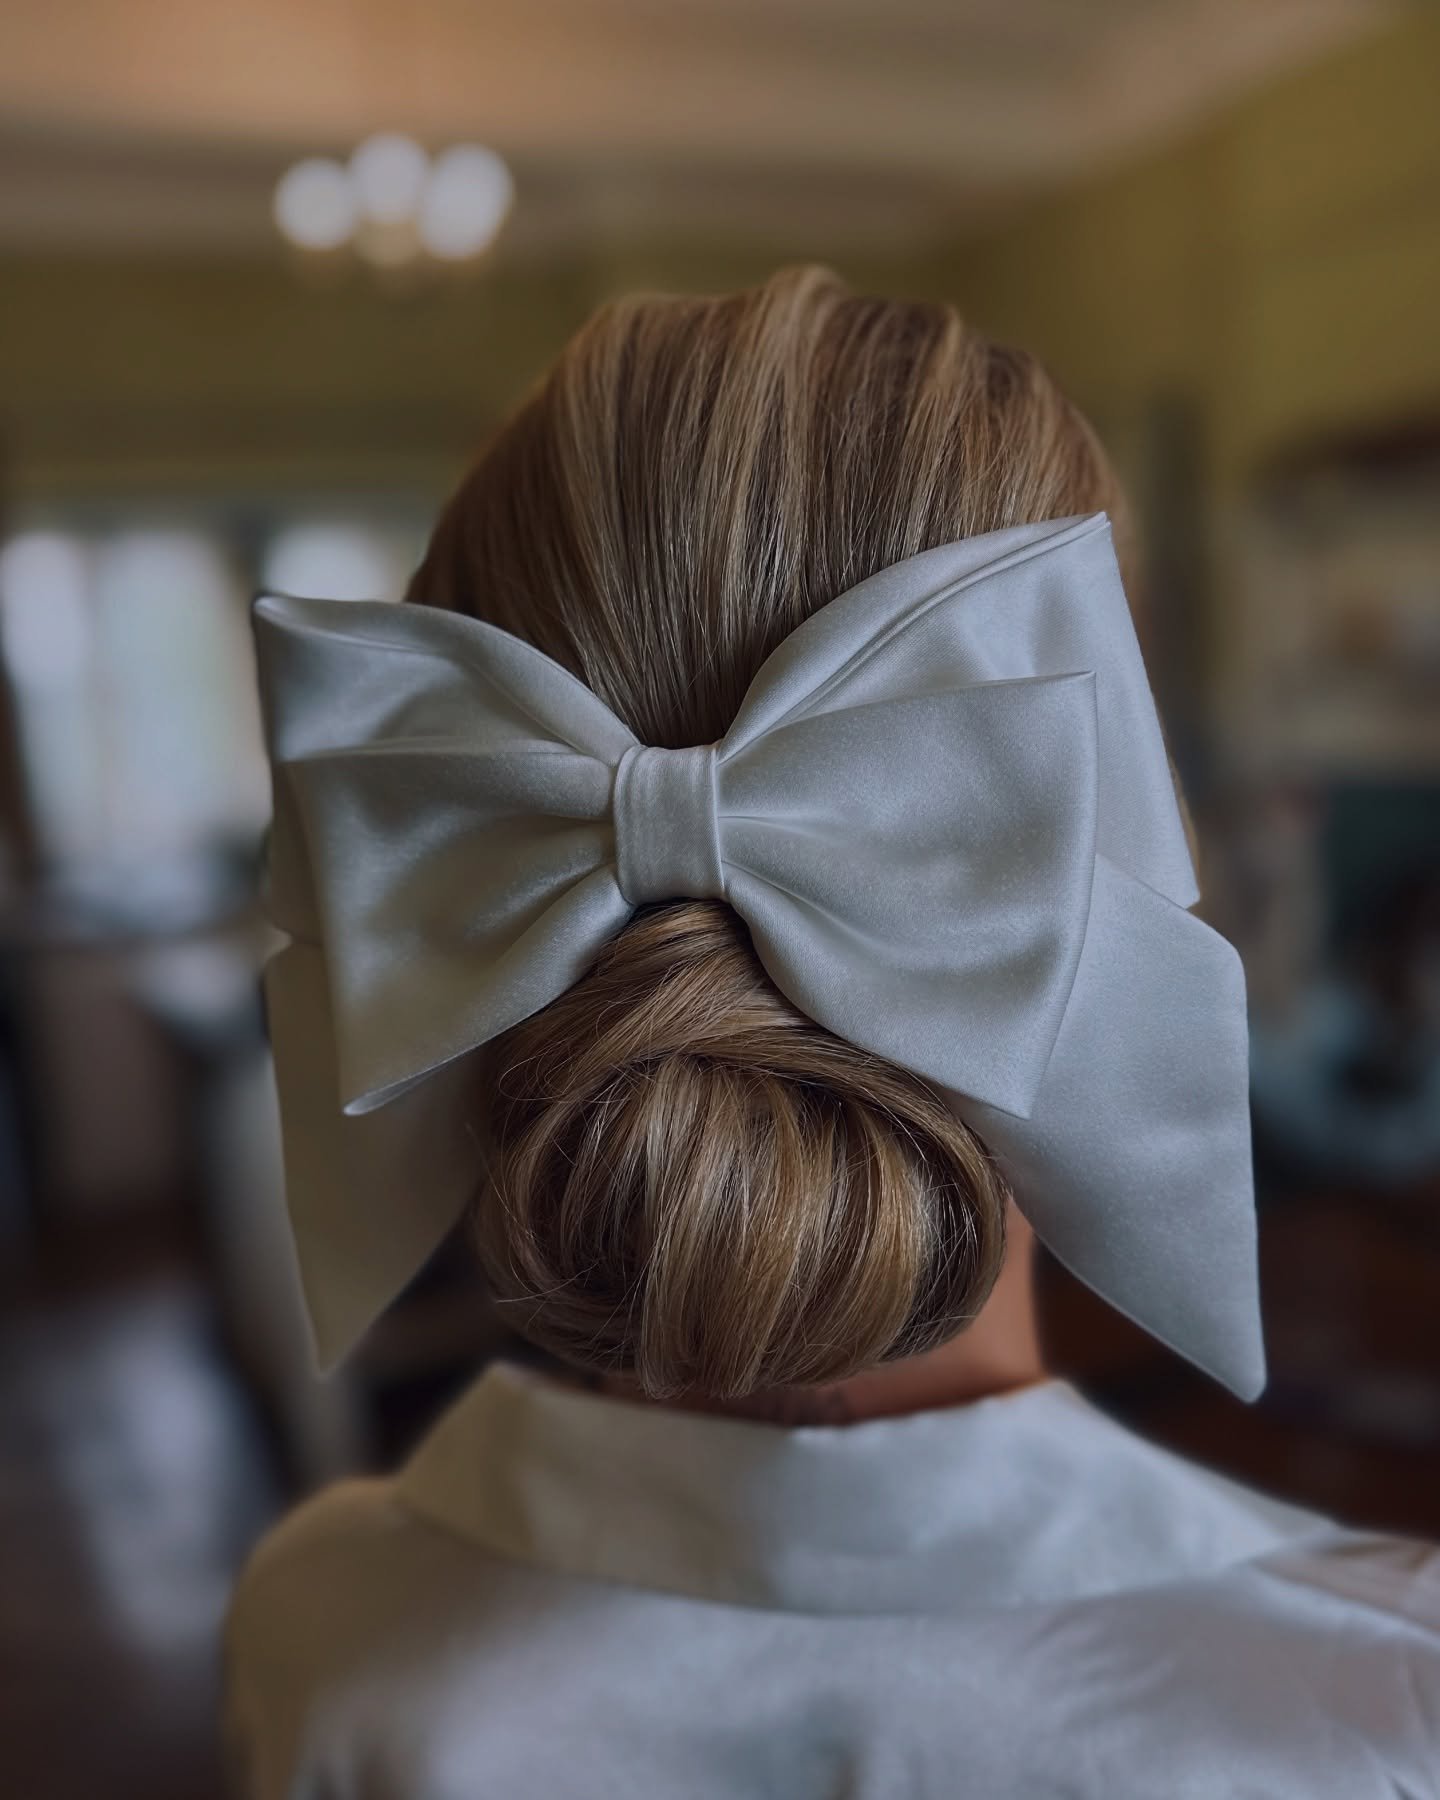
Simple hair, big statement. Smooth your hair into a sleek low bun and secure it with pins, then clip an oversized satin bow just above it.
That’s the whole look. The bow does all the talking, so keep the hair neat and polished.
Ivory or white feels bridal and elegant, black feels chic, and soft pink feels sweet.
It works on short and long hair alike, and it dresses up a plain outfit in seconds.
Choose a bow with a strong clip, so it stays put through hugs and photos.
30. Prom Bun with Curled Tendrils
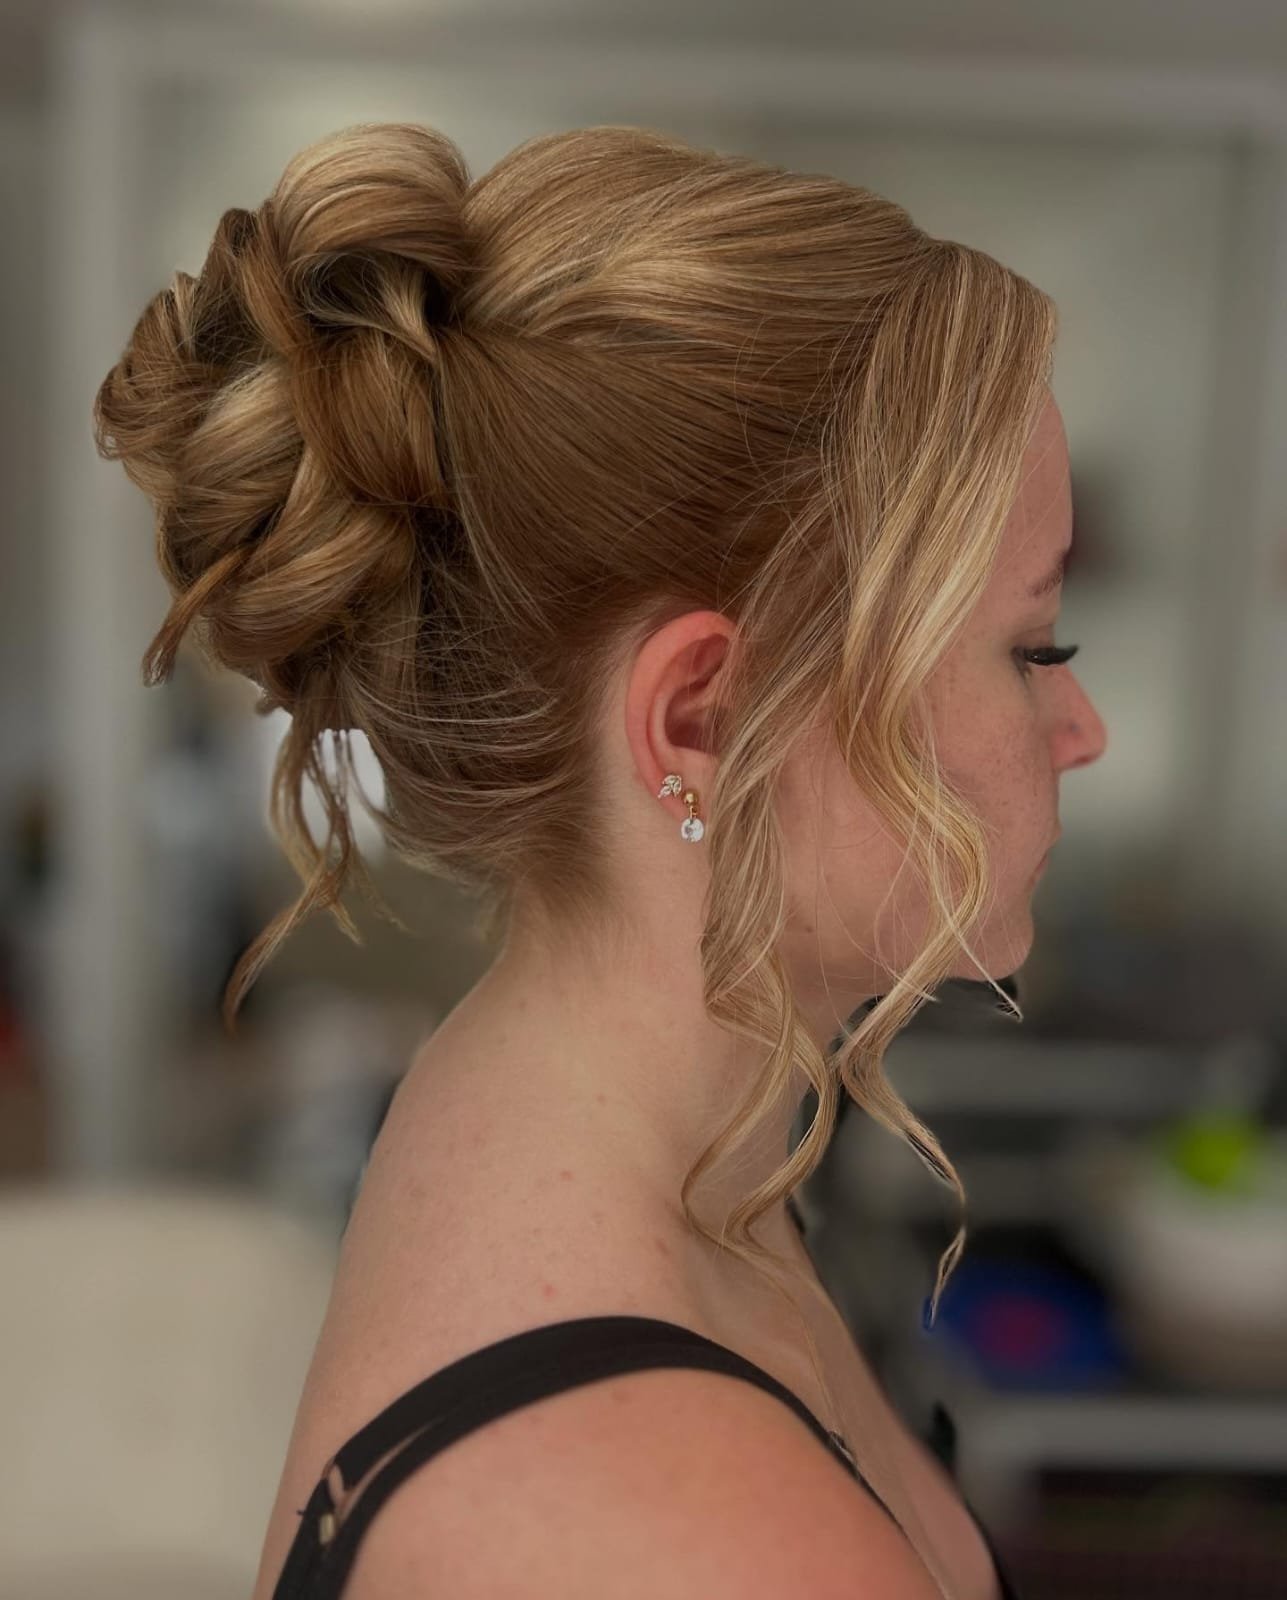
Party hair that stays put. Twist your hair into a soft bun high at the back of your head, with a little lift at the crown, and pin it securely.
Then pull out two or three strands near your face and curl them loosely with a wand, so they frame your cheeks.
It looks glamorous, and it keeps your hair off your neck on the dance floor.
Spray it, pin it twice, and you won’t think about it all night.
Add small sparkly earrings or a few jeweled pins, and it works for homecoming, graduation, or a wedding too.
Quick Tips Before You Start
- A few things that make every bun on this list easier.
- First, second-day hair is your friend. Freshly washed hair is slippery, and it slides right out of pins.
- If yours is squeaky clean, add a little texture spray.
- Second, buy better elastics. The thin ones snap and tug. Spiral ties and soft scrunchies are kinder, and they won’t leave a dent.
- Third, use pins the right way. Slide them in against the direction of the bun, then turn them back toward the head. They grip, and they stay hidden.
- And last, don’t chase perfect. A bun that looks a little loose usually looks better than one that looks tight and planned.
Your Hair, Your Rules
Look, nobody’s bun comes out perfect on the first try. Mine still wobbles on a humid day, and that’s fine. The point of a bun isn’t perfection.
It’s freedom: hair off your neck, one less thing to fuss over, and a style that looks like you.
So grab a few pins and try one of these tomorrow.
If it works, great. If it flops, tweak it, or tuck it into a claw clip and call it a day.
Your hair isn’t going anywhere, and neither is the bun.