
Halloween looks best after dark, and nothing sets the mood like a row of glowing luminaries along your porch steps.
You don’t need fancy supplies to make them.
Paper bags, tin cans, milk jugs, balloons, and even a cardboard box can turn into spooky decorations with a little paint, paper, or glue.
Each of the ten ideas below uses a different base, so you can mix textures and shapes for a display that never looks repetitive.
Most take 15 to 30 minutes, and many are fun to make with kids.
For safety, use flameless LED tea lights in every project. These are easily available at Amazon
They glow just as warmly, they won’t ignite paper or plastic, and they can stay on all evening.
Gather your supplies, put on some spooky music, and let’s start making!
10 DIY Halloween Luminary Ideas
1. Mason Jar Ghost Luminaries
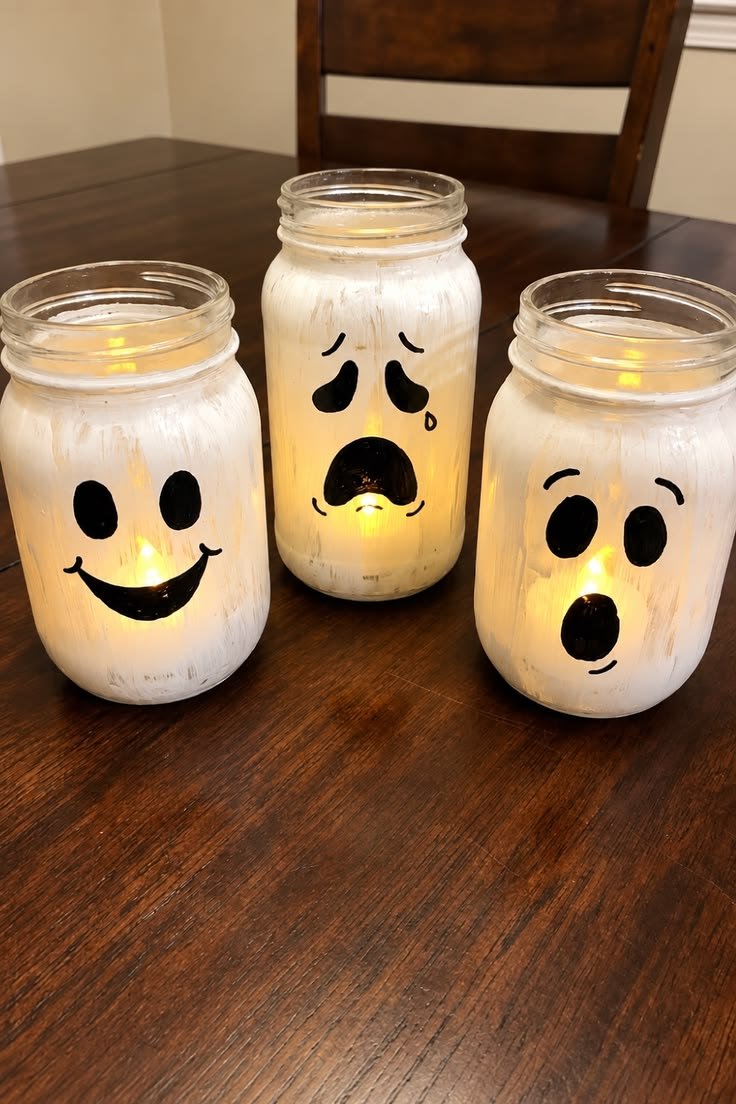
These little ghosts are a classic for a reason. A white-painted glass jar with a simple face glows softly from within, and a few in a row look charming and a little creepy.
They’re easy to make in bulk for a mantel, porch, or party table.
What you need: Clean mason jars, white acrylic paint, a sponge brush, black craft paint or a permanent marker, LED tea lights.
How to DIY:
- Wash and dry each jar so the paint sticks well.
- Dab white paint over the outside with a sponge brush, using light patting strokes. Let it dry, then add a second thin coat.
- Draw two eyes and a mouth with the black paint or marker. Make each face different: round, surprised, or wavy.
- Drop an LED tea light inside and screw on the lid.
Pro Tip: Keep the paint coat thin. If it’s too thick, the light can’t shine through, and your ghosts will look dull instead of glowing.
2. Paper Bag Jack-o’-Lantern Luminaries
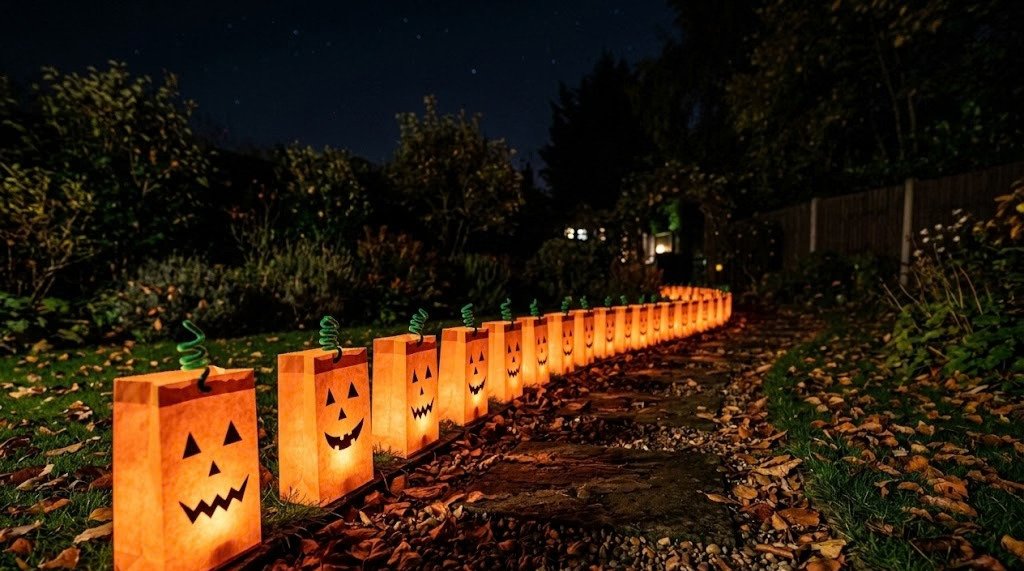
This is the cheapest luminary you can make, and it looks great lined up along a walkway.
Orange paper bags become glowing pumpkins with just a few cutouts.
They’re light, quick, and easy to replace if the weather ruins them.
What you need: Orange paper lunch bags, black marker, small scissors or a craft knife, a handful of sand or small pebbles, LED tea lights.
How to DIY:
- Draw a jack-o’-lantern face on the front of each bag. Keep the shapes simple, with triangles for eyes and a zigzag smile.
- Slide a piece of cardboard inside the bag so you only cut through one side.
- Carefully cut out the face shapes.
- Fold the top edge of the bag down about an inch to stiffen it.
- Pour a few spoonfuls of sand into the bottom to weigh the bag down, then set an LED light on top.
Pro Tip: Fold the top of the bag over twice for a sturdier rim, and add a green pipe cleaner stem for a real pumpkin look.
3. Tin Can Spider Web Luminaries
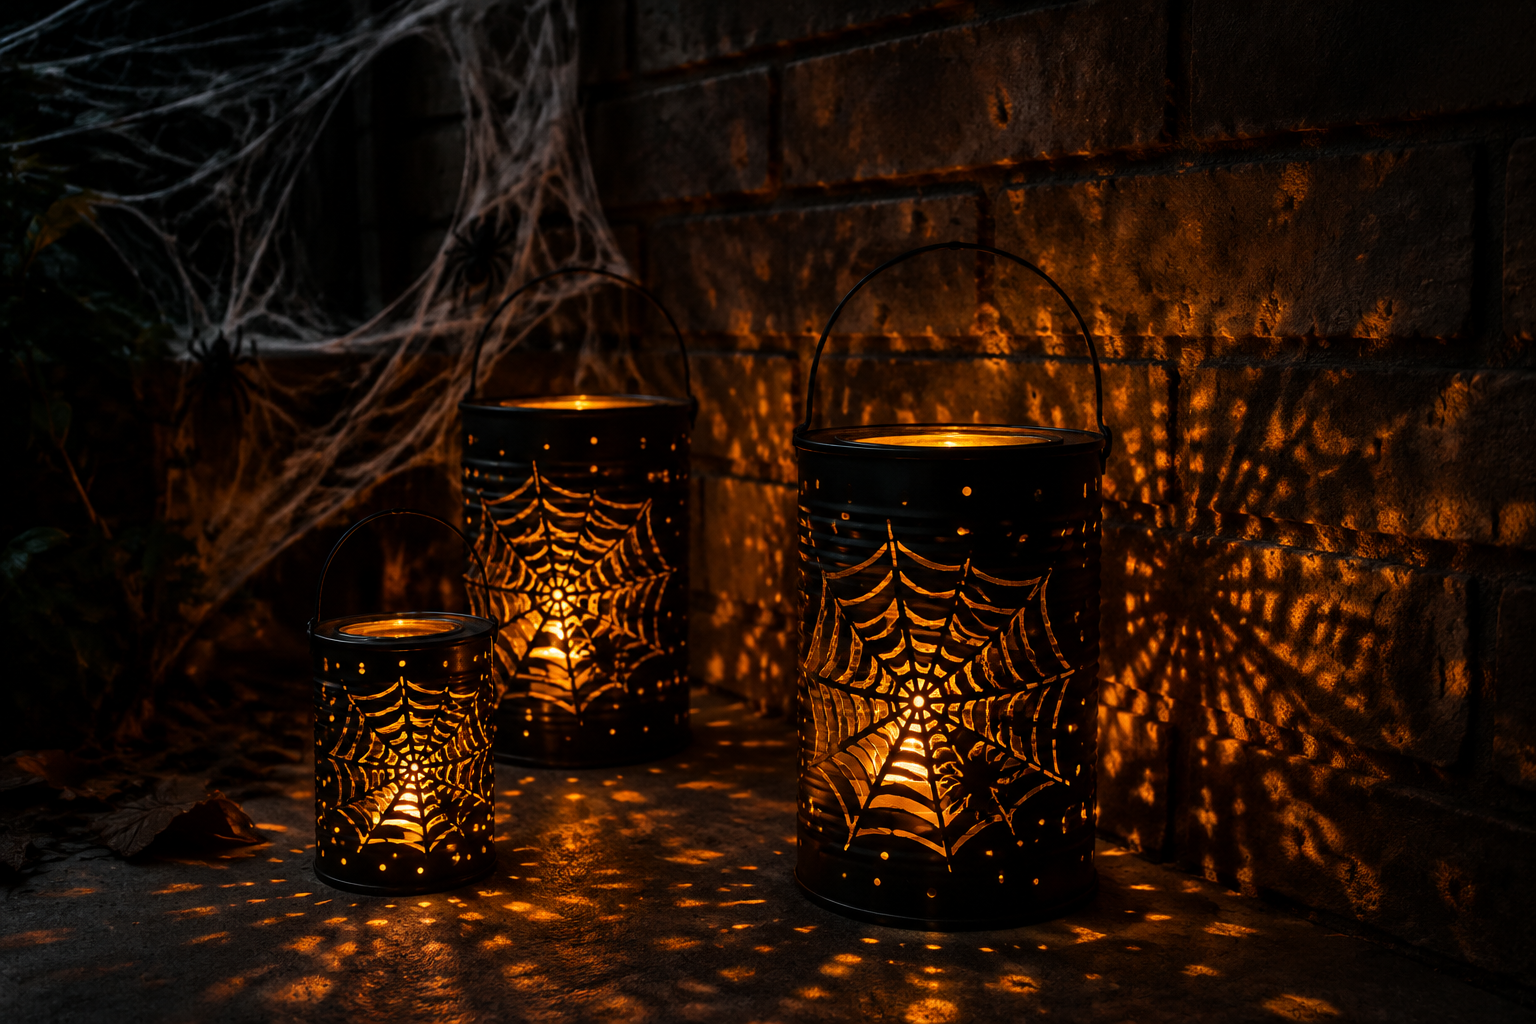
Pierced tin can lanterns throw tiny dots of light across walls and floors, which makes them perfect for creepy effects.
This version uses a spider web pattern, and the light shows up beautifully in a dark yard or hallway.
What you need: Clean tin cans with labels removed, a permanent marker, a hammer, a large nail, a towel, black spray paint (optional), LED tea lights.
How to DIY:
- Fill each can with water and freeze it overnight. The ice keeps the can from denting.
- Draw a web on the can: a few lines from the center outward, then curved lines connecting them.
- Wrap the can in a towel and tap the nail through the dots along your lines.
- Let the ice melt, dry the can, and spray it black if you want a darker look.
- Place an LED tea light inside.
Pro Tip: Press down any sharp edges with pliers or cover the rim with tape. Pierced cans can be rough, so check them before handing them to kids.
4. Milk Jug Ghost Lanterns
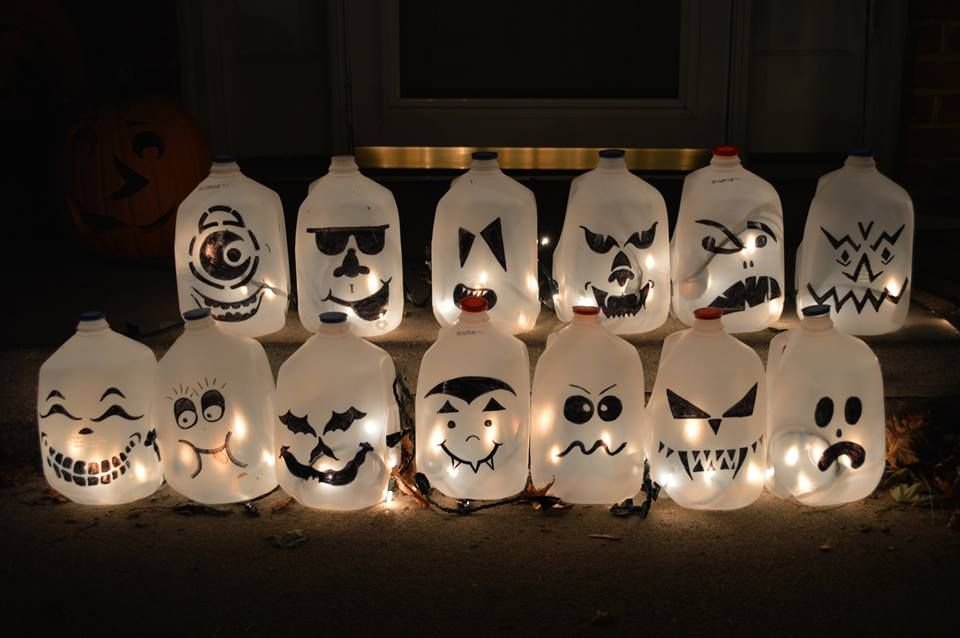
Plastic milk jugs make great luminaries because they’re already frosted and glow evenly.
With a simple face, they turn into large ghost lanterns that look great on porch steps or in the yard.
What you need: Clean, empty milk jugs, a black permanent marker, scissors, a string of battery-operated LED lights or an LED tea light.
How to DIY:
- Wash the jug thoroughly and remove the label.
- Draw a ghost face on the front, making the eyes and mouth big and expressive.
- Cut a small hole in the back, about two inches wide, large enough to insert the lights.
- Place the lights inside. If you’re using a string of lights, feed the cord out through the back hole.
- Keep the cap on, or cut off the top for a wider ghost shape.
Pro Tip: Add a little sand or small stones to the bottom for weight. This keeps the ghosts from tipping over in the wind.
5. Spooky Eyes Toilet Paper Roll Luminaries
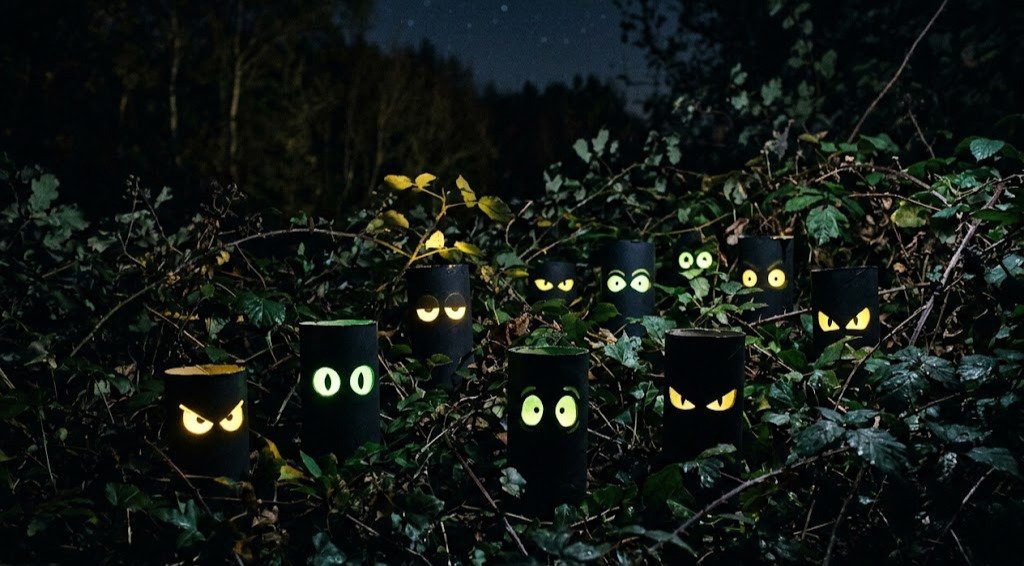
Glowing eyes peeking out of the dark are always a little creepy, and these are made from the humble cardboard tube.
Place them in bushes, on shelves, or along a fence for a surprise.
What you need: Toilet paper rolls, black paint, yellow or green cellophane or tissue paper, scissors, tape, LED tea lights.
How to DIY:
- Paint each tube black inside and out. Let it dry.
- Cut two eye shapes on the front of each tube, such as circles, ovals, or slanted angry eyes.
- Tape a piece of yellow or green cellophane behind the eye holes on the inside.
- Stand the tube on its end over an LED tea light.
Pro Tip: Cut the eyes in different shapes and sizes. A mix of sleepy, angry, and wide-eyed faces looks far spookier than a matching set.
6. Balloon String Spider Web Orbs
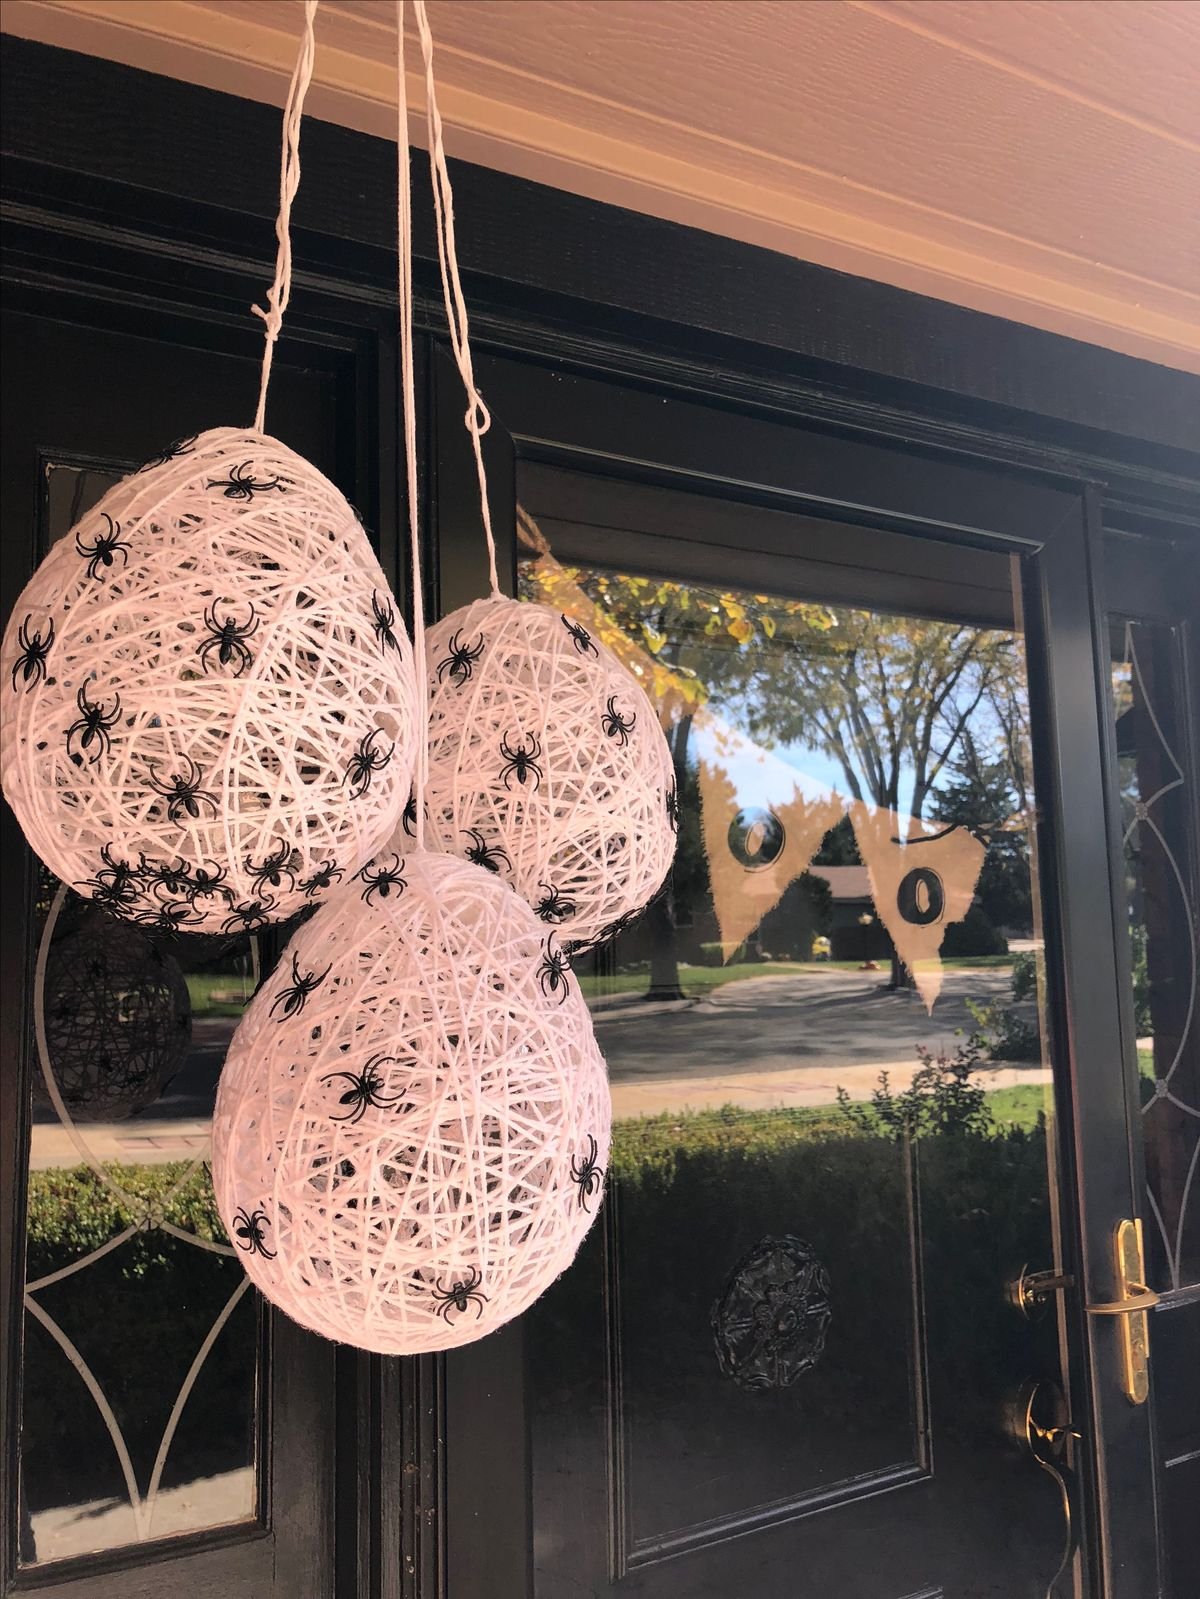
These round, lacy globes look like glowing spider egg sacs hanging in a tree or sitting on a table.
The glue-stiffened string holds its shape after the balloon is removed, and the light shines through the gaps for a delicate web effect.
What you need: Small round balloons, white yarn or thick string, white craft glue mixed with a little water, a shallow bowl, a string of battery-powered fairy lights or a small LED light, a hanging hook (optional).
How to DIY:
- Blow up each balloon to about the size of a grapefruit and tie it off.
- Pour the glue and water mix into the bowl and soak a long piece of yarn in it.
- Wrap the wet yarn around the balloon in all directions, crossing it often to build a web. Leave a hand-sized gap at the knot.
- Let it dry for 24 hours until stiff.
- Pop the balloon and pull it out through the gap.
- Tuck a small LED light inside.
Pro Tip: Set the wrapped balloon on a cup or bowl while it dries so it doesn’t flatten on one side.
7. Polka Dot Mini Pumpkin Luminaries
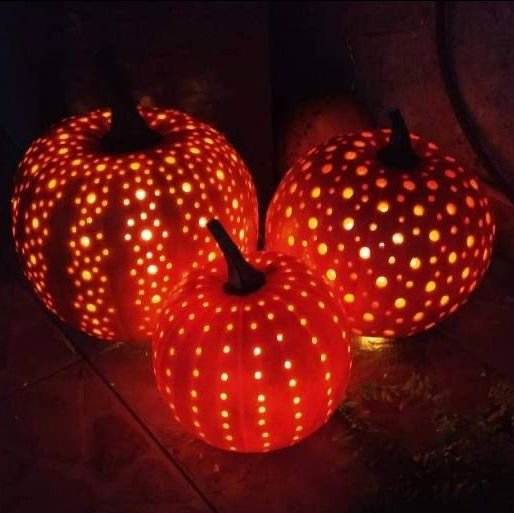
Real mini pumpkins make charming luminaries with no carving knife required.
A few drilled holes let tiny dots of light escape, and the glow looks like fireflies on your porch.
This one is also the most natural-looking idea on the list.
What you need: Mini pumpkins, a drill with a small bit, a spoon, a marker, LED tea lights, paper towels.
How to DIY:
- Cut a small circle in the bottom of each pumpkin and scoop out the seeds and pulp. Dry the inside with paper towels.
- Mark a pattern of dots on the outside with a marker, such as spirals, or random polka dots.
- Have an adult drill a hole at each dot, using steady, gentle pressure.
- Set the pumpkin over an LED tea light, so the bottom hole sits on top of it.
Pro Tip: Use a few different drill bit sizes. Big and small holes together give the pumpkin a layered, sparkly glow.
8. Plastic Cup Mummy Luminaries

Clear plastic cups wrapped in gauze make light, unbreakable mummies that are great for kids’ parties.
Stacked in a pyramid or lined up on a table, they look silly and sweet in equal measure.
What you need: Large clear plastic cups, white gauze, cheesecloth, or torn cotton strips, craft glue, googly eyes, LED tea lights, a little tea (optional).
How to DIY:
- Cut the gauze into strips of different lengths.
- Brush a thin line of glue around the cup and press the first strip on. Wrap at slightly crooked angles, overlapping some pieces and leaving small gaps.
- Keep going until the cup is mostly covered, leaving a gap near the top for the eyes.
- Glue on two googly eyes.
- Turn the cup upside down over an LED tea light so the light shines through the wide base.
Pro Tip: Dip the gauze in a little tea and let it dry before wrapping. It gives the mummies an aged, tan color.
9. Plastic Pumpkin Bucket Luminaries
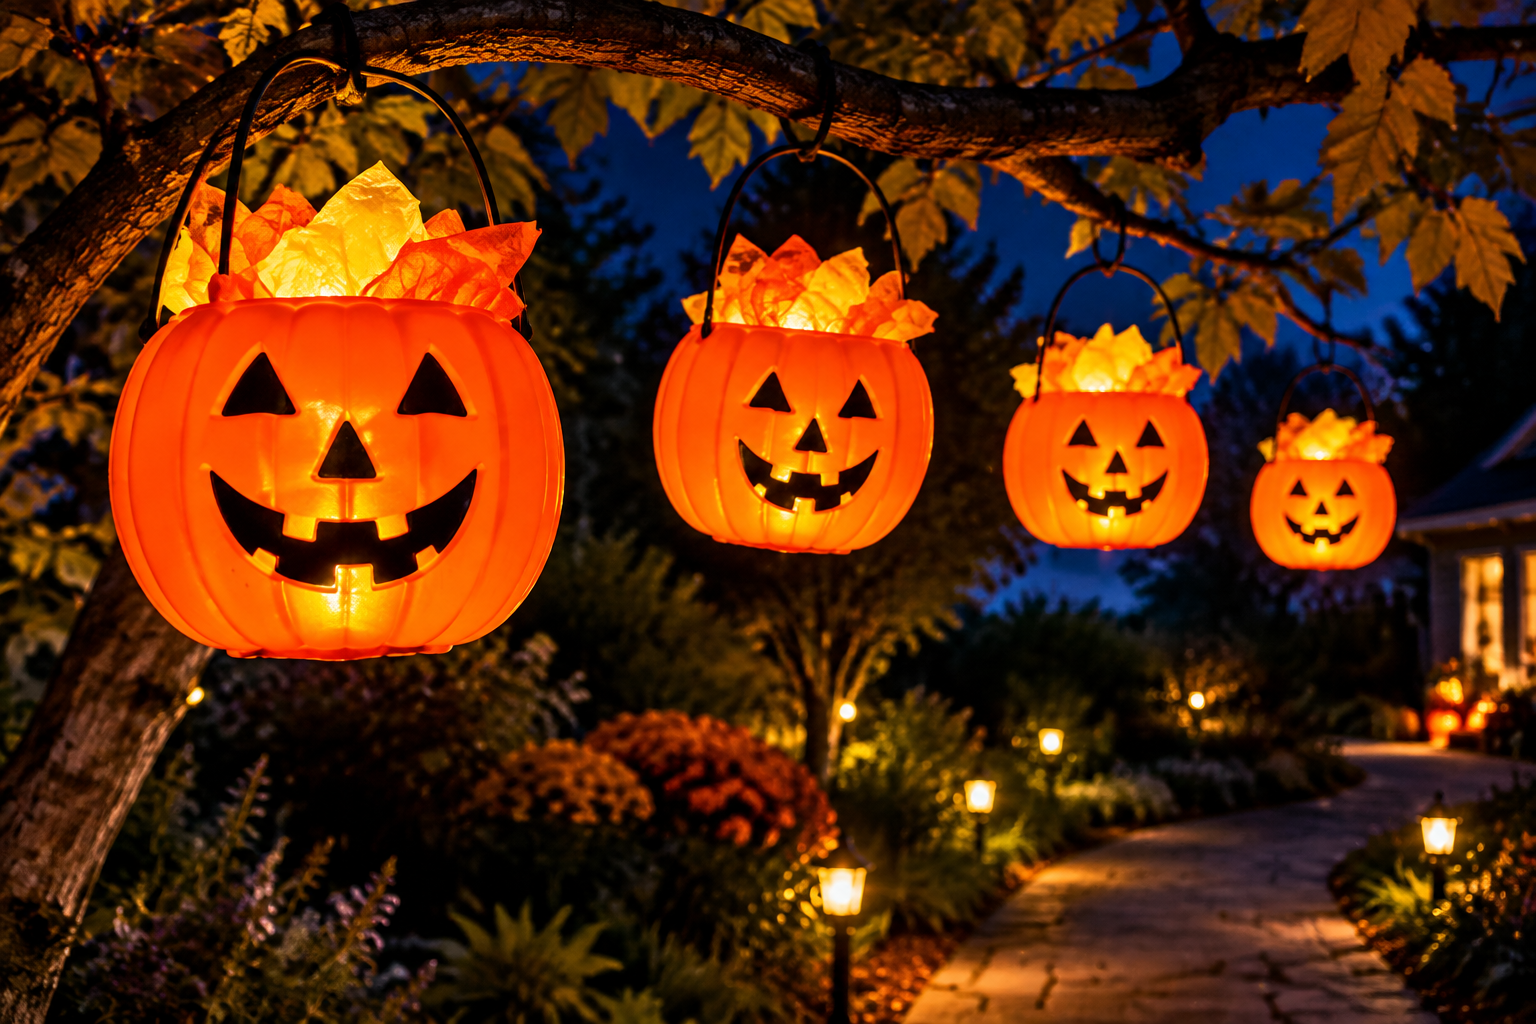
Those cheap orange trick-or-treat buckets work beautifully as large luminaries, and they come ready-made with a handle.
Add a face and some tissue paper, and you have a bold, sturdy lantern for the porch or garden.
What you need: Orange plastic pumpkin buckets, a permanent marker, a craft knife (adult use), yellow tissue paper, tape, battery-powered LED lights or a large LED candle.
How to DIY:
- Draw a face on the front of the bucket with the marker, using big triangles and a wide smile.
- Have an adult carefully cut out the face with the craft knife.
- Tape a sheet of yellow tissue paper on the inside, covering all the cutouts.
- Place an LED candle or a string of lights inside the bucket.
- Use the handle to hang it from a hook or tree branch.
Pro Tip: Layer two sheets of tissue paper, one yellow and one orange. The glow looks deeper and more like real candlelight.
10. Cardboard Box Haunted House Luminaries
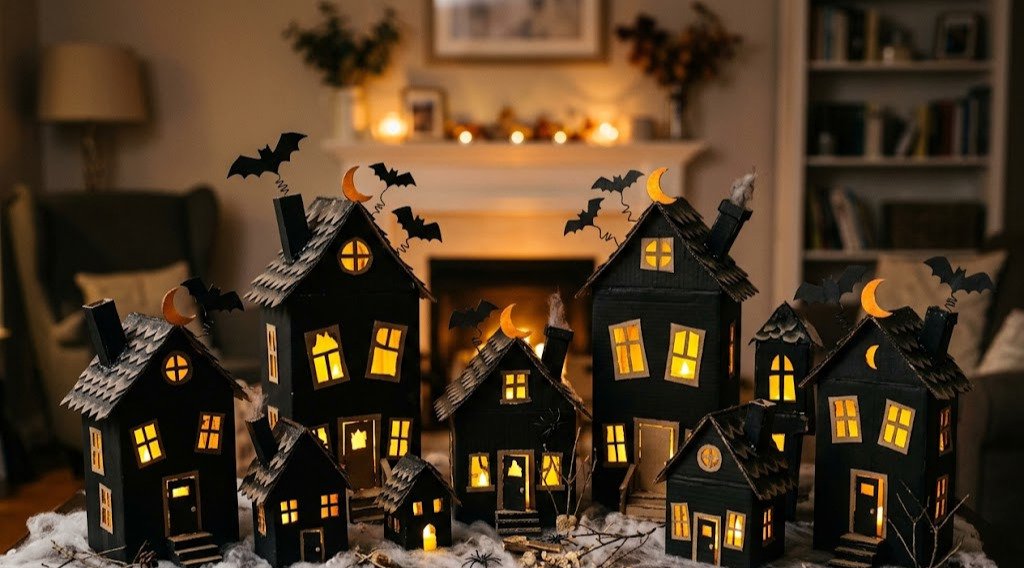
A small cardboard box becomes a glowing haunted house, complete with crooked windows and a spooky door.
It’s a great way to recycle shipping boxes, and a few of them in different sizes make a whole spooky village.
What you need: Small cardboard boxes, black paint, a craft knife (adult use), yellow and orange tissue paper, tape, a pencil, LED tea lights.
How to DIY:
- Paint the box black on all sides and let it dry.
- Draw crooked windows and a door on the front and sides.
- Have an adult cut out the shapes with the craft knife.
- Tape yellow and orange tissue paper behind each window and the door from the inside.
- Cut a flap in the back or leave the bottom open, then place the box over an LED tea light.
Pro Tip: Cut out a few bat and moon shapes from cardstock and glue them to the roof for extra spooky detail.
Light Up Your Halloween Night
A few simple supplies and a little creativity are all it takes to turn your home into a glowing, spooky wonderland.
These luminaries are easy, budget-friendly, and fun to make with family and friends.
Mix and match your favorites, and you’ll have a porch, table, or yard that looks like it came from a magazine.
Whether you’re decorating for trick-or-treaters, hosting a party, or just enjoying the season, there’s an idea here that fits.
Grab your supplies and let your Halloween glow.